Duo Universal Prompt
Introducing Duo's refreshed authentication experience, the Universal Prompt.
| Is your organization still using the traditional Duo Prompt? See the traditional Duo Prompt guide for more information and instructions. | 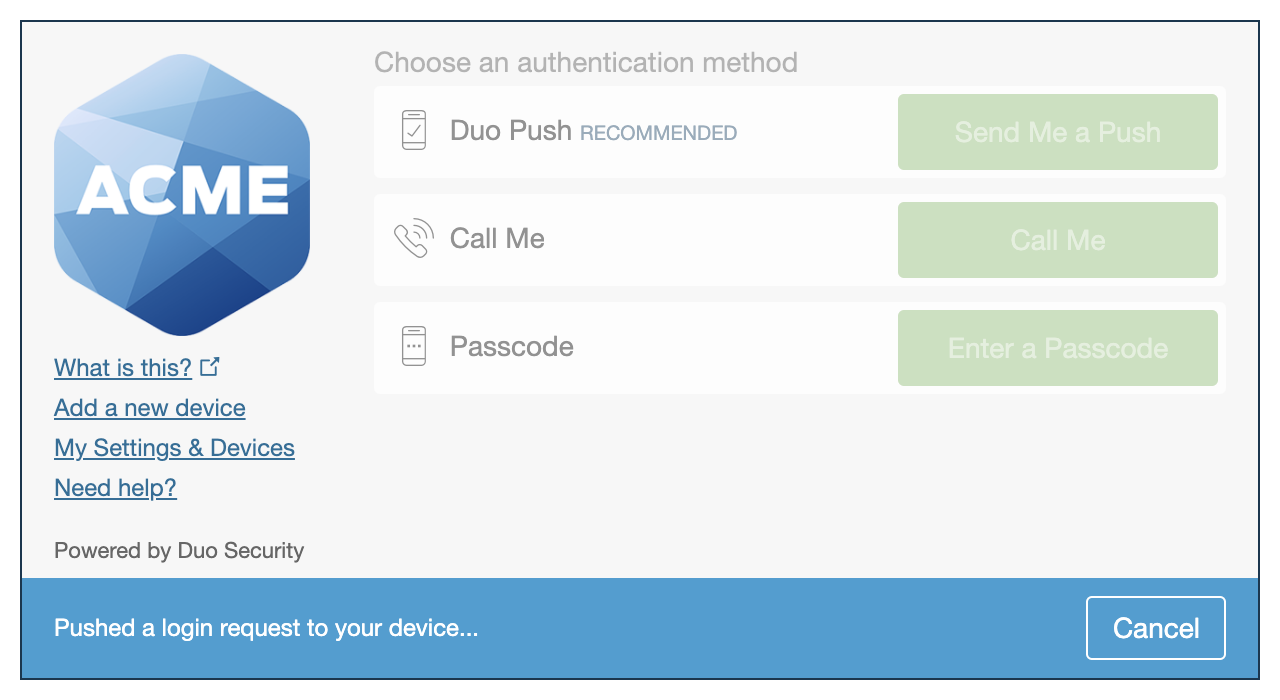 |
Researching Duo for your organization? Learn about Duo's multi-factor authentication (MFA) solutions.
Contents
- About the Duo Universal Prompt
- Supported Browsers
- Log In With the Duo Universal Prompt
- Duo Universal Prompt Login Options
- Platform Authenticators
- Roaming Authenticators
- Duo Push
- Verified Duo Push
- Duo Desktop
- Duo Mobile Passcode
- Text Message Passcode
- Phone Call
- Hardware Token Passcode
- Bypass Code
- First-time Enrollment in Duo
- Add or Manage Devices After Enrollment
- Add Another Device
- Rename or Remove a Device
- Reactivate Duo Mobile for an Existing Device
- Device Notifications
- Software Updates
- Duo Desktop
- Personal Devices
- How to Get Help
About the Duo Universal Prompt
When you log into an application protected with Duo using a web browser or certain client applications, you see a Duo prompt after entering your application login information.
The Universal Prompt provides a simplified Duo experience over the traditional prompt, helping you log in to your applications faster than before.
You'll notice that the Duo login options look different from how they did in the traditional prompt, but the Universal Prompt still supports a wide range of Duo login options so you (or your Duo administrator) can choose the options that work best for your organization.
Another difference between the Universal Prompt and the traditional prompt is that the traditional prompt loads on a web page that's part of your organization's application, while with the Universal Prompt your browser redirects to a page hosted by Duo for you to verify your login attempt, and then redirects back to the application.
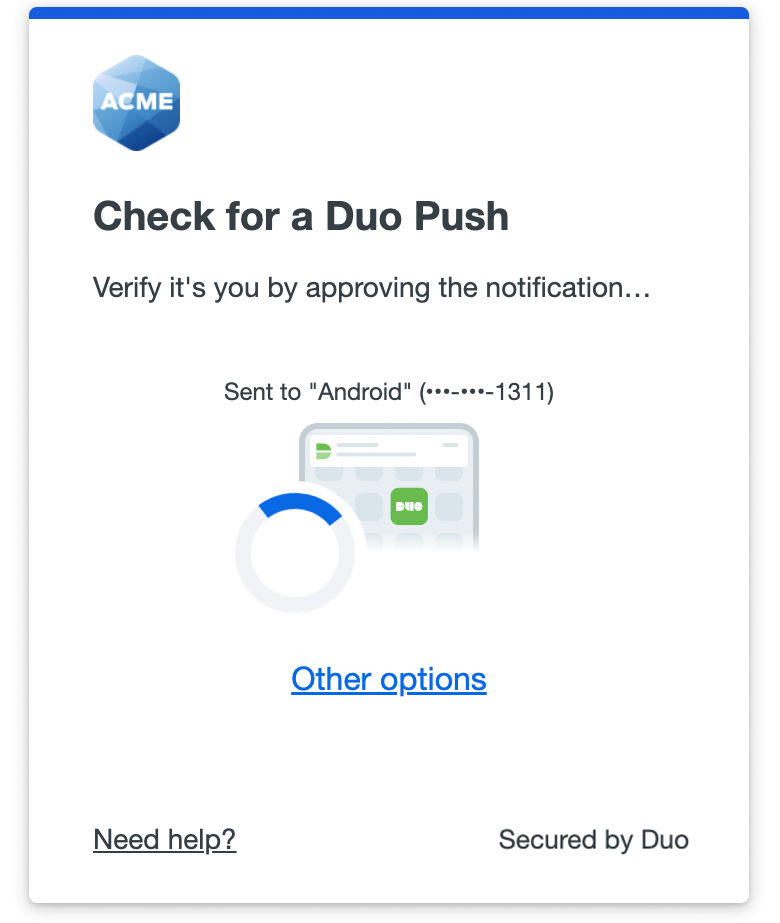
Here's a comparison of logging in with Duo Push in the Universal Prompt and traditional prompt:
| Universal Prompt | Traditional Prompt |
 |
 |
Supported Browsers
The Universal Prompt supports Chrome (Desktop and Mobile), Firefox, Safari (Desktop and Mobile), Edge, and Internet Explorer. Not all browsers support all Duo authentication methods, so for the widest compatibility we recommend Chrome.
Check the table below for supported browser versions and Duo login option compatibility. Platform and roaming authenticators may require a different browser or a newer minimum browser version; please refer to WebAuthn Browser Support. Duo's support for the minimum browser version includes Duo Push, passcode, and phone call authentication options.
| Browser | Minimum Supported Version |
|---|---|
| Chrome | 38 |
| Safari | 9 |
| Firefox | 47 |
| Edge | 17 |
| Internet Explorer | 11 |
While other browsers may work with the Universal Prompt, Duo actively tests and supports the browsers and minimum versions listed in the table.
When you log in Duo checks your current browser or client compatibility with the Universal Prompt. If your browser or client is not compatible, Duo will show you the traditional prompt experience instead.
WebAuthn Supported Browsers
Check the tables below for supported browser versions for platform authenticators (like Touch ID, Face ID, Windows Hello, or Android biometrics) and roaming authenticators (like security keys). While other browsers may work, Duo actively tests and supports the browser minimum versions listed in the tables.
Windows 10 and Later
| Browser | Minimum Supported Version | Platform Authenticator | Roaming Authenticator (Security Keys) |
|---|---|---|---|
| Edge | 79 | Yes 1 | Yes |
| Chrome | 73 | Yes 1 2 | Yes |
| Firefox | 66 | Yes | Yes |
- Windows Hello is not supported in Chrome Incognito or Edge InPrivate browsing sessions.
- Use of passkeys as platform authenticators requires Windows 11 and Chrome 108 or later.
macOS 11 and Later
You must sign in with the same iCloud account and enable iCloud Keychain sync on all the Apple devices you plan to use with Duo and passkeys. See the iCloud documentation for instructions specific to your device types:
| Browser | Minimum Supported Version | Platform Authenticator | Roaming Authenticator (Security Keys) |
|---|---|---|---|
| Safari | 14 | Yes 1 | Yes |
| Chrome | 70 | Yes 1 | Yes |
| Firefox | 114 | Yes 2 | Yes 3 |
- Use of passkeys as platform authenticators requires macOS 13 and Safari or Chrome 108.
- Firefox 122 or later is required for platform authenticators.
- For Duo Passwordless, Firefox on macOS cannot prompt to create a security key's PIN. Security keys that already have a PIN set can be used to authenticate in Firefox.
iOS/iPadOS 15 and Later
You must sign in with the same iCloud account and enable iCloud Keychain sync on all the Apple devices you plan to use with Duo and passkeys. See the iCloud documentation for instructions specific to your device types:
| Browser | Minimum Supported Version | Platform Authenticator | Roaming Authenticator (Security Keys) |
|---|---|---|---|
| Safari | 15 | Yes 1 | Yes |
| Chrome | 95 | Yes 1 | Yes |
| Edge | 95 | Yes 1 | Yes |
| Firefox | 68 | Yes 1 | Yes |
- Use of passkeys as platform authenticators requires iOS 16+ or iPadOS 16+.
Android 11 and Later
| Browser | Minimum Supported Version | Platform Authenticator | Roaming Authenticator (Security Keys) |
|---|---|---|---|
| Chrome | 95 | Yes 1 | Yes 2 |
| Firefox | 68 | Yes 3 | No 4 |
- Passkey support with Google Password Manager.
- Chrome on Android 11 cannot prompt for the security key's PIN to fulfill the passwordless user verification requirement.
- Firefox on Android 11 does not support Android biometric enrollment.
- Firefox on Android cannot prompt for the security key's PIN to fulfill the passwordless user verification requirement.
Linux
Linux has no supported platform authenticators.
| Browser | Minimum Supported Version | Platform Authenticator | Roaming Authenticator (Security Keys) |
|---|---|---|---|
| Chrome | 73 | No | Yes |
| Edge | 79 | No | Yes |
| Firefox | 114 | No | Yes |
ChromeOS 108 and Later
| Browser | Minimum Supported Version | Platform Authenticator | Roaming Authenticator (Security Keys) |
|---|---|---|---|
| Chrome | 108 | Yes | Yes |
Language Support
Your browser's language settings determine the language shown in the Universal Prompt, with no extra configuration necessary.
When the Universal Prompt displays English, Spanish, French, German, or Japanese, phone callback authentication will use the same language shown in the prompt.
Catalan, Chinese (Simplified), Chinese (Traditional), Czech, Danish, Dutch, Finnish, Hindi, Indonesian, Italian, Korean, Norwegian, Polish, Portuguese (Brazil), Portuguese (Portugal), Swedish, Thai, Turkish, and Vietnamese languages will display in the Universal Prompt, but phone callback authentication will be in English.
Log In With the Duo Universal Prompt
After completing Duo enrollment (or if your Duo administrator already set you up to use Duo), you'll see the Duo prompt the next time you perform a browser-based login to a web service or application protected with Duo.
The first time you log in to an application with Duo using the Universal Prompt, Duo may choose one of your configured login options automatically, selecting the most-secure method from the ones you have available.
If your organization's Duo administrator turned off automatic authentication method selection, you'll choose one of your available methods to continue authentication. We recommend selecting the most-secure available option.
Duo authentication methods from most to least secure:
- Platform authenticators
- Roaming authenticators
- Verified Duo Push
- Duo Mobile push approval
- Duo Desktop authentication
- YubiKey passcodes
- Duo Mobile generated passcodes
- Hardware token passcodes
- SMS passcodes
- Phone call approval
Duo considers platform authenticators and roaming authenticators to be the most secure authentication methods, so if you have set up either of these methods and the application allows their use you'll automatically be prompted to use your platform authenticator (like Touch ID) or roaming authenticator (like security key) the first time you log into that application.
The next most secure Duo method is using Duo Mobile to approve push notifications. If you do not have a platform authenticator or roaming authenticator available, but you do have a phone or tablet with Duo Mobile activated, the Universal Prompt may automatically send you a Duo Push the first time you log in to that application. You may also have to enter a code into Duo Mobile to approve the push request if your organization requires it.
If you haven't set up Duo Mobile, then the Duo Universal Prompt may automatically select your next available option, following the most to least secure preference order.
If you don't want to use the method Duo automatically suggests for that application, cancel the Duo authentication in progress and click or tap Other options. Then, select the method you want from the list.
Completing Duo login sets the login option you used as the first choice for this application. Future Universal Prompt logins to that application from the same device and browser may automatically use that same method. If you cancel the authentication in process and choose a different device, then the device you use becomes the first choice for that application.
There is no way to turn off automatic device selection yourself, or to explicitly configure a default authentication device. Contact your organization's Duo administrator or help desk to determine whether they can change your automatic device selection setting.
Your organization's Duo administrator may choose to block some authentication options for certain applications, requiring that you choose a different device. Since Duo remembers the last-used authentication device for each application you access, the Universal Prompt should always display the right default option for that application.
Authentication methods are shown in the following order when on a mobile device:
- Verified Duo Push
- Duo Mobile push approval
- Duo Mobile generated passcodes
- SMS passcodes
- Phone call approval
- Hardware token passcodes
- Platform authenticators
- Roaming authenticators
- YubiKey passcodes
Choose a Different Method
If you ever want to choose a different device or Duo method than the one chosen automatically by the Universal Prompt, or want to cancel an authentication in progress to select a different method, click Other options near the bottom. This takes you to a list of all your available Duo authentication options. Click on the one you want to use and follow the instructions shown to complete logging in to the application.
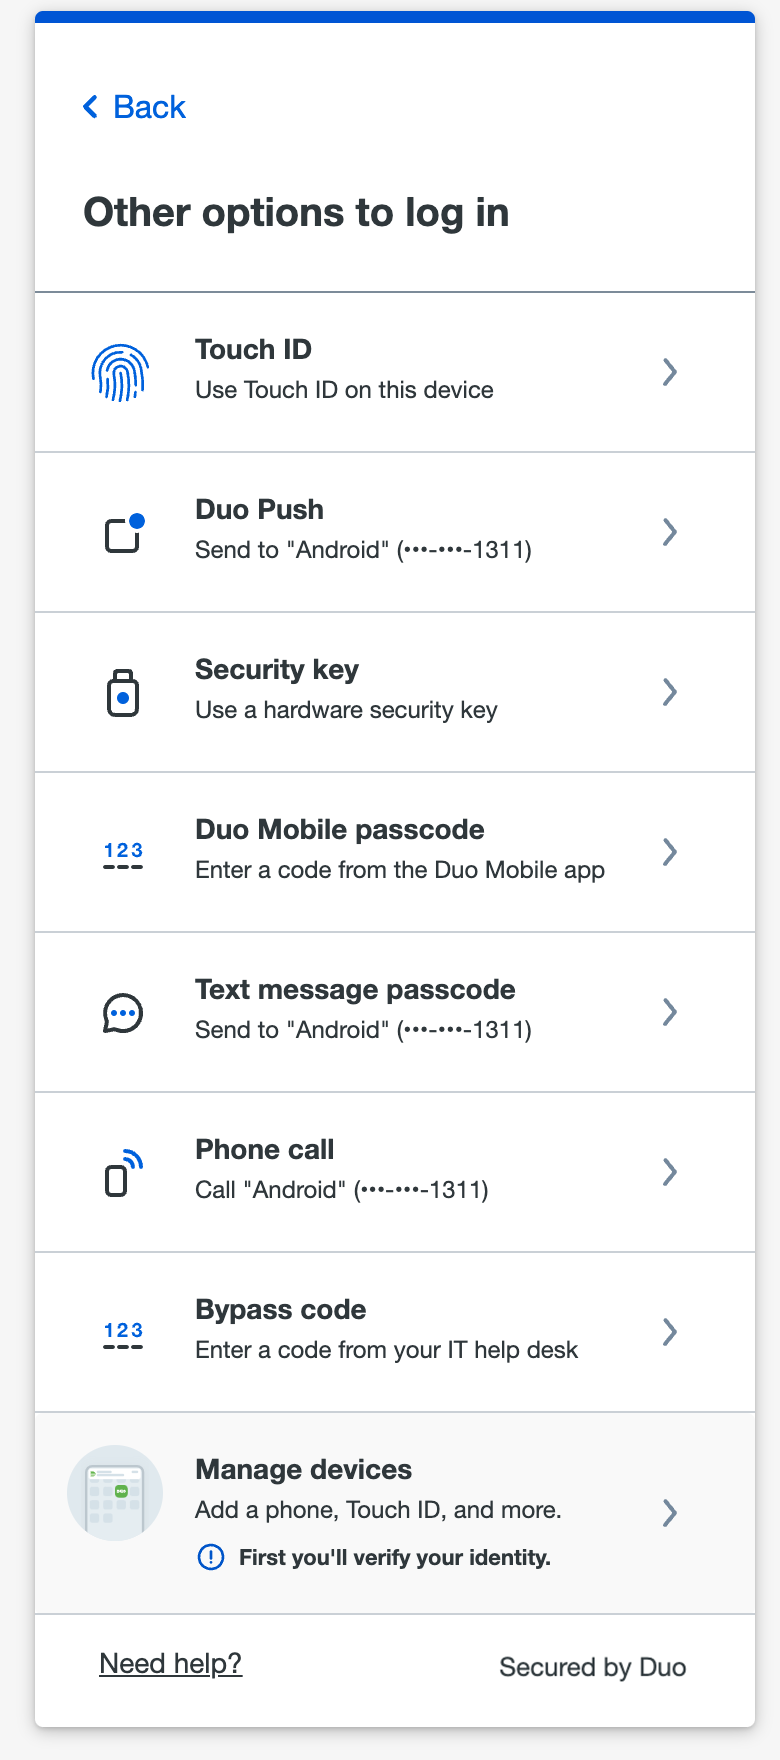
The Universal Prompt shows a drop-down filter near the top when you have seven or more devices. The filter choices show phones you have enrolled using the last four digits of your number, hardware tokens, and security keys. Use the filter to select the device you want to use for authentication, then choose from the available methods for that device to continue. Set the filter to show all your devices to choose platform authenticators and passkeys, like Touch ID or Windows Hello.
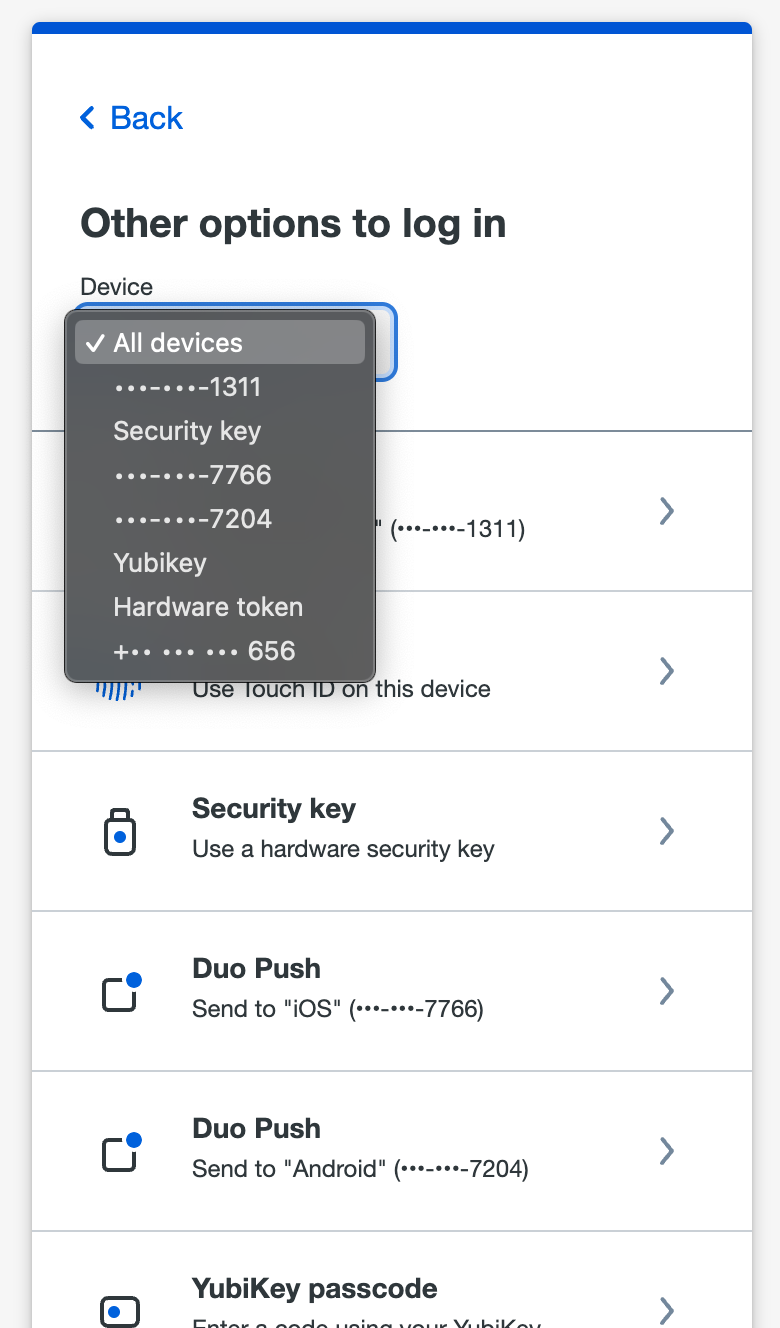
Your organization might apply a policy that prevents the use of some authentication methods for one or all applications. If so, those options won't show up in the list.
Remembered Devices
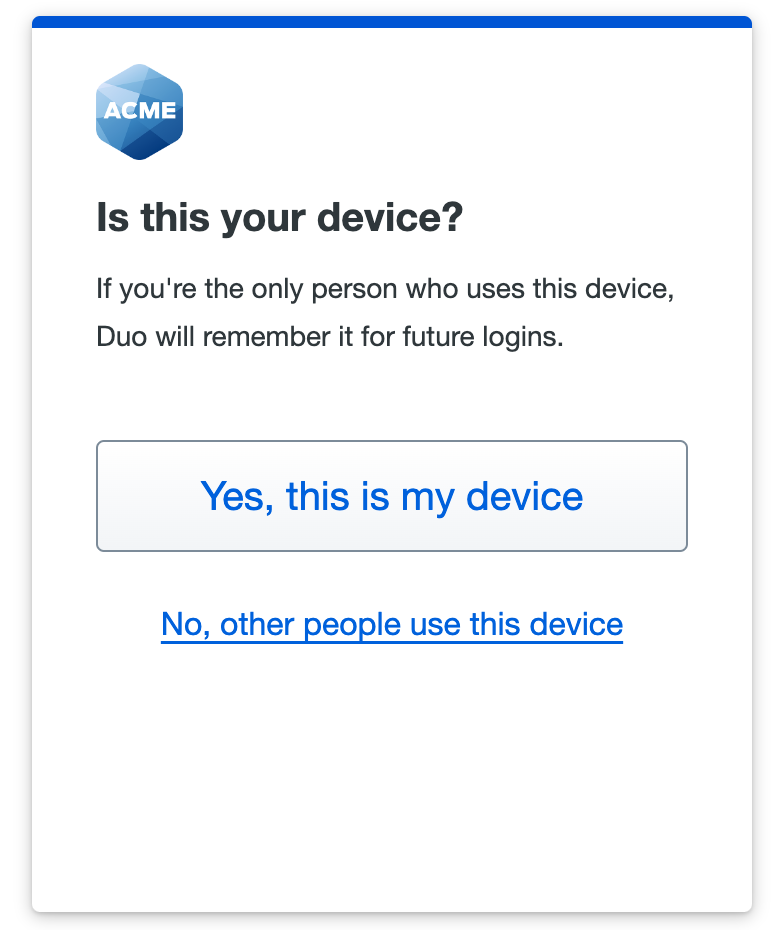
If your organization's policy allows it, you may be able to skip authenticating with Duo again for a set amount of time. The first time you approve the Duo authentication request, you'll see the option to remember your device.
Choose Yes, this is my device to create a trusted device session that will let you skip Duo two-factor authentication when you log in again with the same browser and device until that remembered device session expires.
Depending on the policy applied by your Duo administrator, this may remember your device across all your organization's Duo-protected applications, or there may be unique policies applied to applications that require you to perform Duo authentication again regardless of whether you remembered the device. Ask your Duo administrator or help desk for more information.
Do not trust the device when using a public or shared computer! This could leave your Duo session available to other users. Remember the device only when you access applications from your own computer.
Clicking on No, other people use this device will not create a trust session. You won't be asked to remember that device again for 14 days.
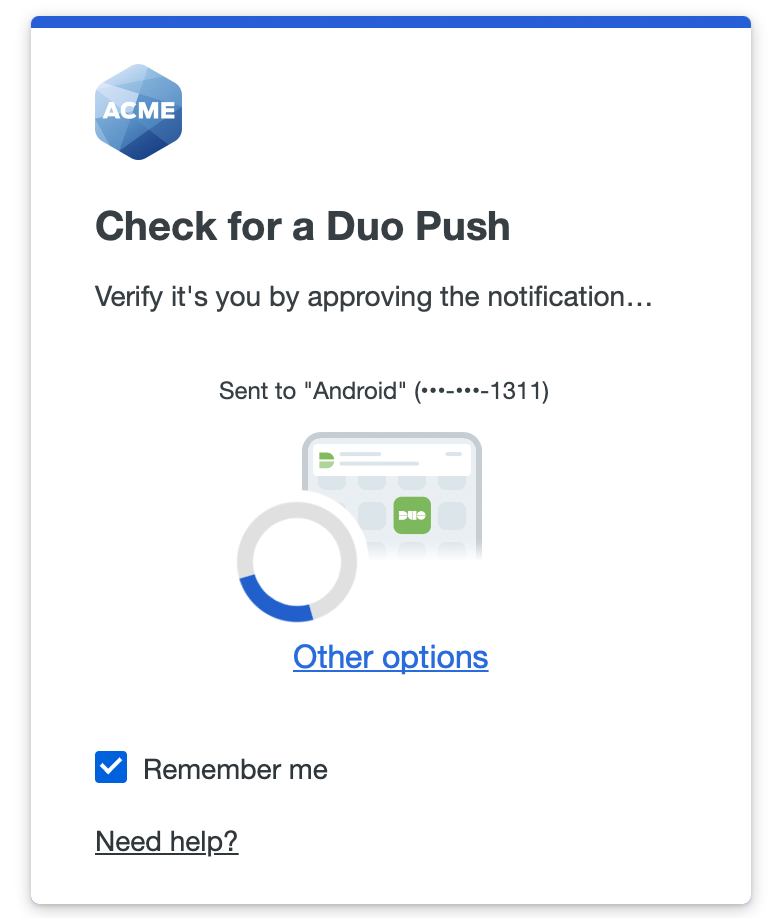
When your trusted browser session expires, you will need to use two-factor authentication again. Duo Push, phone call, text message, and passcode authentication methods will show the option to remember the device already enabled for you. Leaving the option enabled creates a new remembered device session.
If you don't want to remember the device anymore, uncheck the Remember me box before you approve the Duo Push or phone call request or enter a passcode.
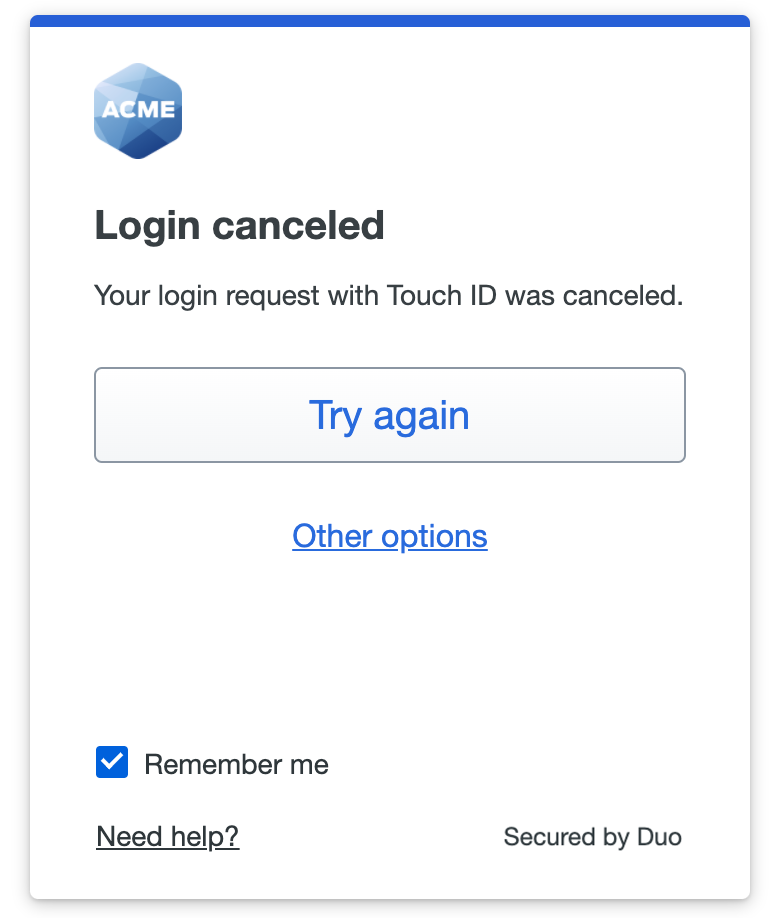
If you log in automatically with a WebAuthn method like Touch ID, a passkey, or a security key you won't see the Remember me option on the page. You will need to cancel the Duo authentication in progress if you don't want to remember that device anymore. This sends you back to the page where you can uncheck the Remember me box and then try to log in again.
Duo Universal Prompt Login Options
Availability of the following Duo login options in the Universal Prompt depends on your browser or browser version, or on the policies applied by your organization's Duo administrator.
Platform Authenticators
Platform authenticators are authentication methods built into the device you use to access services and applications protected by Duo. Examples of platform devices would be Touch ID on Mac, Face ID on an iPhone, Windows Hello, and Android biometrics.
Touch ID on Mac
In order to use Touch ID with Duo, make sure you have the following:
- A MacBook Pro, MacBook Air, or Magic Keyboard with a Touch ID button.
- A fingerprint enrolled in Touch ID (see how to do this at the Apple Support site).
- A supported browser: Safari or Chrome. Refer to the browser support table.
- iCloud Keychain sync enabled on all the Apple devices you will use with Duo and the passkey you will create during setup.
Touch your Mac's Touch ID sensor when prompted to log in to the application. If you aren't able to access the Touch ID sensor (such as when you close and dock your laptop), then you can choose to type in your Mac login password instead to verify.
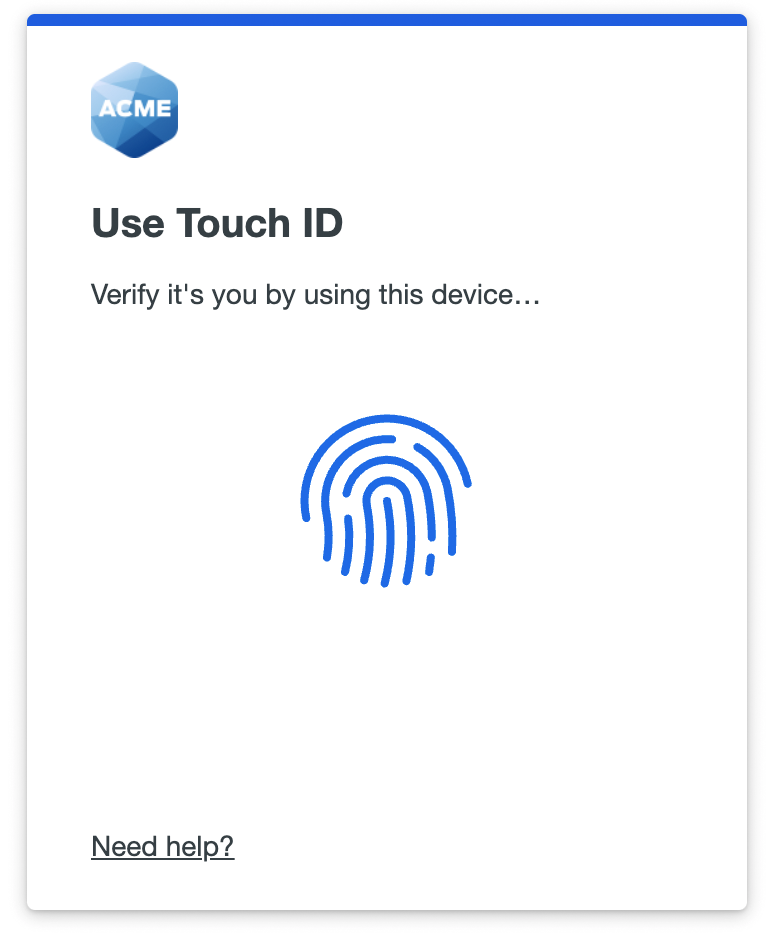
If you need to cancel a Touch ID authentication in progress, click or tap the cancel option shown by your browser, outside of the Duo Universal Prompt.
Face ID or Touch ID on an iPhone or iPad
In order to use Face ID or Touch ID on an iPhone or iPad with Duo, make sure you have the following:
- An iPhone or iPad that supports Face ID or Touch ID.
- Face ID or Touch ID already set up on the iPhone or iPad. Learn how to set up Face ID or set up Touch ID at the Apple Support site.
- iCloud Keychain sync enabled on all the Apple devices you will use with Duo and the passkey you will create during setup.
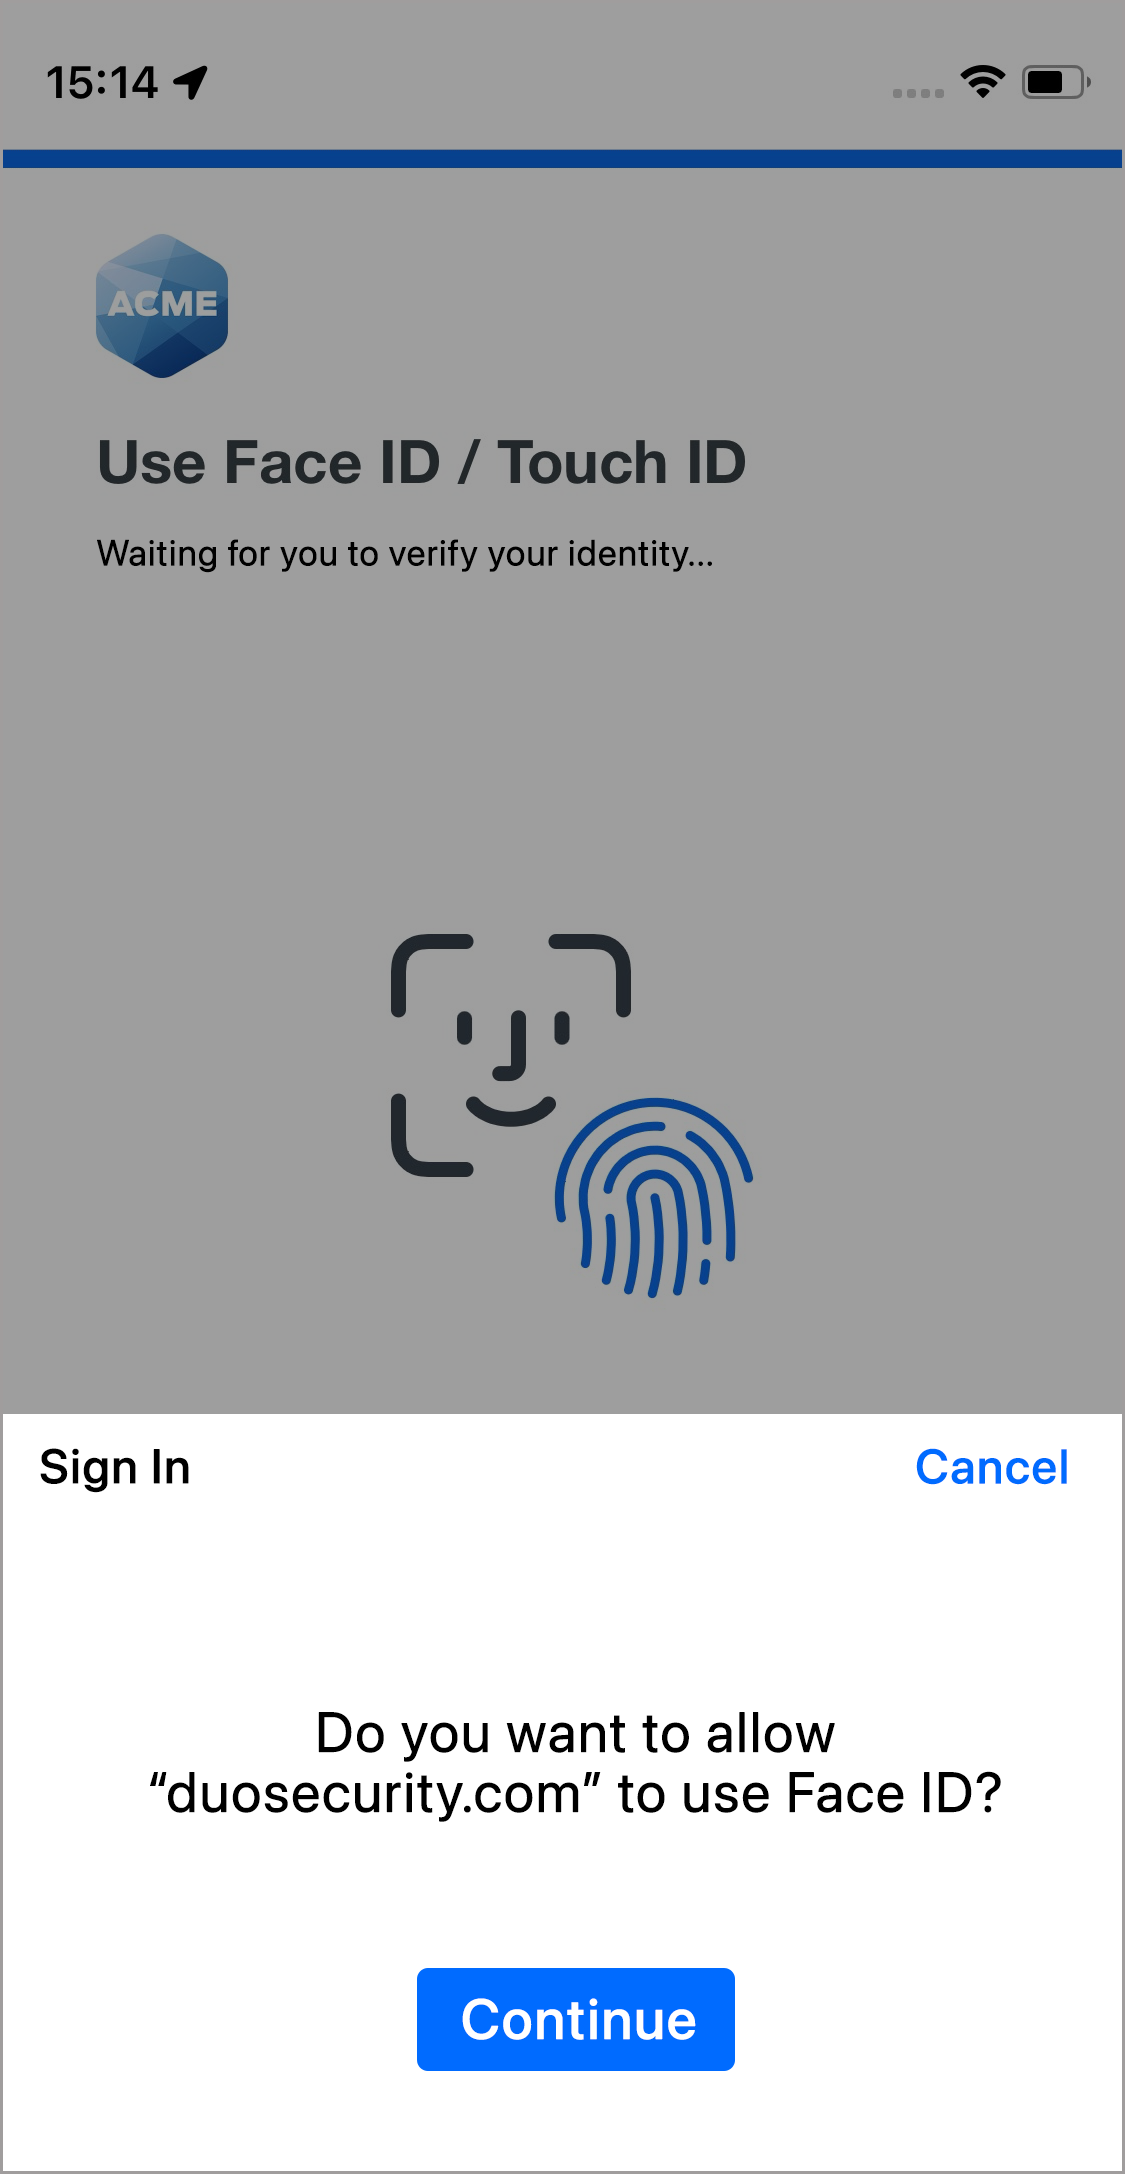
Depending on the option your device supports, you'll either scan your face to use Face ID while logging in, or you'll scan your fingerprint instead to use Touch ID.
Windows Hello
In order to use Windows Hello with Duo, make sure you have the following:
- A device running Windows 10 or later.
- Windows Hello set up on the device for signing in with a PIN, fingerprint, or facial recognition. Learn how to set up Windows Hello at the Microsoft support site.
- A supported browser: Chrome, Edge, or Firefox. Refer to the browser support table. Note that Chrome Incognito and Edge InPrivate browsing won't work with Windows Hello, but will work with Security Keys.
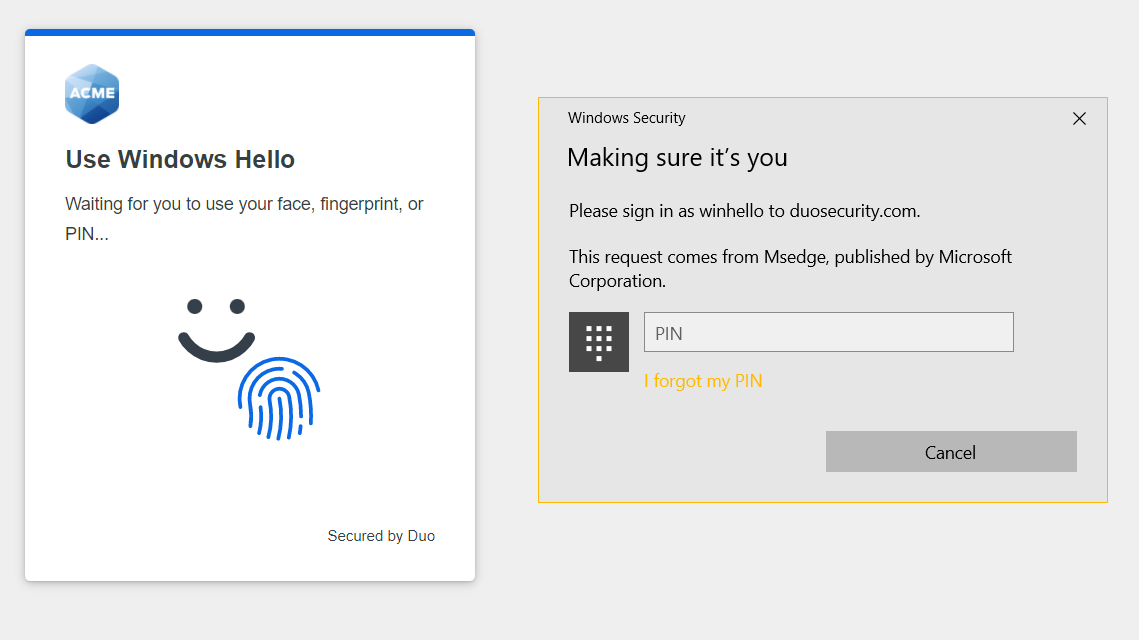
Follow your device's prompt to enter your Windows Hello PIN, scan your fingerprint, or use facial recognition to log into Duo.
Android Biometrics
In order to use Android Biometrics with Duo, make sure you have the following:
- An Android device that supports biometrics, like fingerprint or face unlock.
- Facial or fingerprint unlock set up on that device. Go to Settings → Security to change your unlock settings. Refer to the Google support articles Unlock your Pixel phone with your fingerprint and Unlock your Pixel phone with your face, the Samsung articles Set up and use the fingerprint sensor on your Galaxy phone and Use Facial recognition security on your Galaxy phone, or your device manufacturer's support site for examples of how to do this.
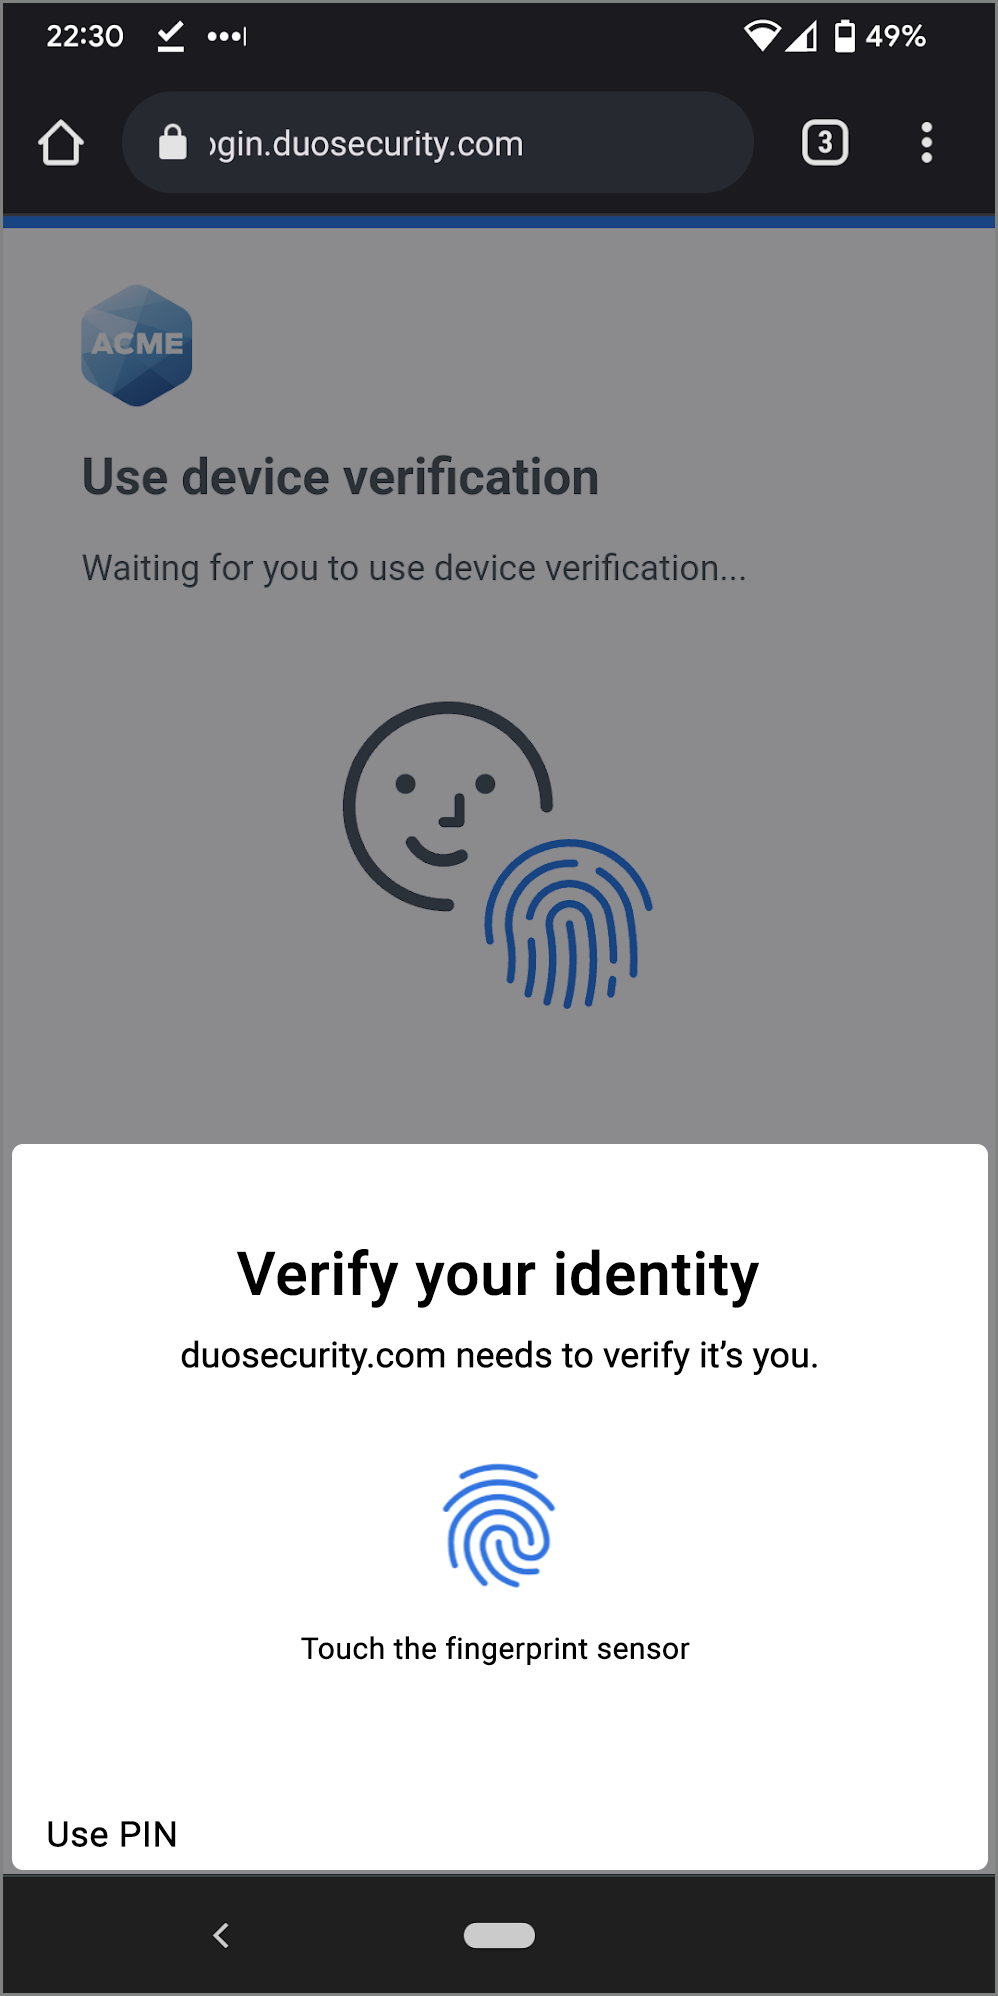
Follow your device's prompt to scan your fingerprint or use facial recognition to log into Duo.
Additional Passkey Registration
If you had to cancel authentication because your enrolled passkey isn't available on the access device you're using now, you may be presented with the option to try again or enroll another passkey.
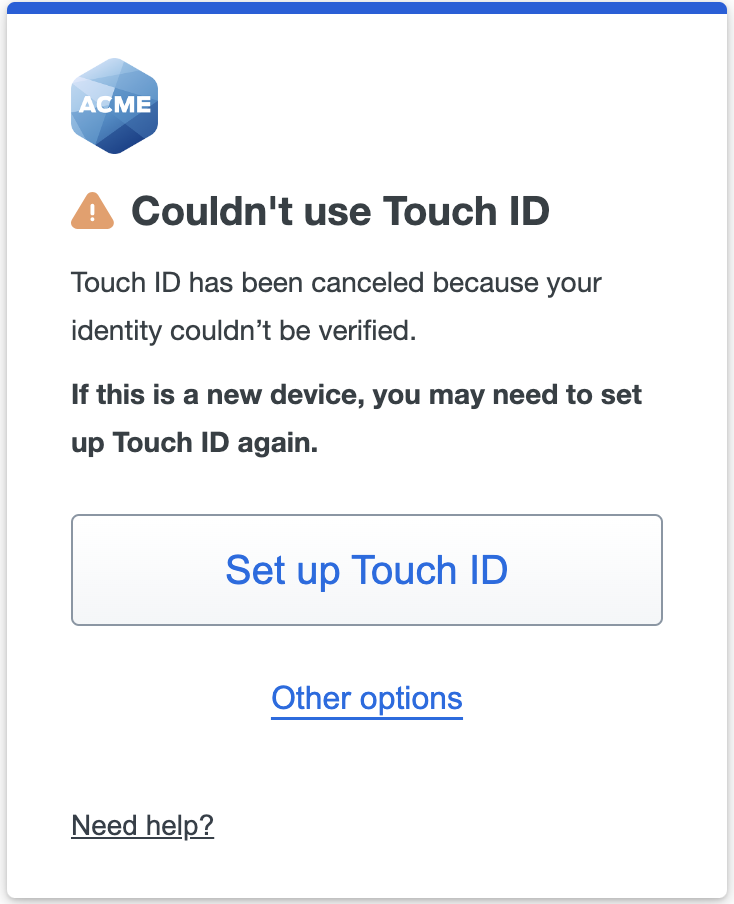
The following example shows how to setup Touch ID on a Mac. These steps are the same for other platform authenticators such as Face ID/Touch ID on an iPhone or iPad, Windows Hello, or Android Biometrics.
- Click Set up Touch ID.
- Click Continue and follow the instructions to setup the new passkey (Touch ID on Mac, Face ID/Touch ID on an iPhone or iPad, Windows Hello, Android Biometrics)
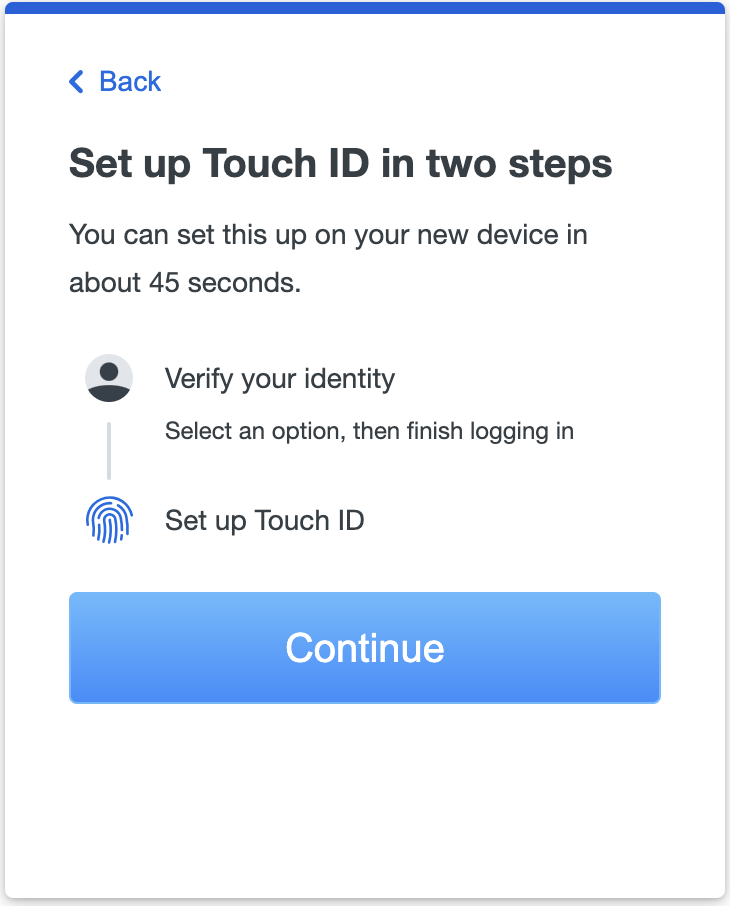
Log in with the new passkey you have just added and access your Duo-protected application.
Roaming Authenticators
Roaming authenticators are WebAuthn FIDO2 security keys, like those from Yubico or Feitian. They can move from one system you use to access services and applications protected by Duo to another, such as a USB security key you unplug from one laptop and plug into another.
Security Key
A security key plugs into your USB port and when tapped or pressed it sends a signed response back to Duo to verify your login. Duo uses the WebAuthn authentication standard to interact with your security keys. You may also see WebAuthn referred to as "FIDO2".
In order to use a security key with Duo, make sure you have the following:
- A supported browser (check the table above to verify your browser supports security keys).
- An available USB port.
- A WebAuthn/FIDO2 security key. WebAuthn/FIDO2 security keys from Yubico or Feitian are good options. U2F-only security keys (like the YubiKey NEO-n) are not supported.
- If your organization requires user verification of your security key with a PIN or biometric then your security key must support FIDO2.
Insert your security key if not already plugged in, and then tap or press your security key when prompted to log in to the application. Some types of keys flash as a prompt for you to authenticate. Your browser may also pop up a prompt instructing you to tap your security key.
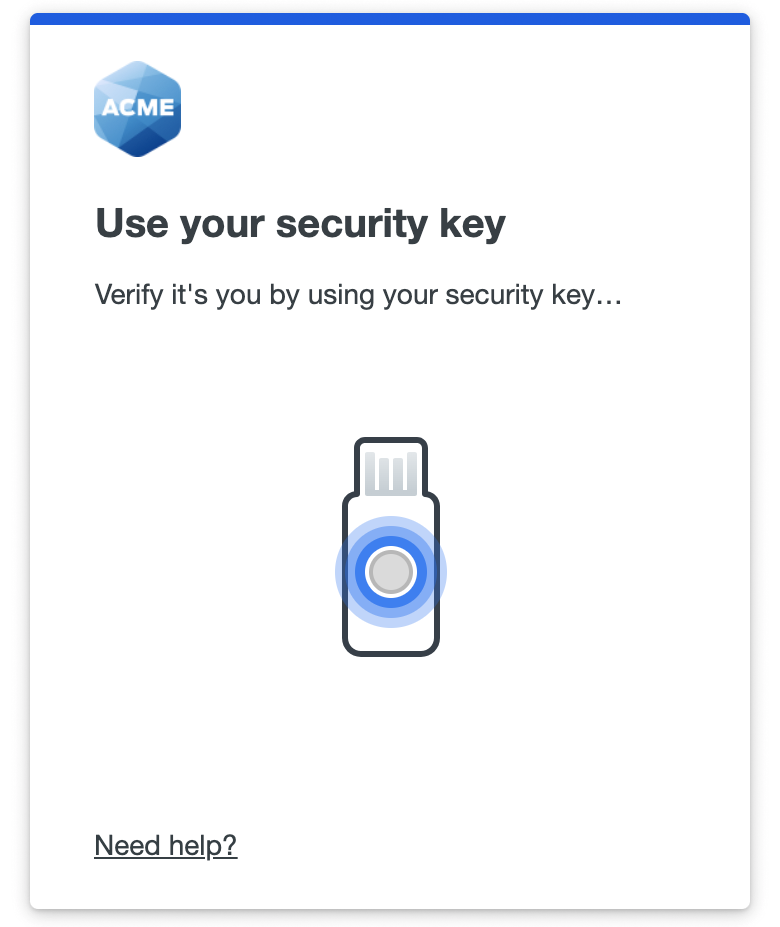
You need to interact with the prompt to use a security key from Safari browser on macOS or any browser on iOS. Click or tap the Use security key button and then tap or press your security key.
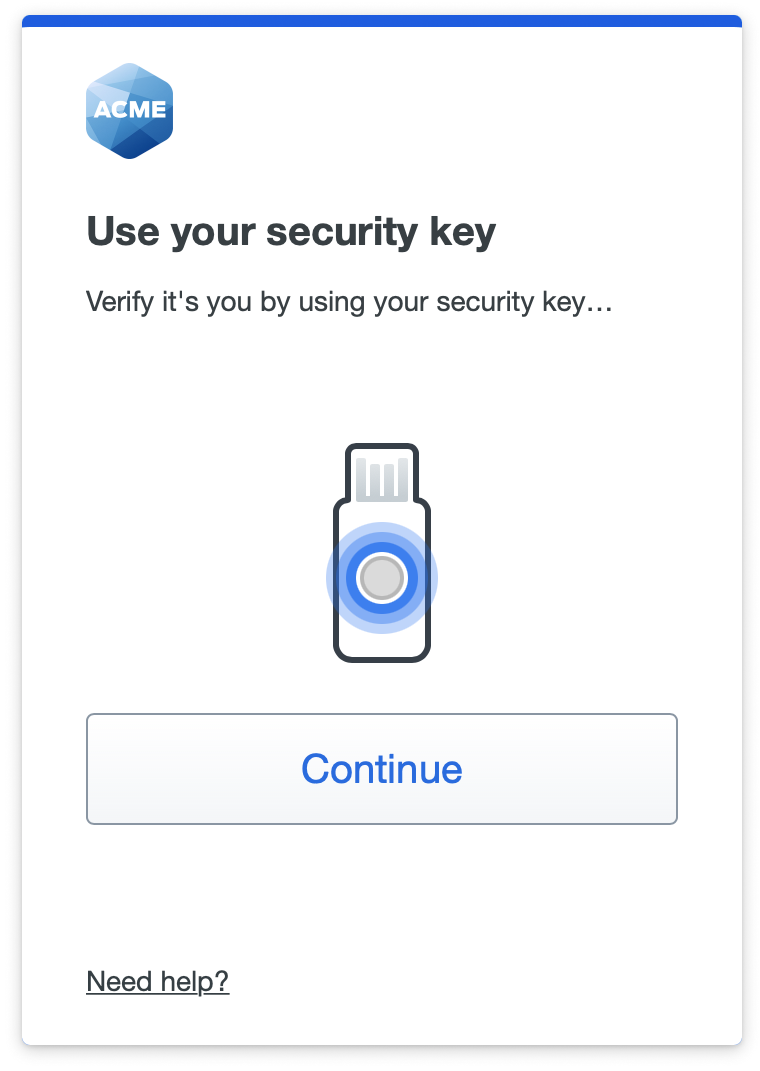
If your organization requires user verification you'll need to enter your PIN or scan your biometric as well (Chrome example shown).
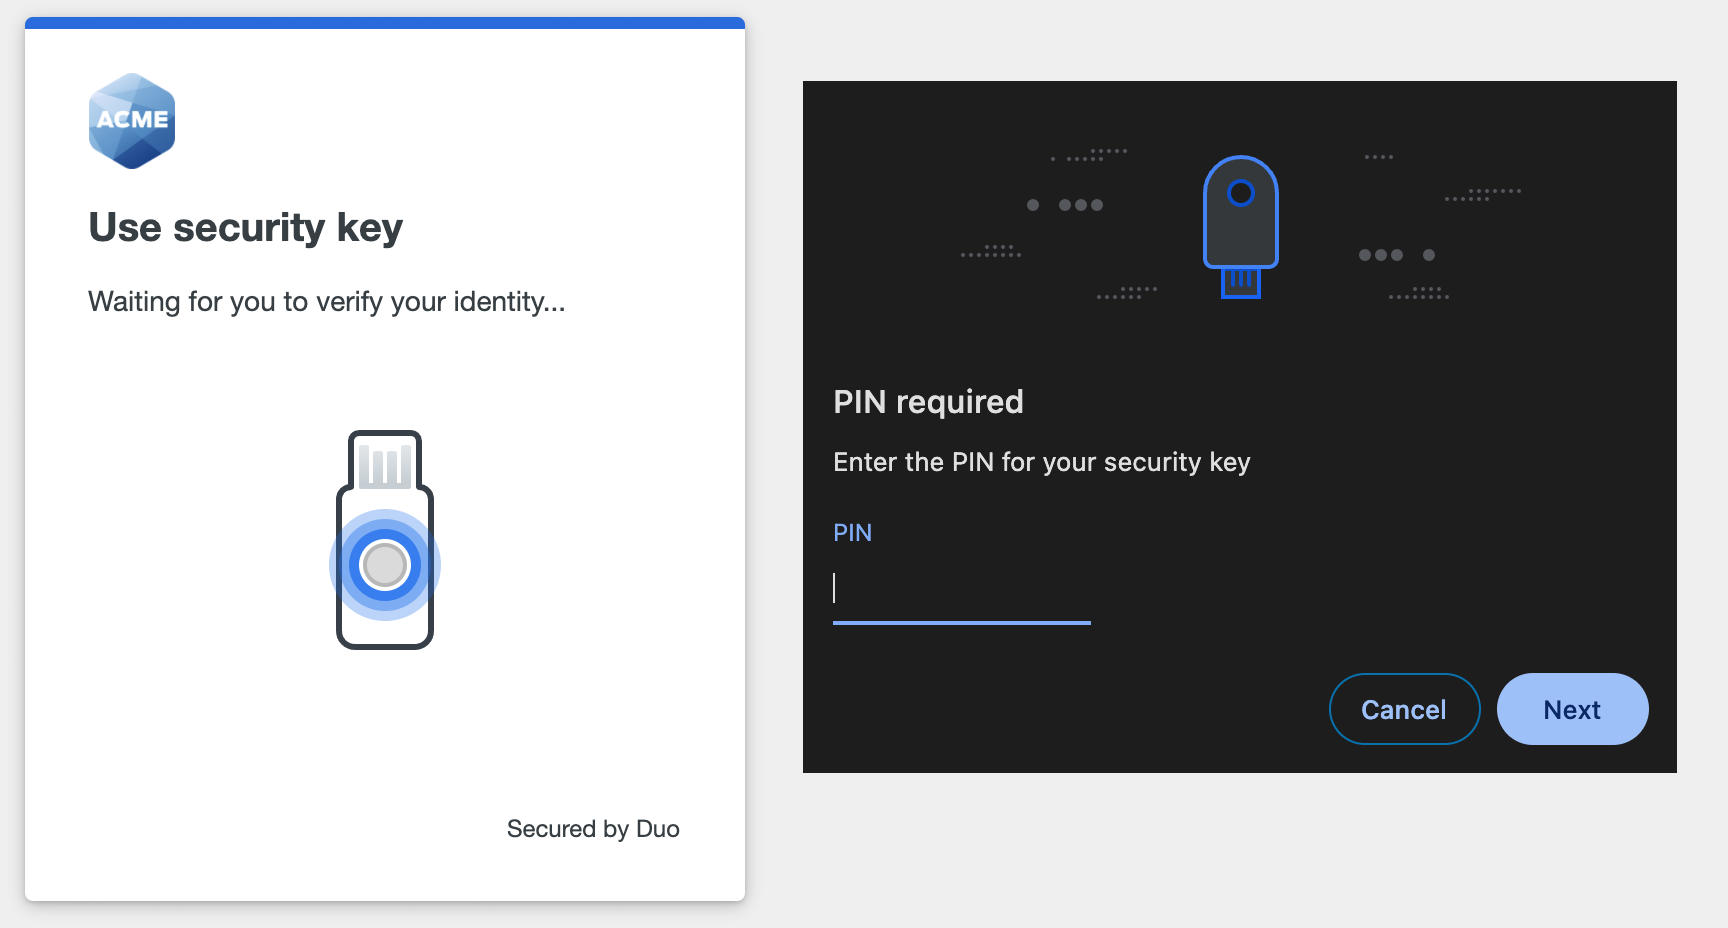
If you need to cancel a security key authentication in progress, click or tap the cancel option shown by your browser, outside of the Duo Universal Prompt.
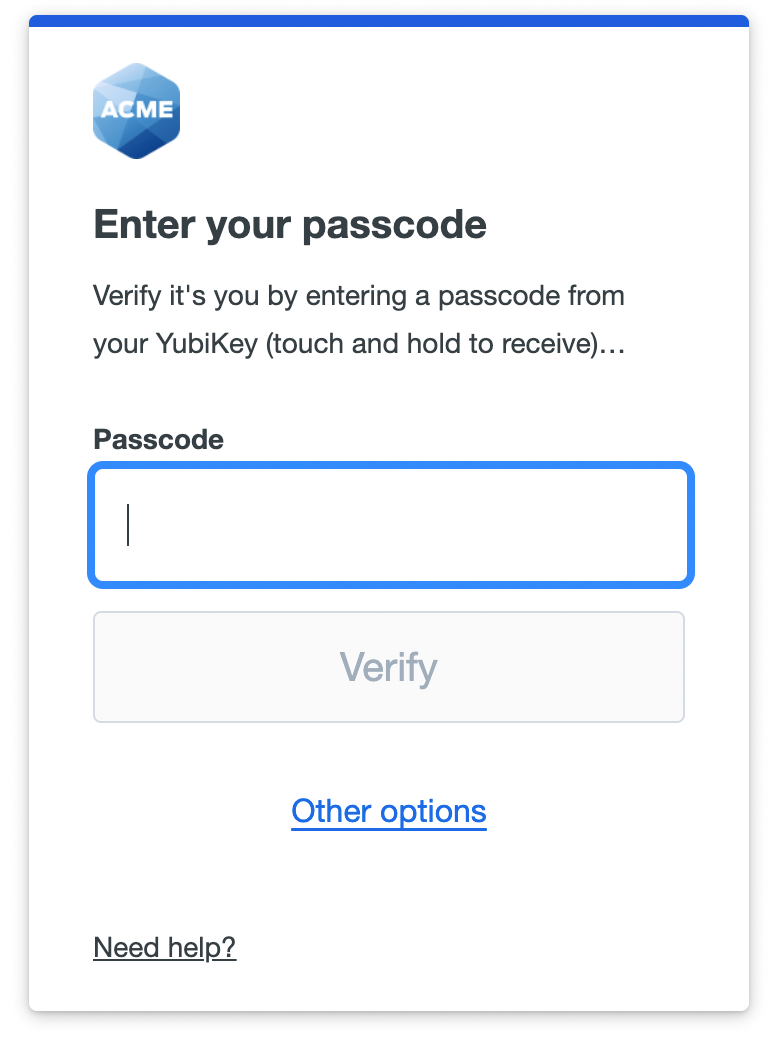
YubiKey Passcode
Log in using a passcode generated by a YubiKey. Connect or plug in your YubiKey and press it to generate and submit a passcode to log in to the application.
Your administrator must have configured the YubiKey for passcode use in Duo. This is a separate function from using a YubiKey as a security key.
Duo Push
Pushes a login request to your iOS or Android phone or tablet if you have Duo Mobile installed and activated. Review the request on your phone or tablet and tap Approve to log in to the application.

Verified Duo Push
Your organization may wish for you to enter a verification code shown within the Duo Universal Prompt into Duo Mobile when you approve a Duo Push request. This protects you from approving login requests not made by you and helps keep your accounts and information safe.
If your organization requires Duo Push verification, Duo Universal Prompt displays a numeric code three to six digits in length on-screen when you choose to use Duo Push to log in to that application.
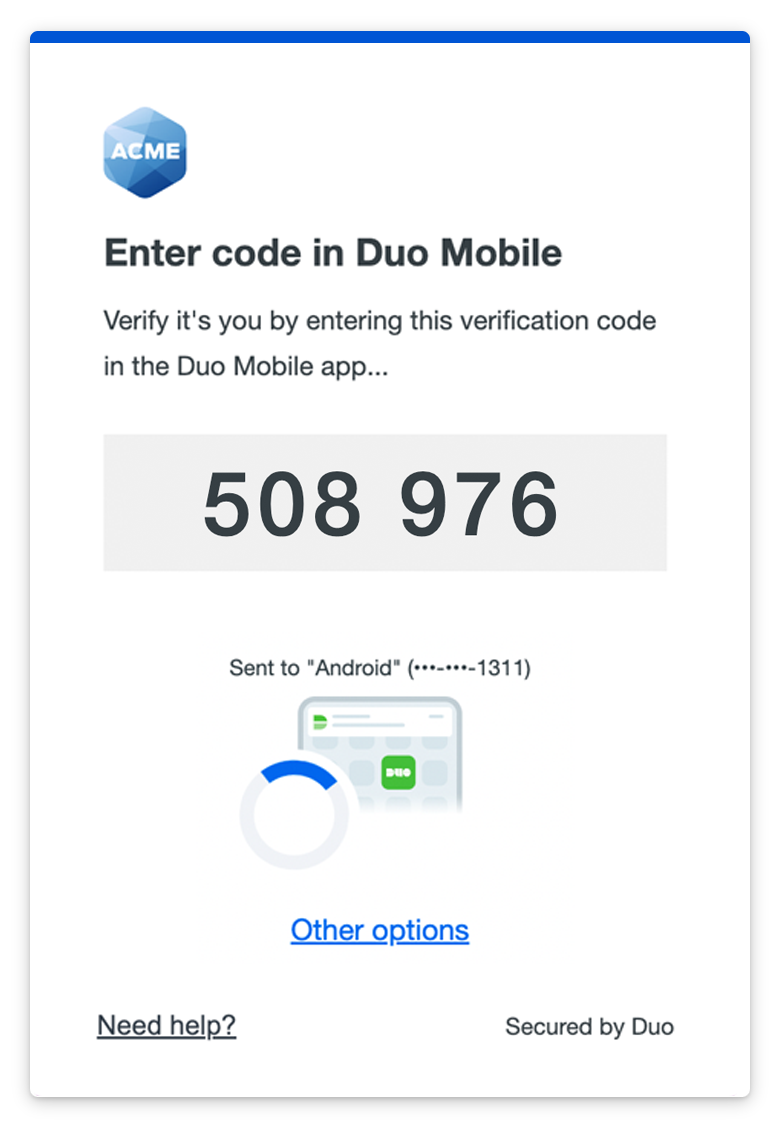
Enter the code shown on your screen into the Duo Push request received on your Android or iOS device. Tap Verify to finish approving the login request.
If your installed Duo Mobile version does not support verification then you will receive a Duo Push request without the code entry field. If you try to approve then the login fails and you'll see a message instructing you to update your software. Use a different allowed authentication method or contact your help desk.
Verified Duo Push with Bluetooth Autofill
Your organization may prompt you to allow Bluetooth permissions for Duo Desktop and Duo Mobile so verification codes can be automatically filled in.
Allow Bluetooth permissions on your Android or iOS device. If you're on macOS, you'll also be prompted to allow Bluetooth permissions for Duo Desktop.
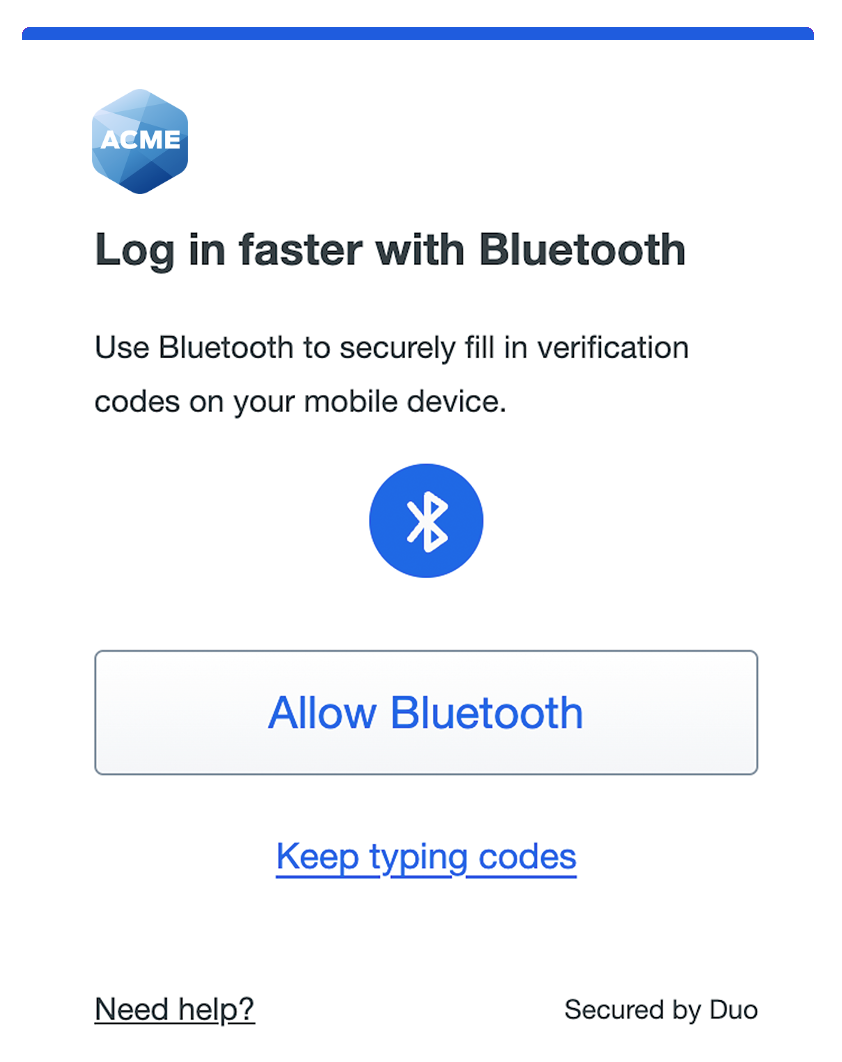
After you allow Bluetooth permission, you'll see "Making sure you're nearby..." as Duo Mobile checks if your phone is near your access device. Once Duo Mobile receives the verification code from Duo Desktop, the code will autofill in Duo Mobile. Tap Verify.
Proximity Verification
Your organization may require your mobile device to be near your access device during authentication. You will be prompted to allow Bluetooth permissions for Duo Desktop and Duo Mobile so your proximity can be verified.
Allow Bluetooth permissions on your Android or iOS device. If you're on macOS, you'll also be prompted to allow Bluetooth permissions for Duo Desktop.
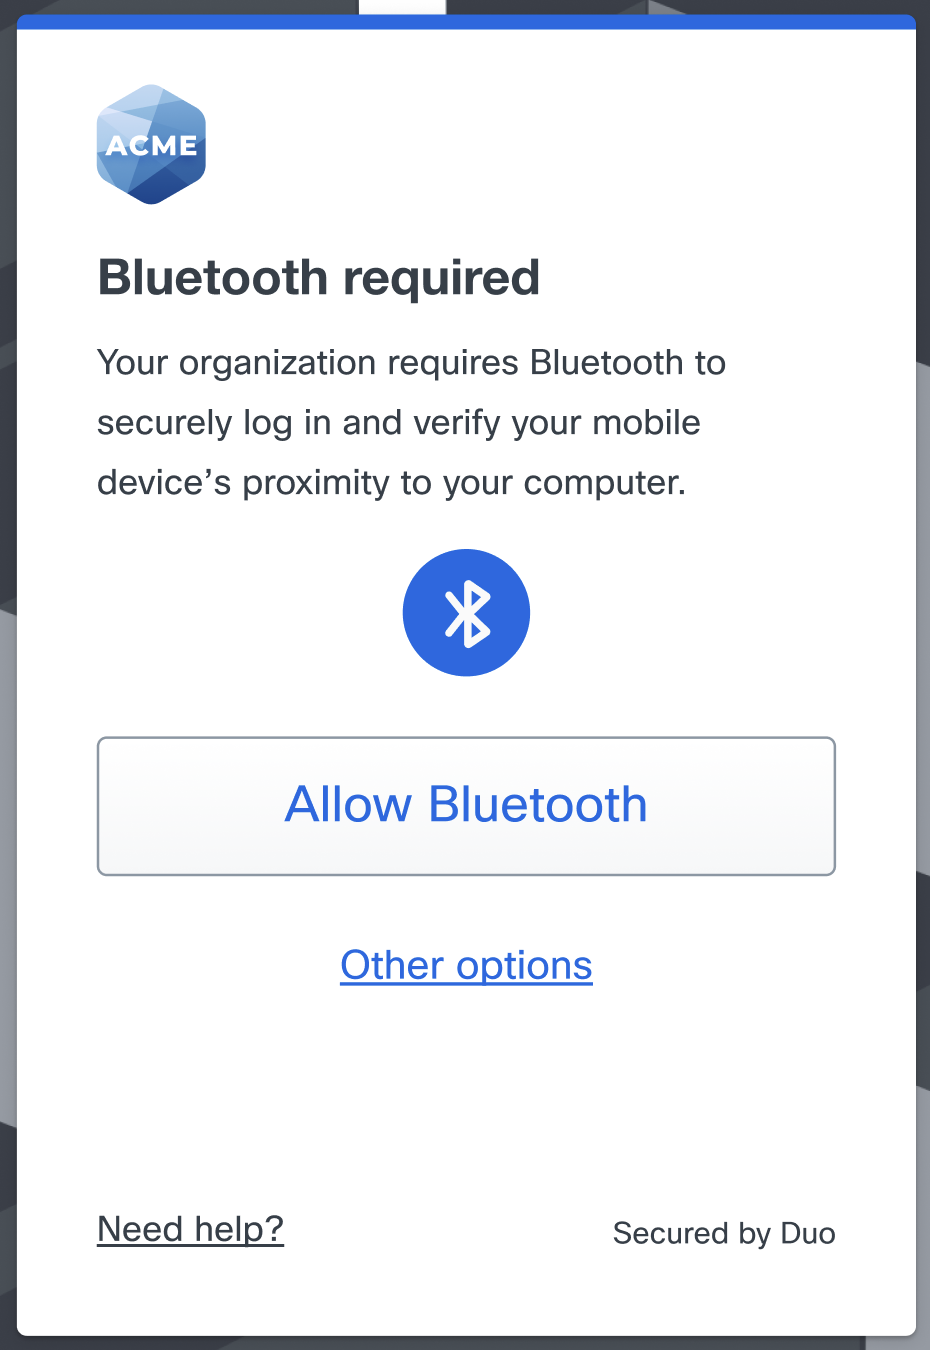
After you allow Bluetooth permission, you'll see "Making sure you're nearby..." as Duo Mobile checks if your phone is near your access device. Once the Bluetooth connection confirms that your mobile device is near your access device, you'll see "You're nearby". Tap Approve.
Duo Desktop
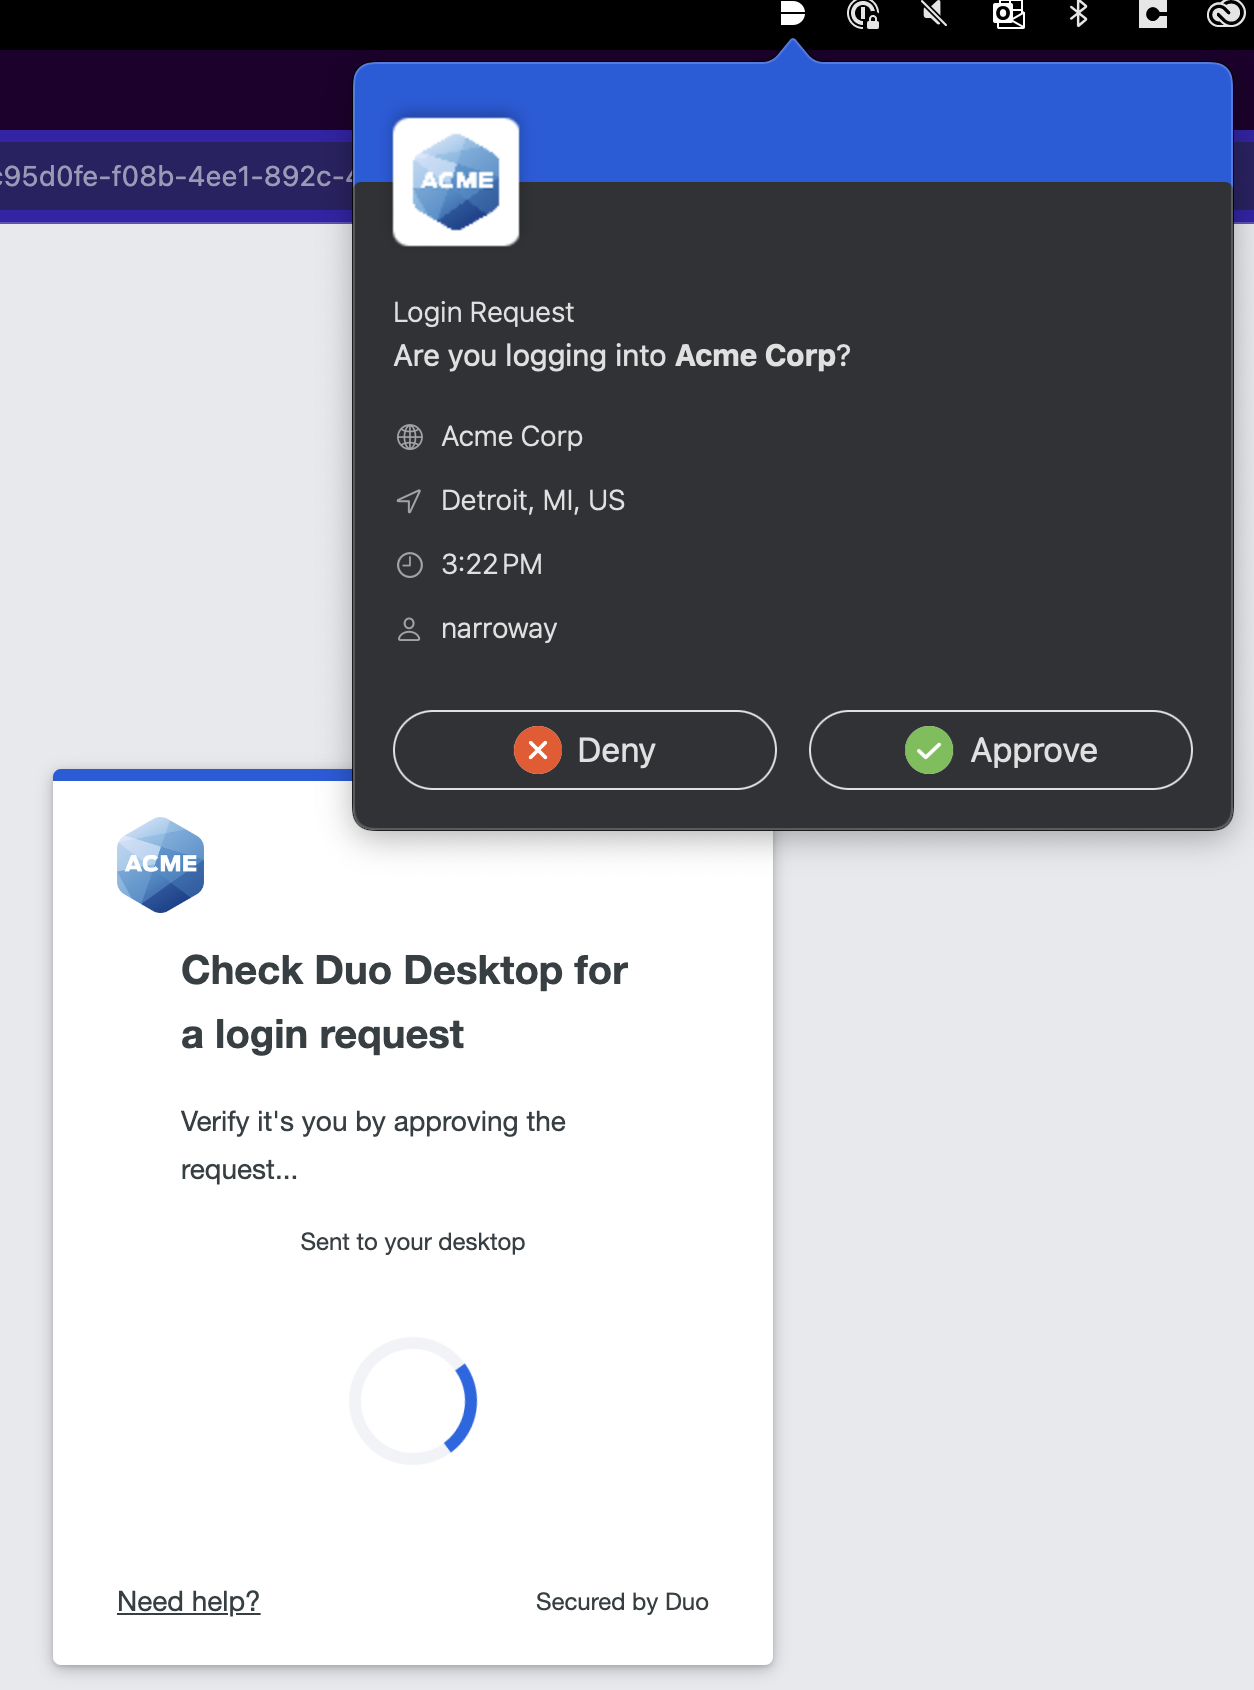
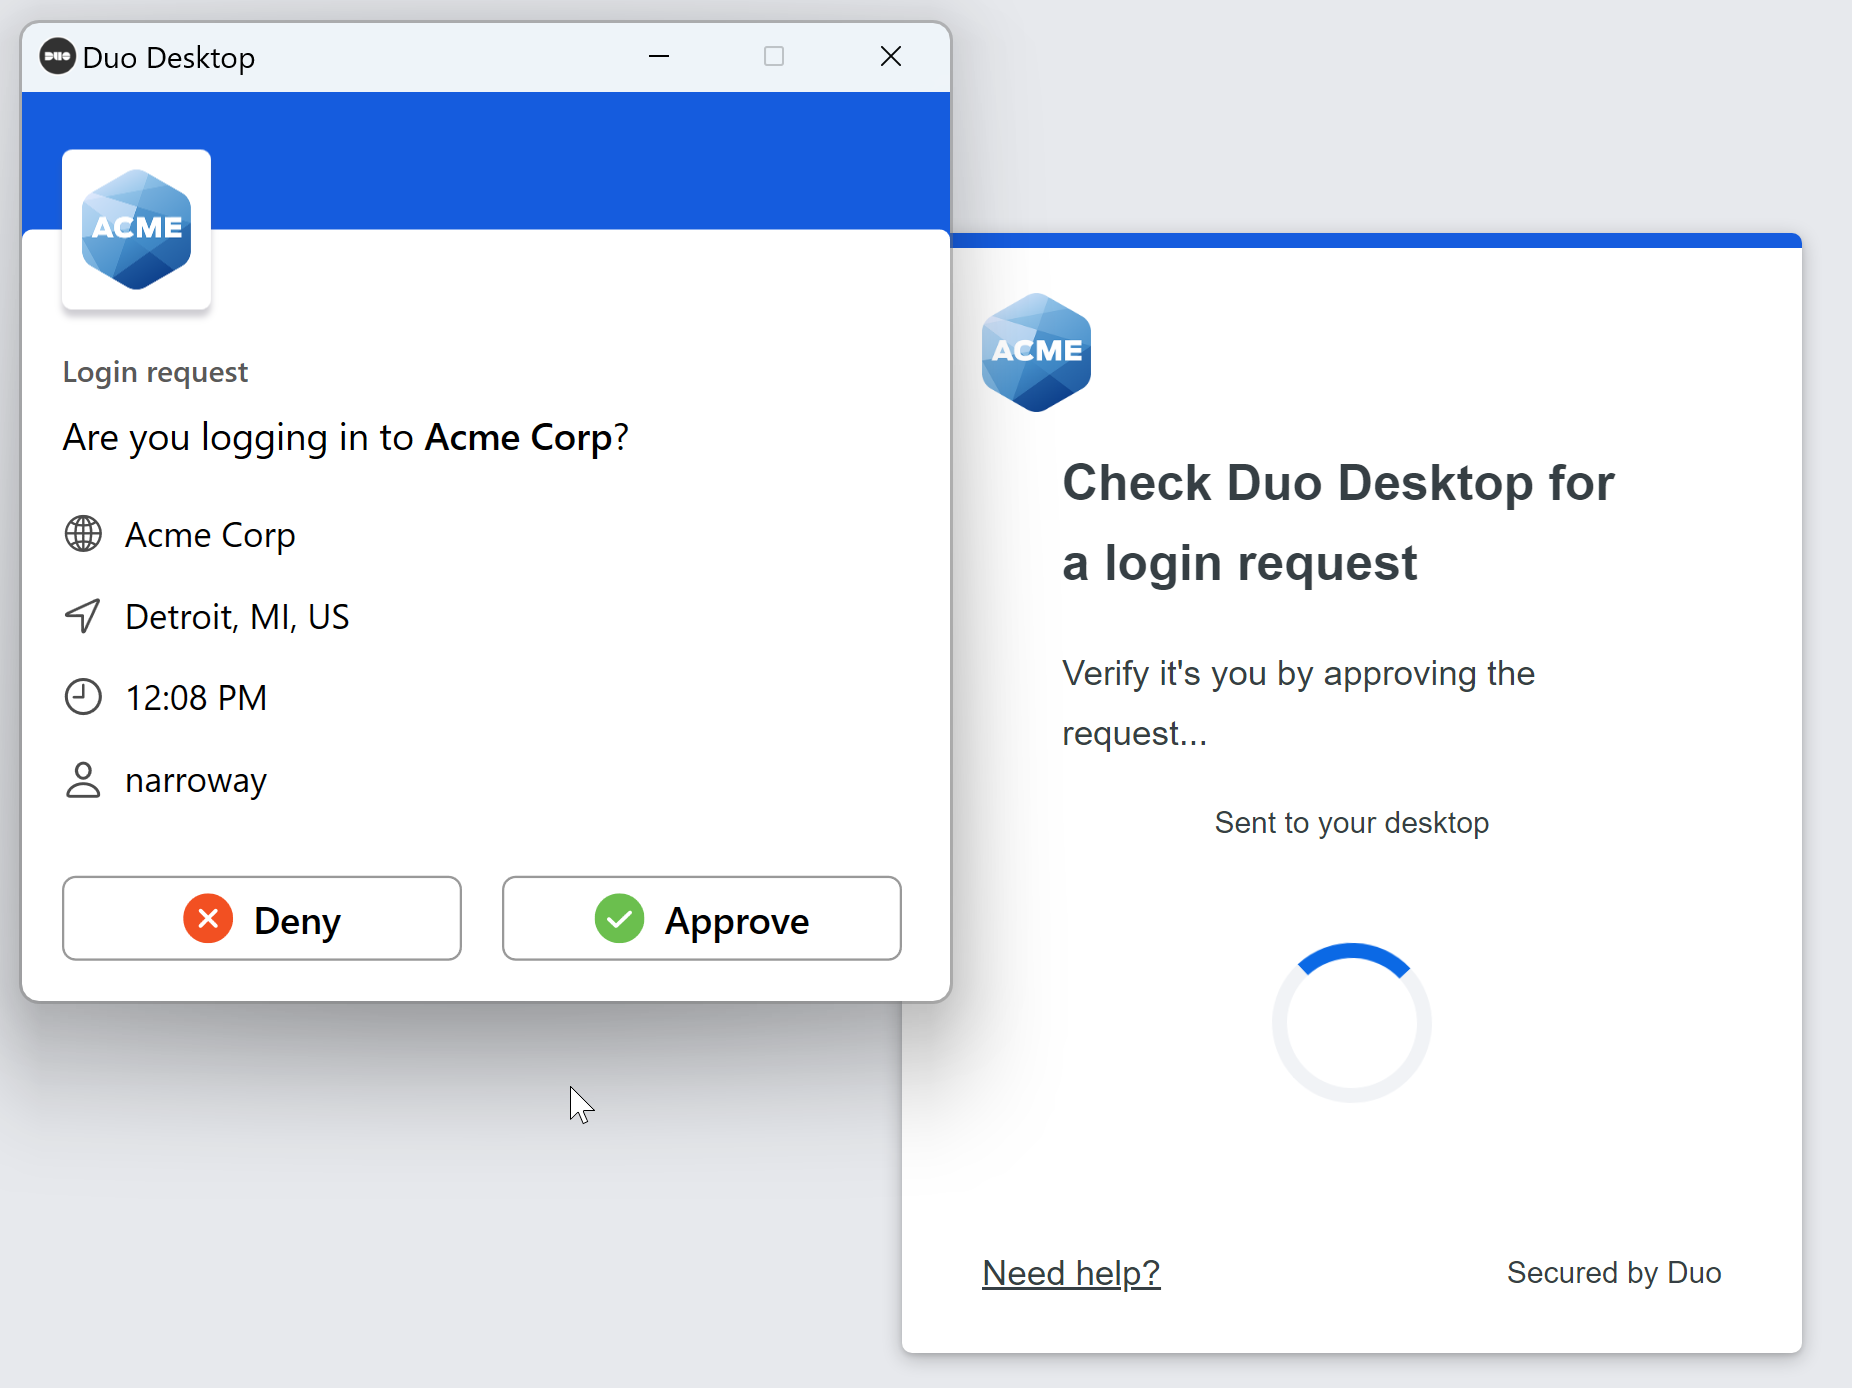
Duo Desktop will ask you to approve or deny the authentication attempt. Review the request and click Approve to log in to the application.
On macOS:
On Windows:
Duo Mobile Passcode
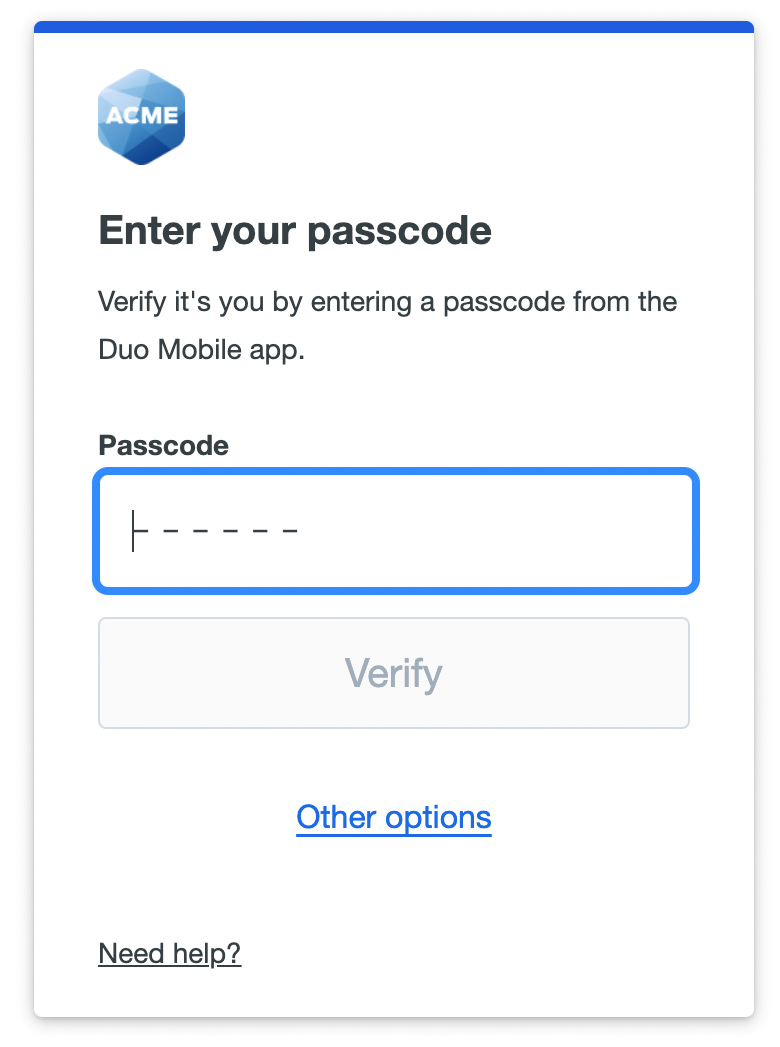
Log in using a passcode generated by the Duo Mobile app installed and activated on your Android or iOS device. Open Duo Mobile and locate your organization's account in the accounts list, and tap it to generate a six-digit passcode. Enter that passcode into the space provided and click or tap Verify to log in to the application.
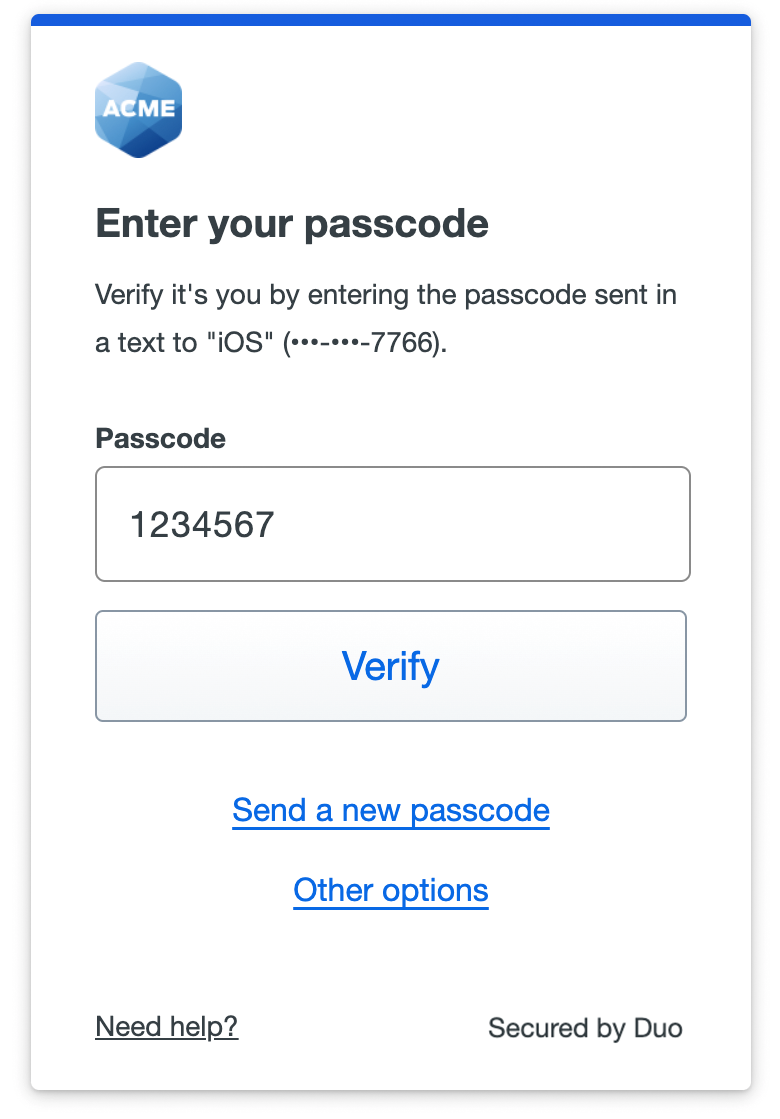
Text Message Passcode
Log in using a passcode received from Duo in a text message. When you land on the text message page, it will show that a text message was just sent to you with a passcode. When you receive the message, enter that passcode into the space provided and click or tap Verify to log in to the application. When authenticating from a mobile device in the United States and Canada your browser may automatically enter the passcode for you.
If you did not receive the text message from Duo, use the Send a new passcode link to try sending it again.
Passcodes received in a text message expire when used.
Phone Call
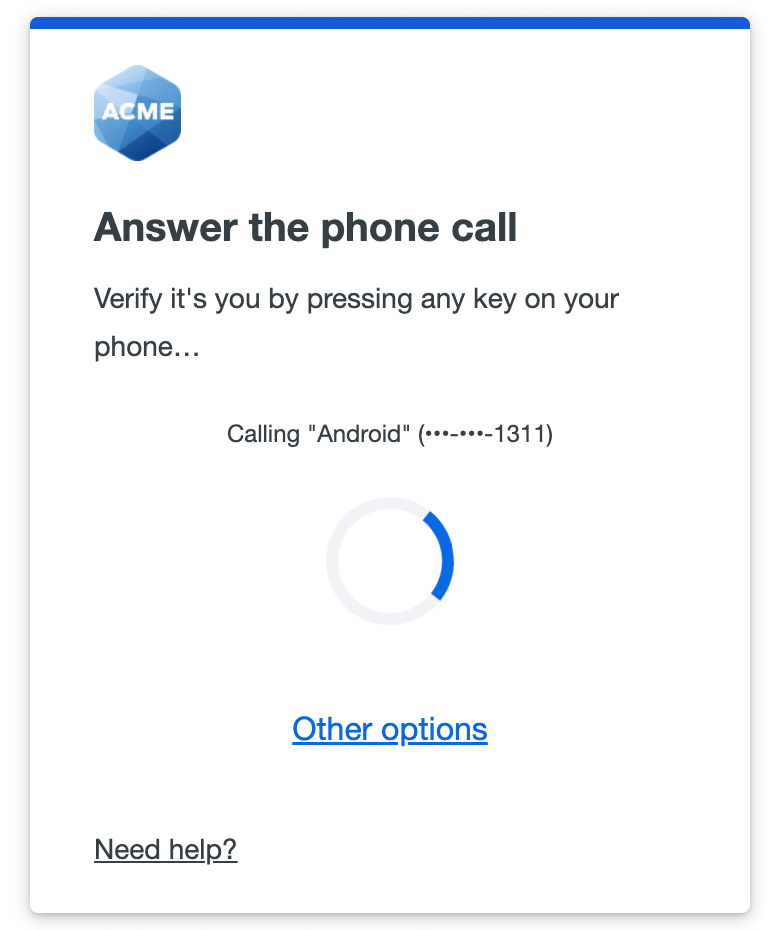
Authenticate via phone callback. Answer the phone call from Duo and follow the voice instructions to log in to the application.
Hardware Token Passcode
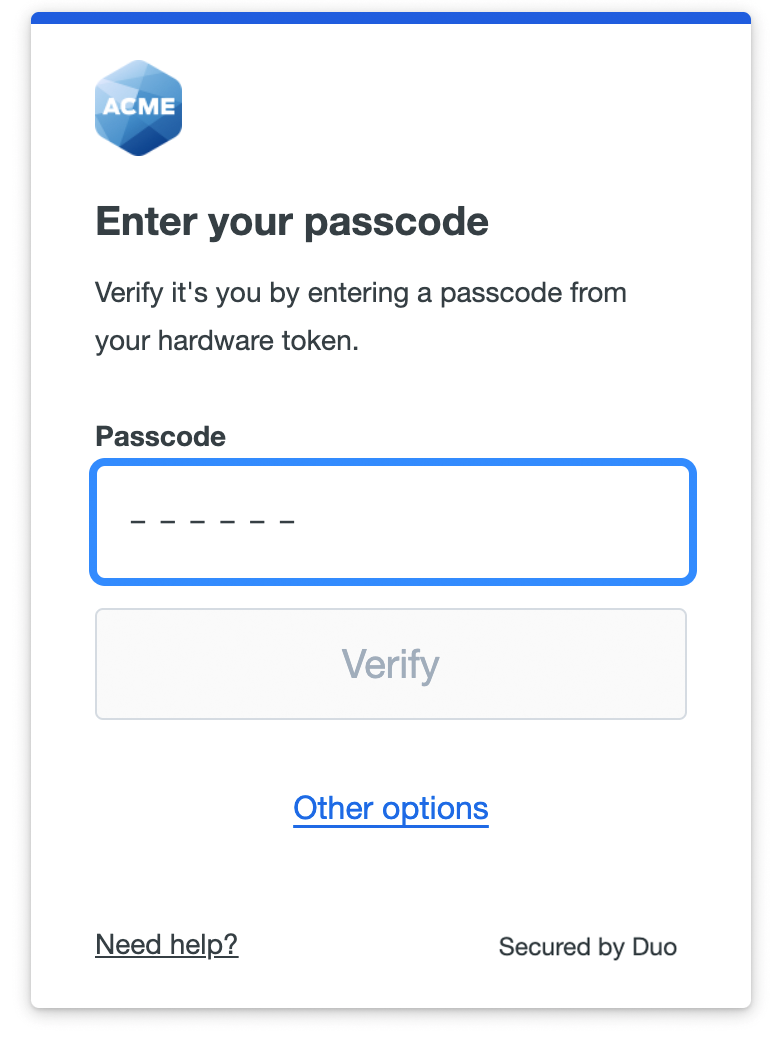
Log in using a passcode generated by a hardware token provided to you by your organization. Enter that passcode into the space provided and click or tap Verify to log in to the application.
Bypass Code
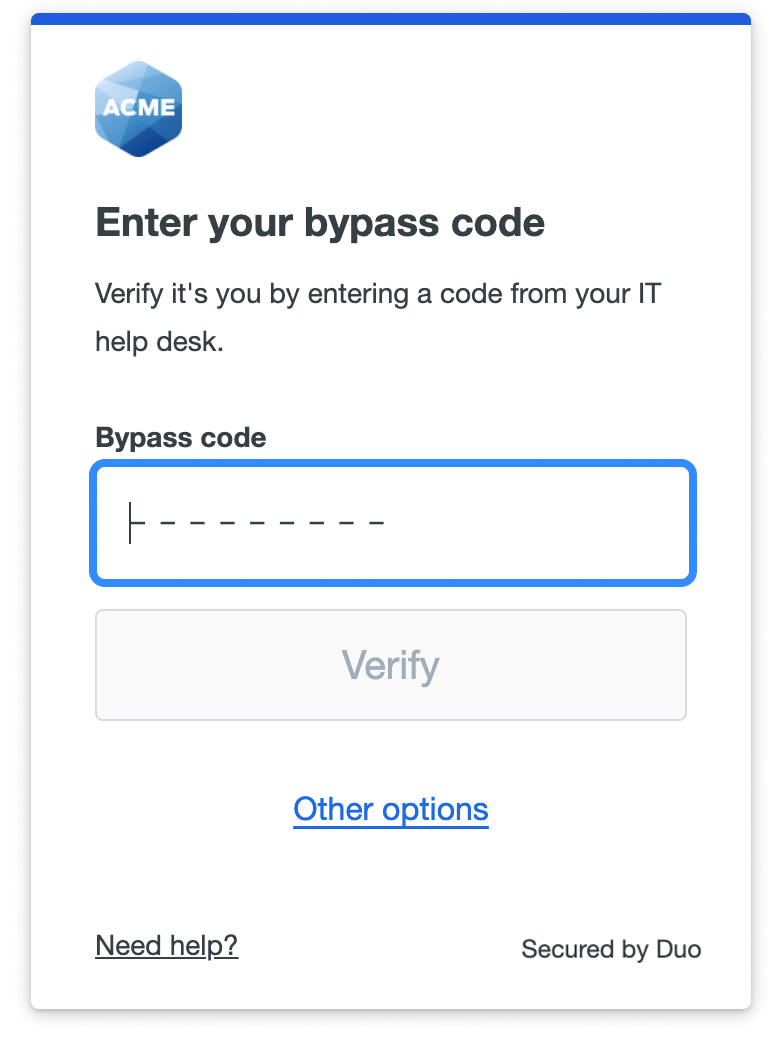
Log in using a code provided by your organization's Duo administrator or help desk. Enter that code into the space provided and click or tap Verify to log in to the application.
First-time Enrollment in Duo
Enrollment is the process that registers you as a user in Duo with a device capable of performing two-factor authentication.
Please see the Duo Universal Prompt enrollment instructions to learn how to enroll in Duo.
Add or Manage Devices After Enrollment
If enabled by your administrator, you can add additional verification methods, manage your existing devices, or reactivate Duo Mobile for Duo Push from the Duo Universal Prompt.
When logging in to an application with the Universal Prompt, click the Other options link on the authentication page to view your list of available methods. If your organization enabled self-service device management then you'll see a Manage devices choice at the end of the list. Click that to enter the device management portal.
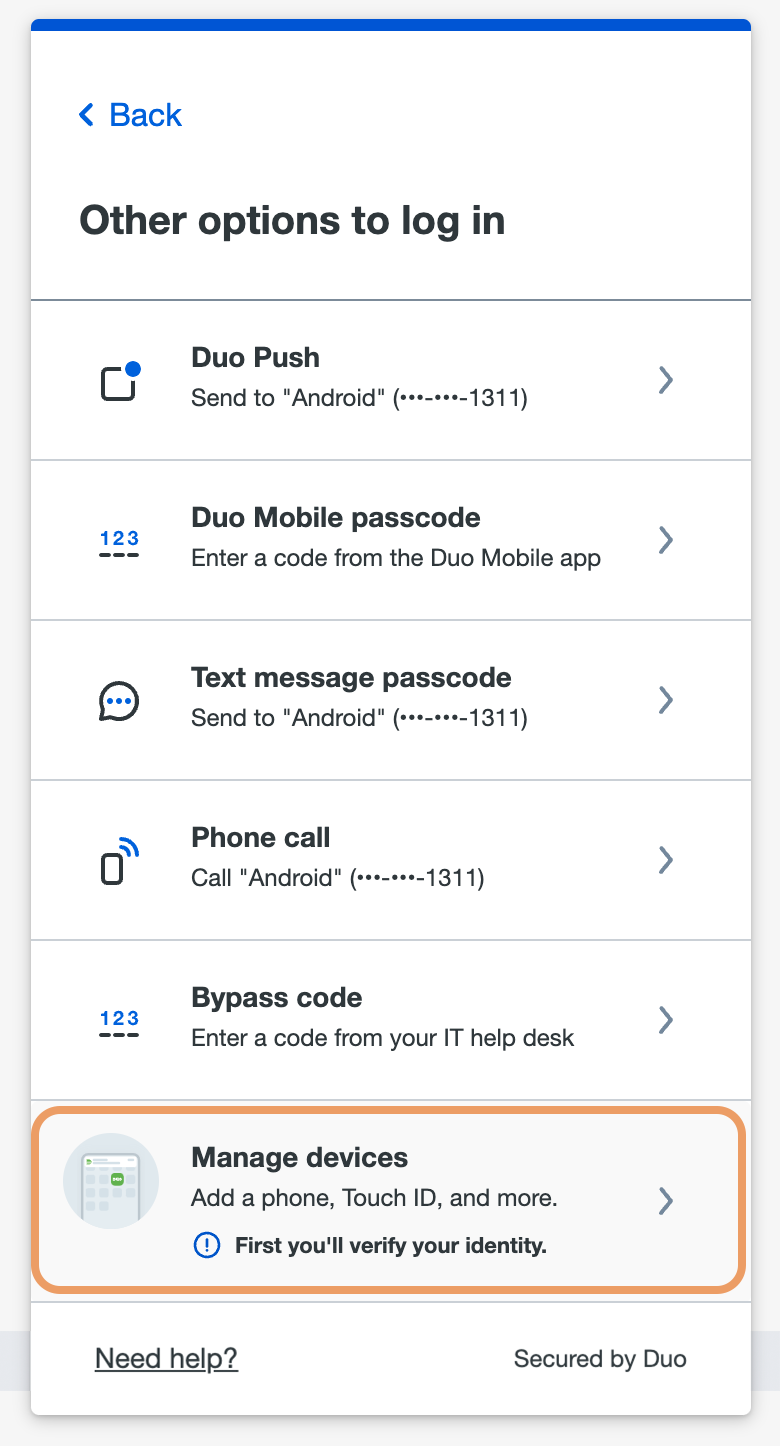
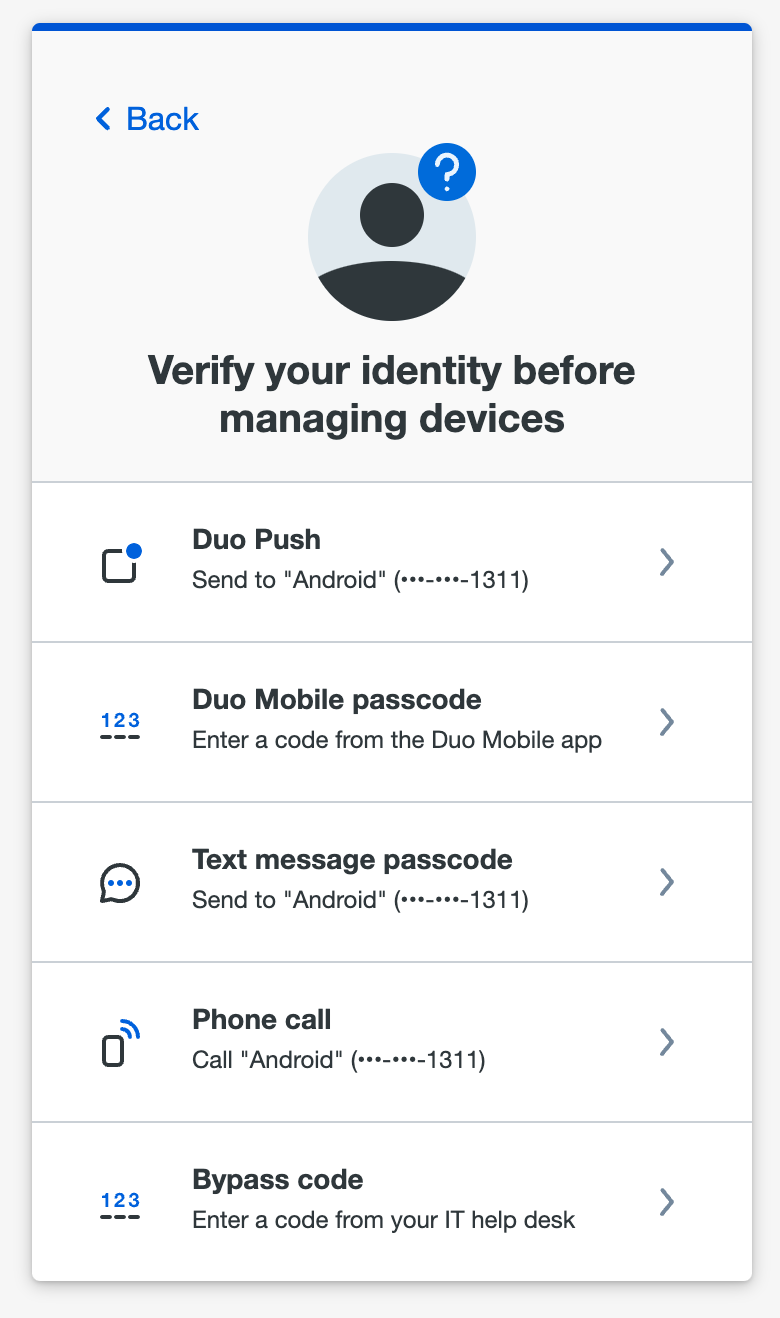
To access the device management you'll first need to verify your identity, just as you do when logging in to a service or application protected by Duo. Click on an available option to verify your identity. If you're visiting device management to delete or update a device you don't have anymore (such as a phone you lost or replaced), be sure to pick a verification option that you still have with you. If you don't have any devices you can use to authenticate to device management, contact your organization's Duo administrator or help desk.
After approving a Duo authentication request, you can see all your registered devices in the device management portal.
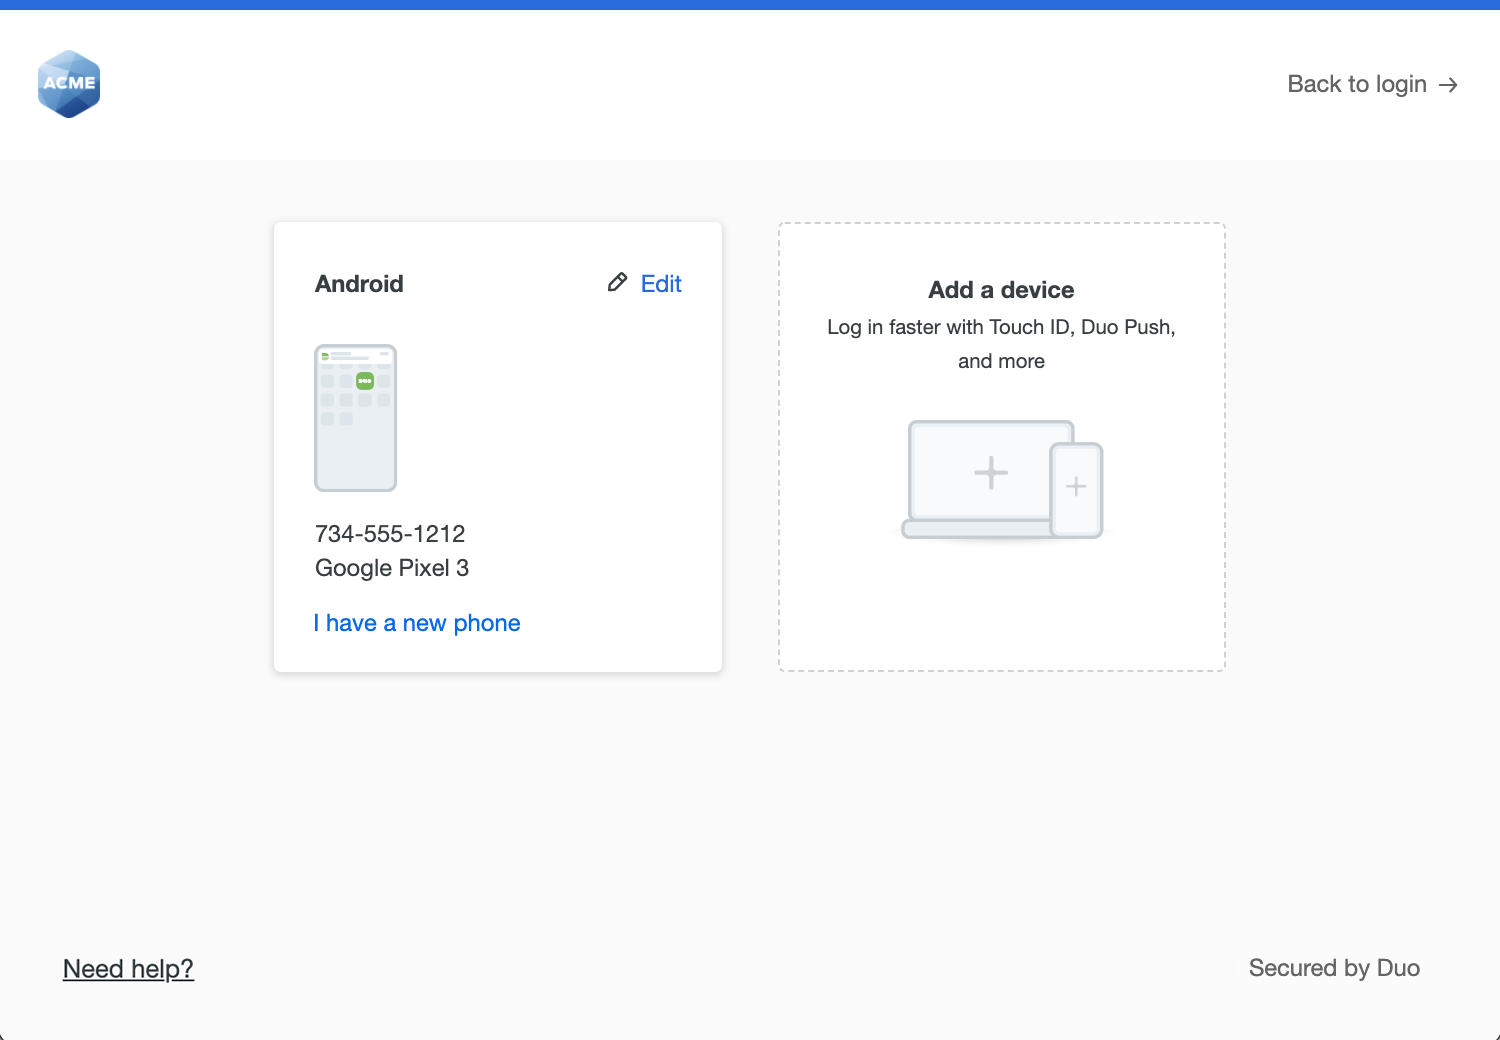
Please note that you cannot authenticate in to the self-service portal with Duo Desktop. You must use another authentication method to access device management.
Add Another Device
To add a new method of verifying your identity in Duo, click Add a device and select one of the verification options.
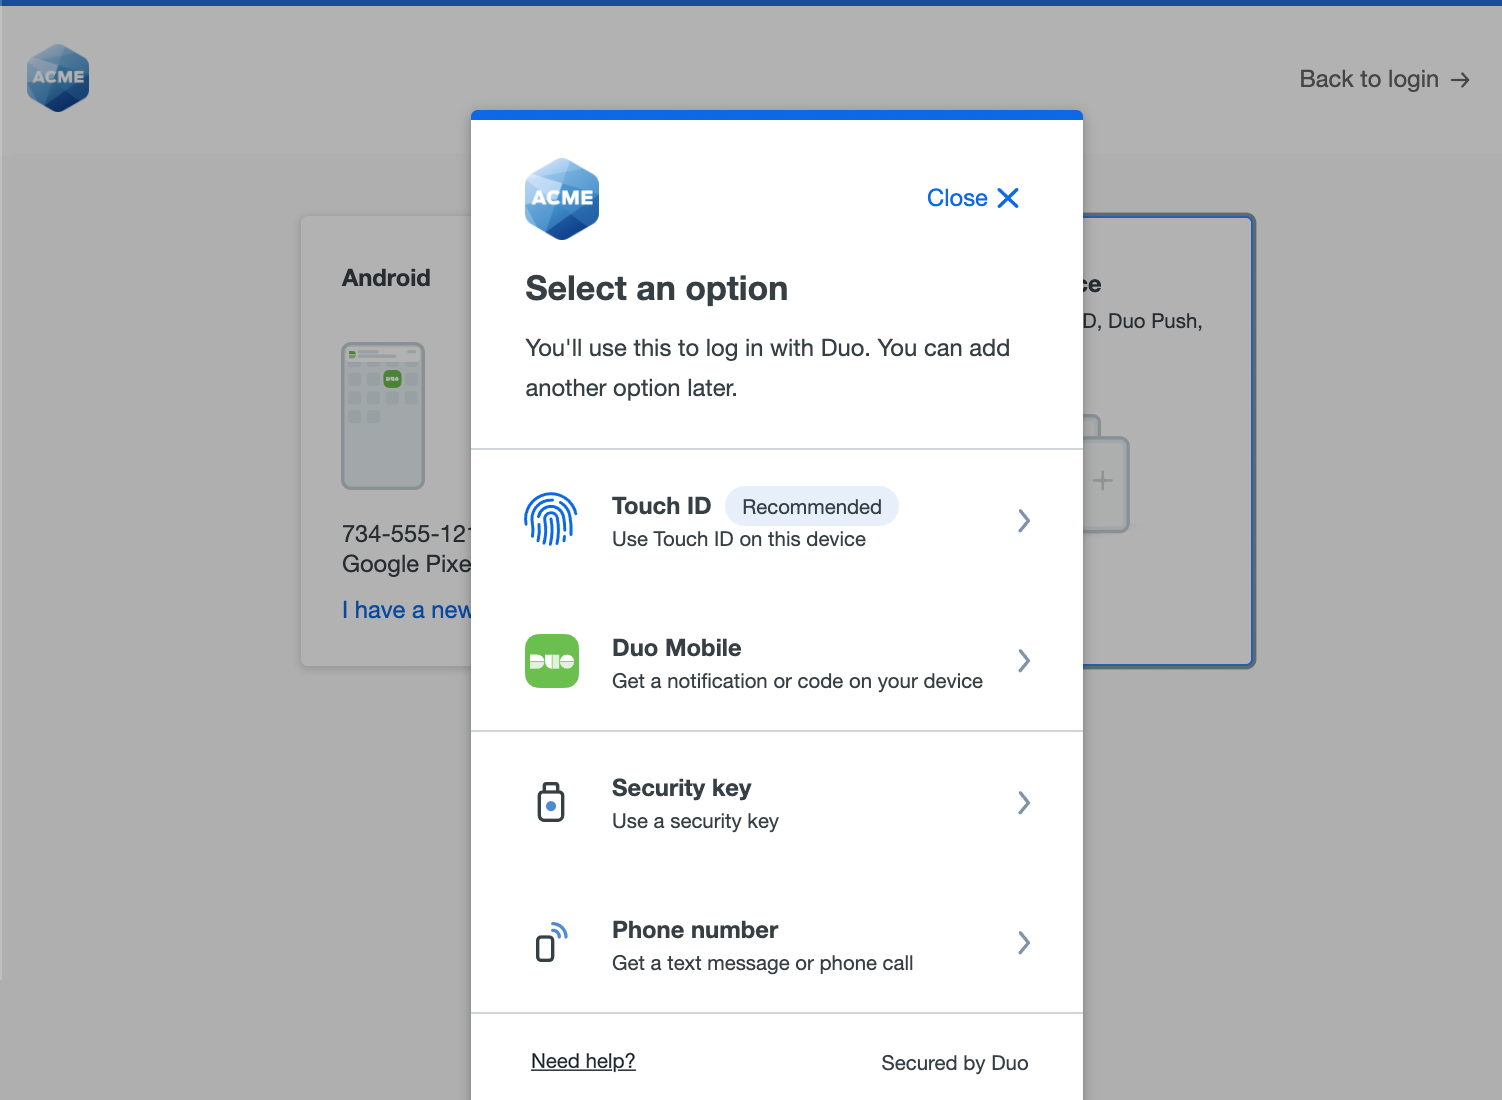
Duo takes you through the steps of adding the new device, just like first-time enrollment. The difference between adding a new device from device management and during first-time enrollment is that when you have finished enrolling the new device you return to the device management page to view all your registered devices, including the new one, instead of continuing to log into an application.
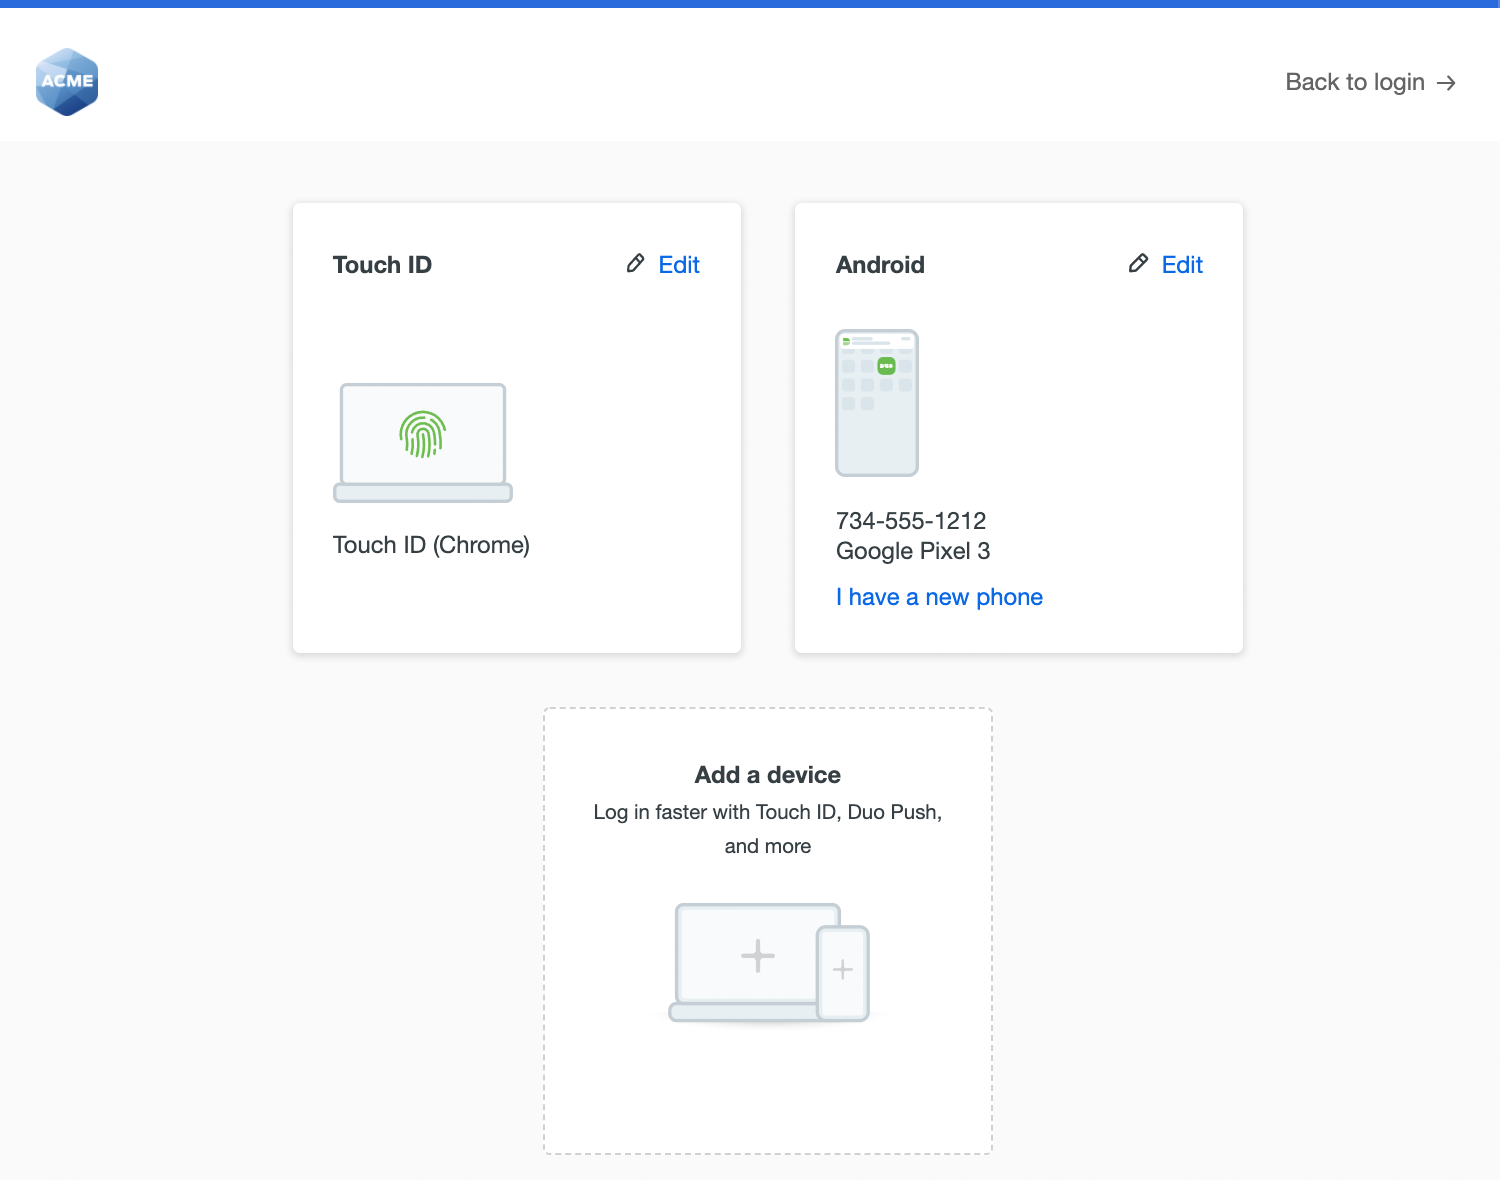
When you access device management during login to a Duo Single Sign-On application or from Duo Central and use it to add platform authenticators, like Touch ID or Windows Hello, then you'll be able to use that authentication method to log in to Duo Single Sign-On applications without a password if your organization has enabled Duo Passwordless.
Rename or Remove a Device
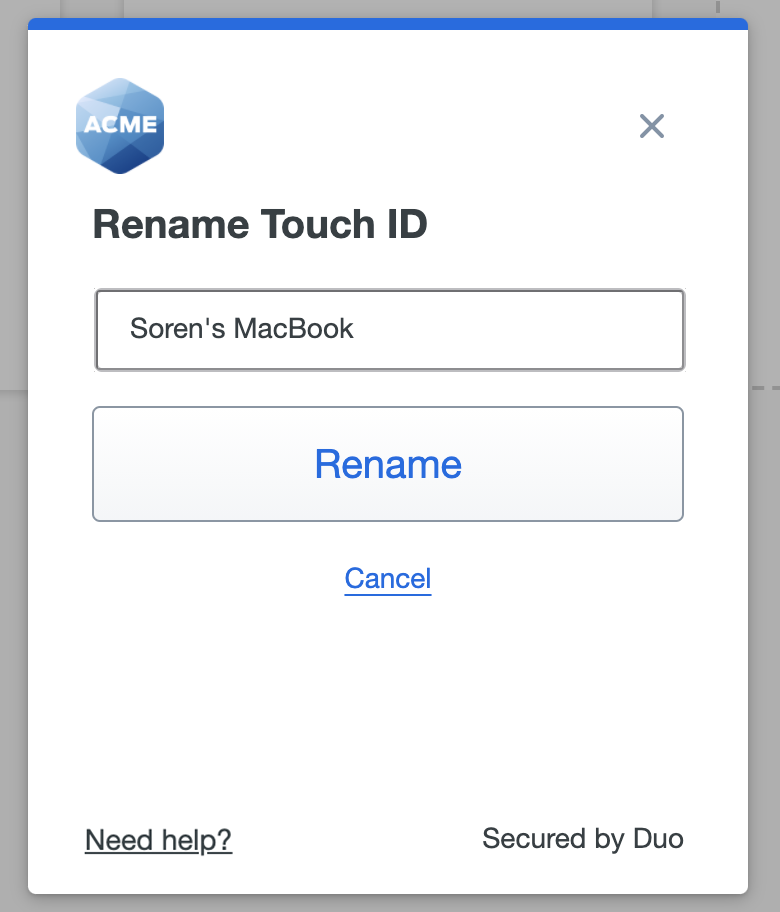
Click Edit and then Rename to give a device a new name to help you identify it. This new name shows up in the verification method list and on the authentication page when you log in with Duo to make it easier for you to identify which device you're using.
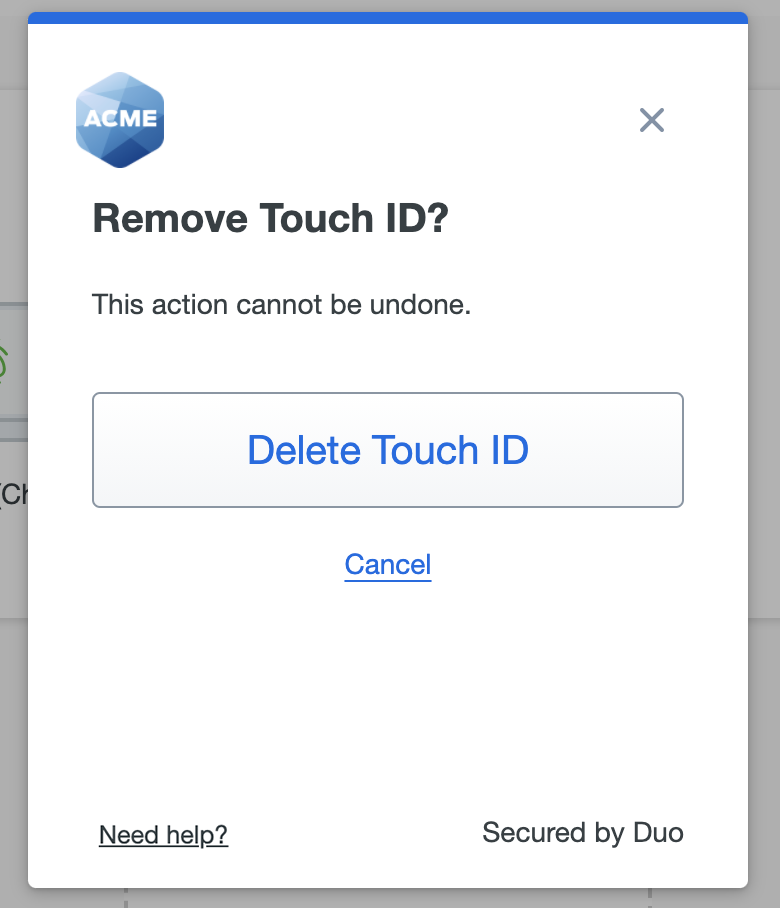
To delete a device, click Edit and then Remove. You'll be able to confirm that you want to remove this device before deleting it. Once deleted, a verification device can't be restored, but if you still have the device available you can add it again. You can't delete your only identity verification device.
Reactivate Duo Mobile for an Existing Device
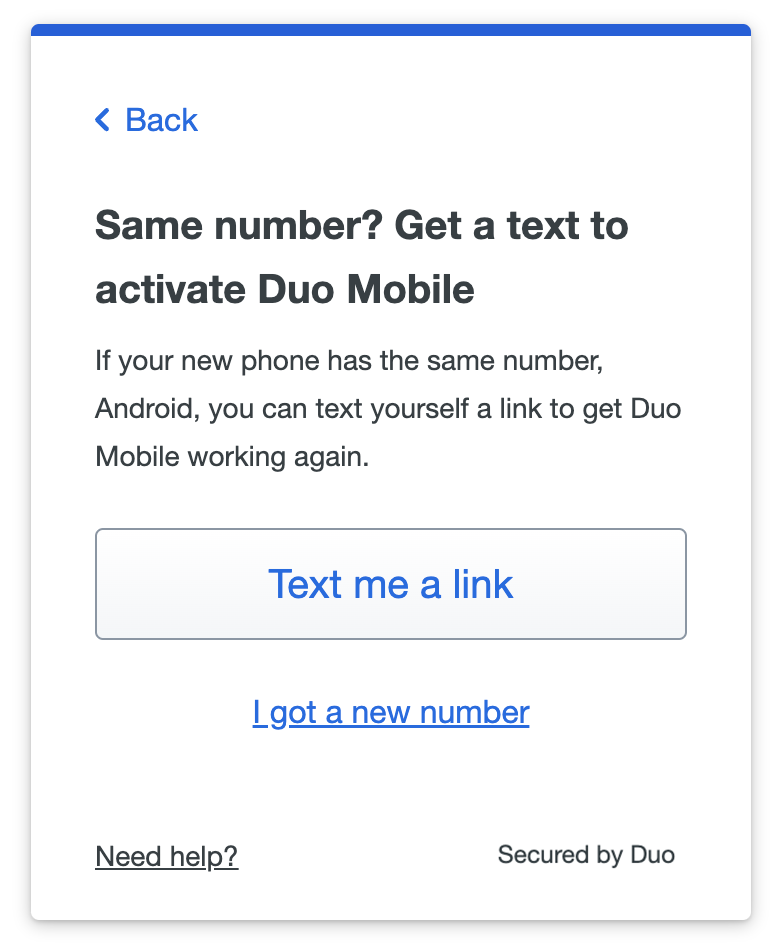
If you have replaced the phone you activated for Duo Push, or if Duo Push stops working, you can get Duo Push working again without contacting your help desk. If your organization has self-service enabled then if a Duo Push authentication times out you'll see the I got a new phone link shown in the Universal Prompt. Click or tap that link to begin the reactivation process.
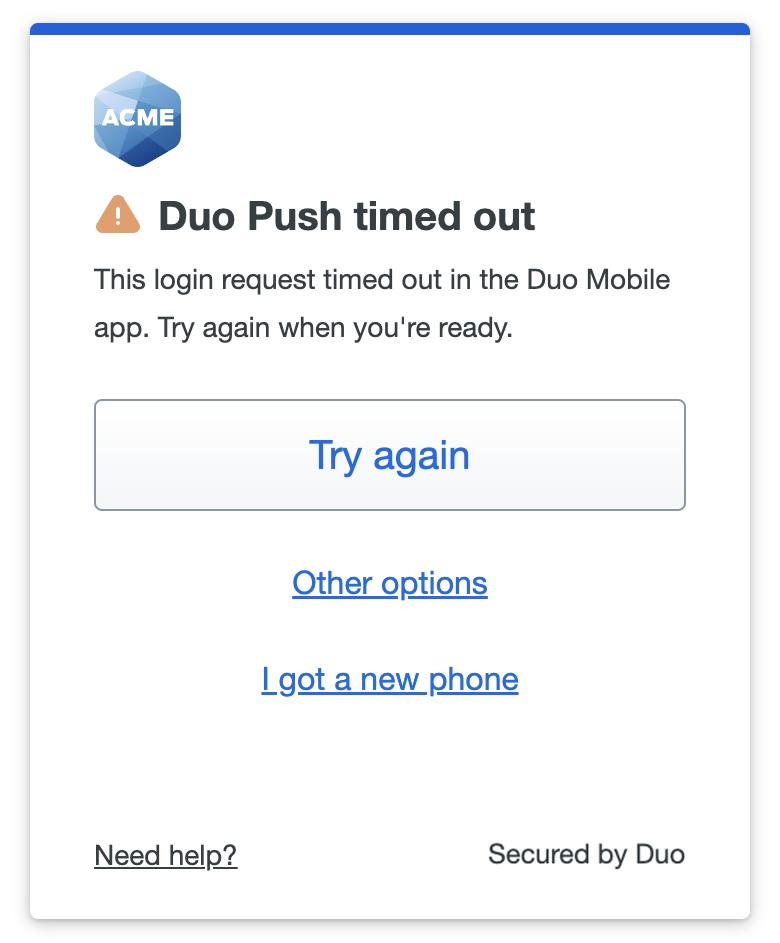
If you still use the same phone number as you did when you first set up the phone to use Duo Push, then click or tap the Text me a link button. When the text message with the link arrives on your phone, tap it to automatically reactivate Duo Mobile on your phone to use Duo Push again. If you don't have Duo Mobile installed be sure to install it before you try to open the activation link in the text message.
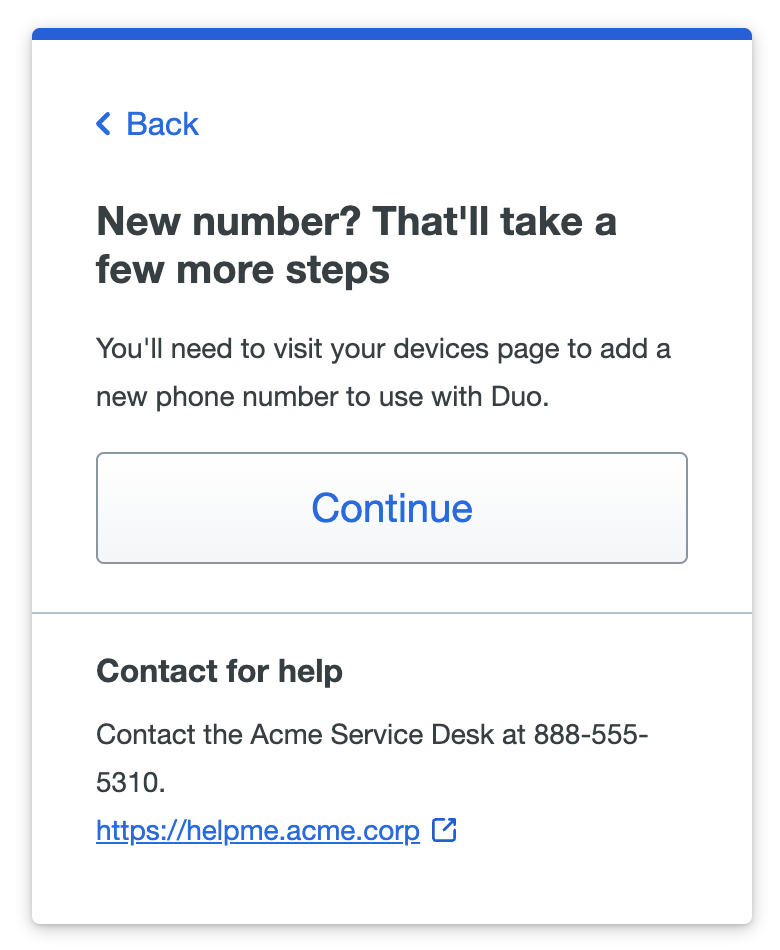
If you are using a different phone number than the one you first set up to use Duo Push then tap or click the I got a new number link.
If you have a new phone number then you can't send yourself a text message with a Duo Push reactivation link. Click or tap Continue to proceed to the Duo self-service device management portal, where you can complete the steps to add your new phone number and set up Duo Push on the new phone so you can use it to log in with Duo.
You'll still need to verify your identity with a different Duo verification method, so if you don't have one available you will need to contact your organization's help desk or Duo administrator for assistance.
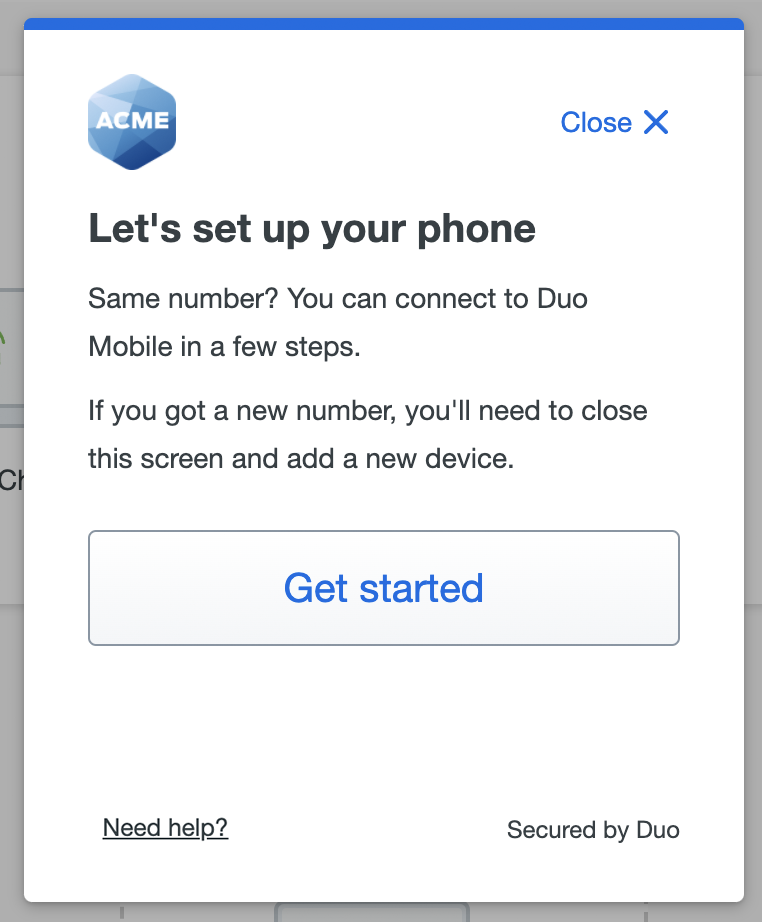
You can also reactivate Duo Mobile for use with Duo Push on a new phone from the device portal if it uses the same phone number as when you set up the original phone in Duo.
- Locate the existing phone in the device management portal and click the I have a new phone link.
- Click Get started if your phone uses the same phone number as before. If you want to add a new phone with a different number, cancel reactivation and follow the process for adding a new device instead.
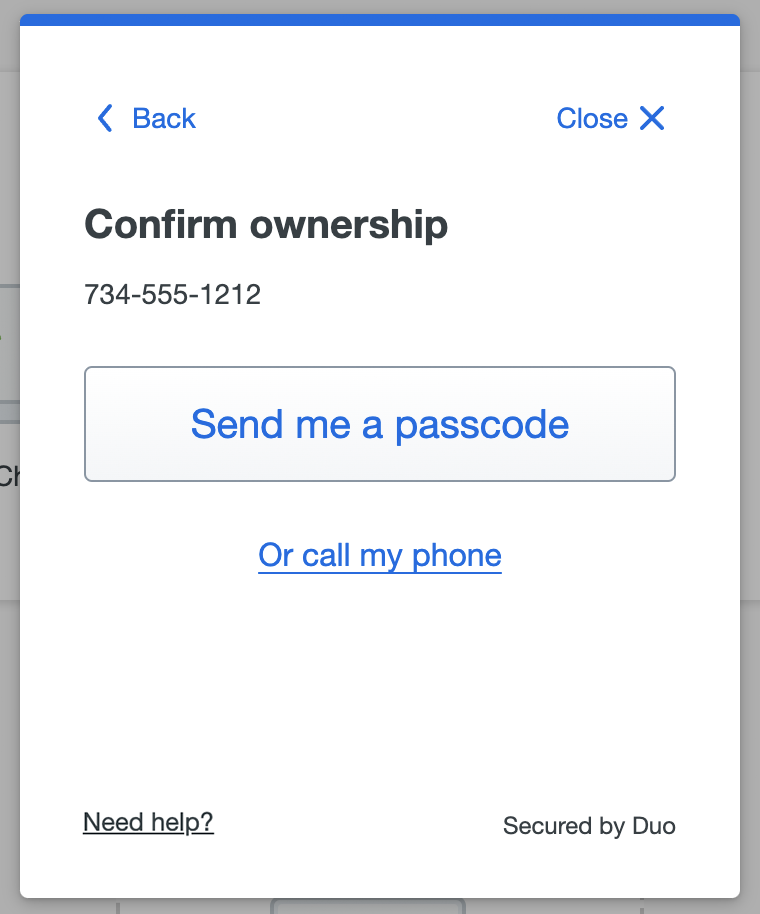
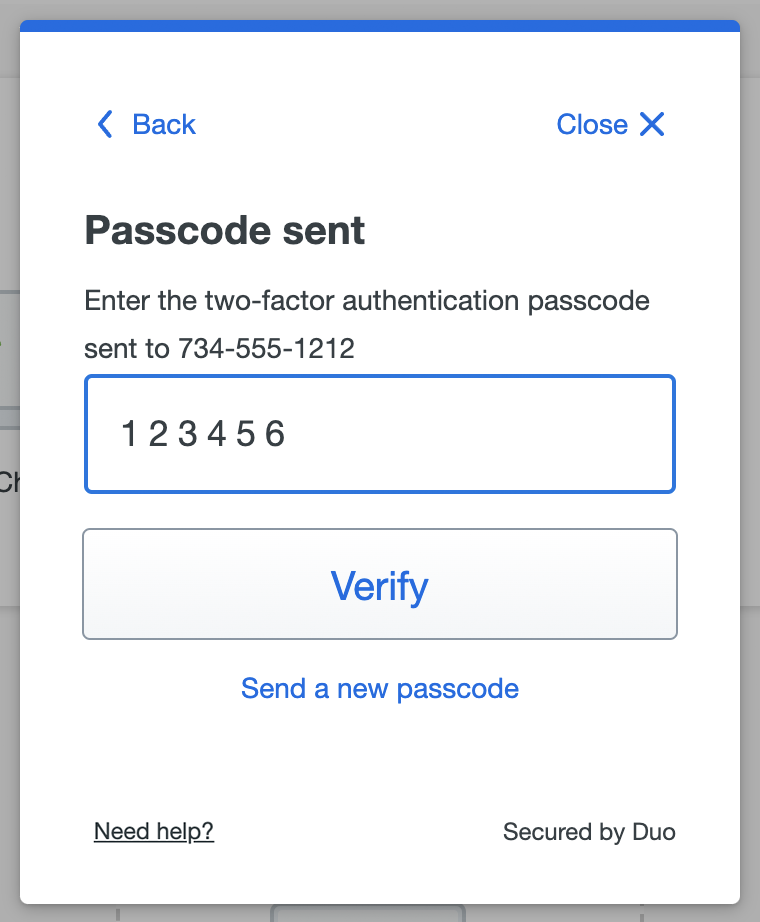
- Verify that you have access to the phone by clicking Send me a passcode or Or call my phone to receive a passcode from Duo.
- Enter the verification passcode you received in a text message or phone call and click Verify .
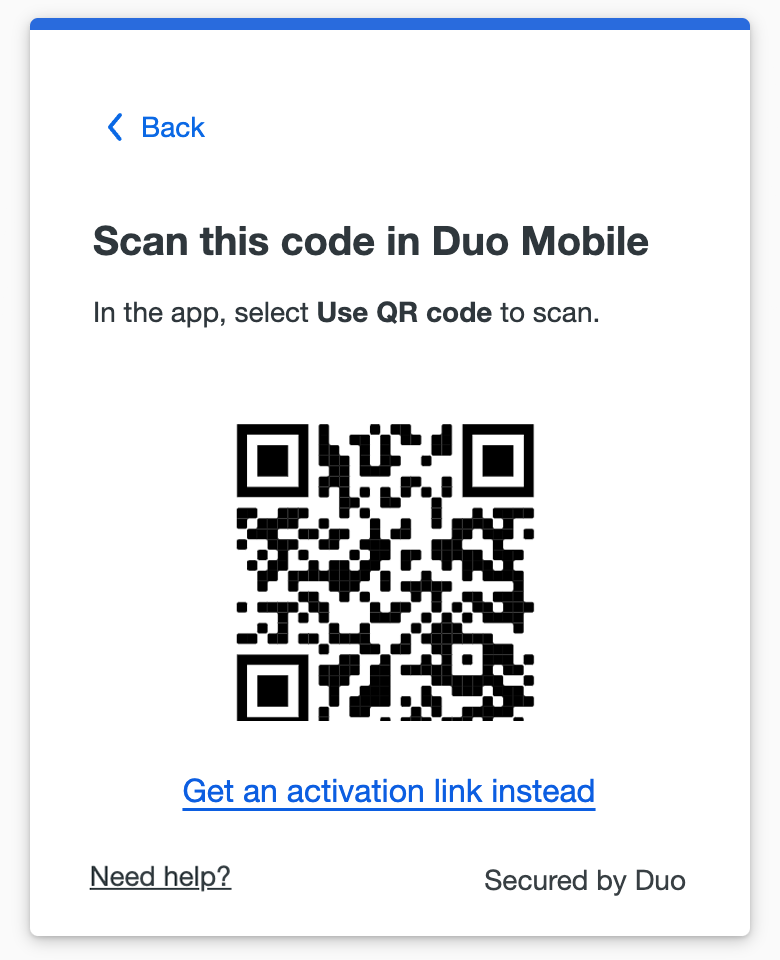
- Install the Duo Mobile app on your new phone if you hadn't already done so, open it and tap Add to scan the QR code shown on-screen, continuing the same steps you completed when you originally set up Duo Mobile for Duo Push on your phone.
- Click Continue when you've finished reactivating Duo Mobile on your new phone to return to the device management portal.
If your existing phone stops receiving Duo Push requests your Duo administrator or help desk might suggest that you try reactivating Duo Mobile on your phone with this process as a troubleshooting step.
Device Notifications
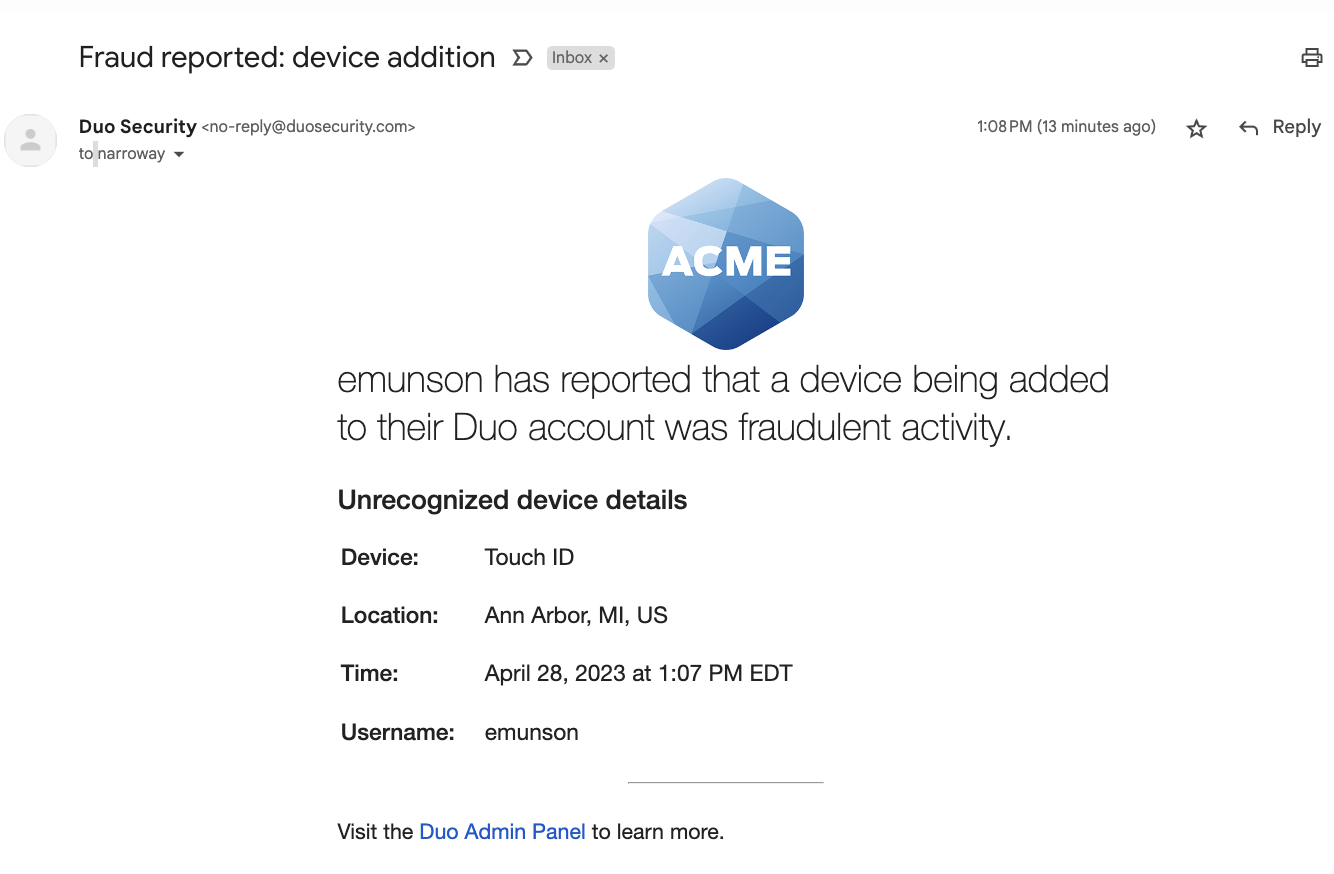
Your organization may have enabled notifications when you add or remove a device in Duo. You could receive an email notification, a notification pushed directly to the device where you activated Duo Mobile, or both.
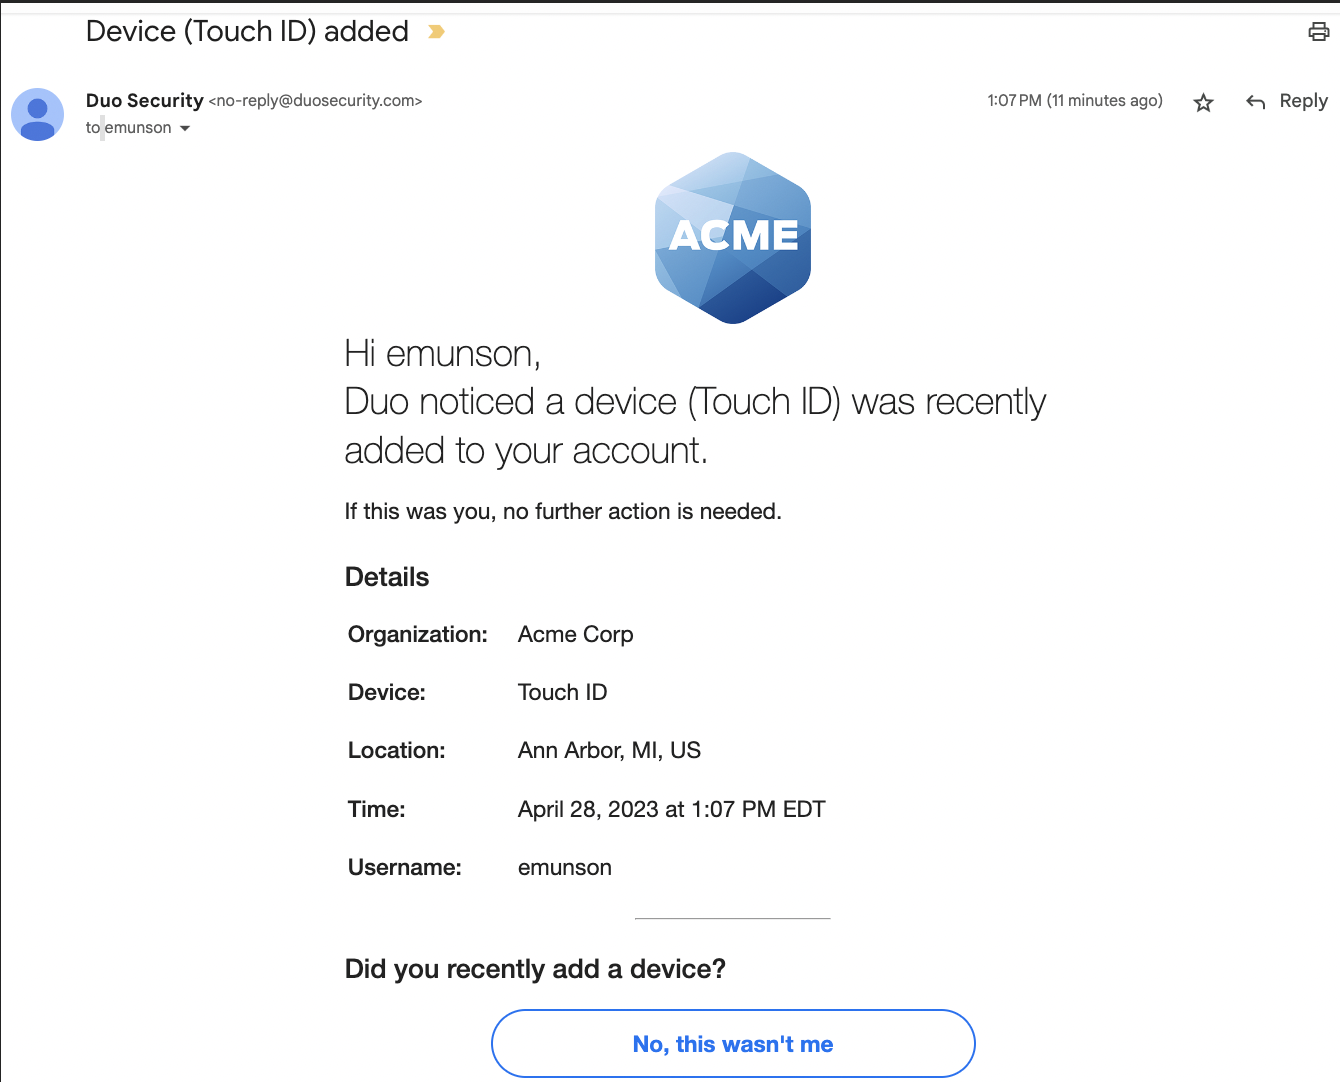
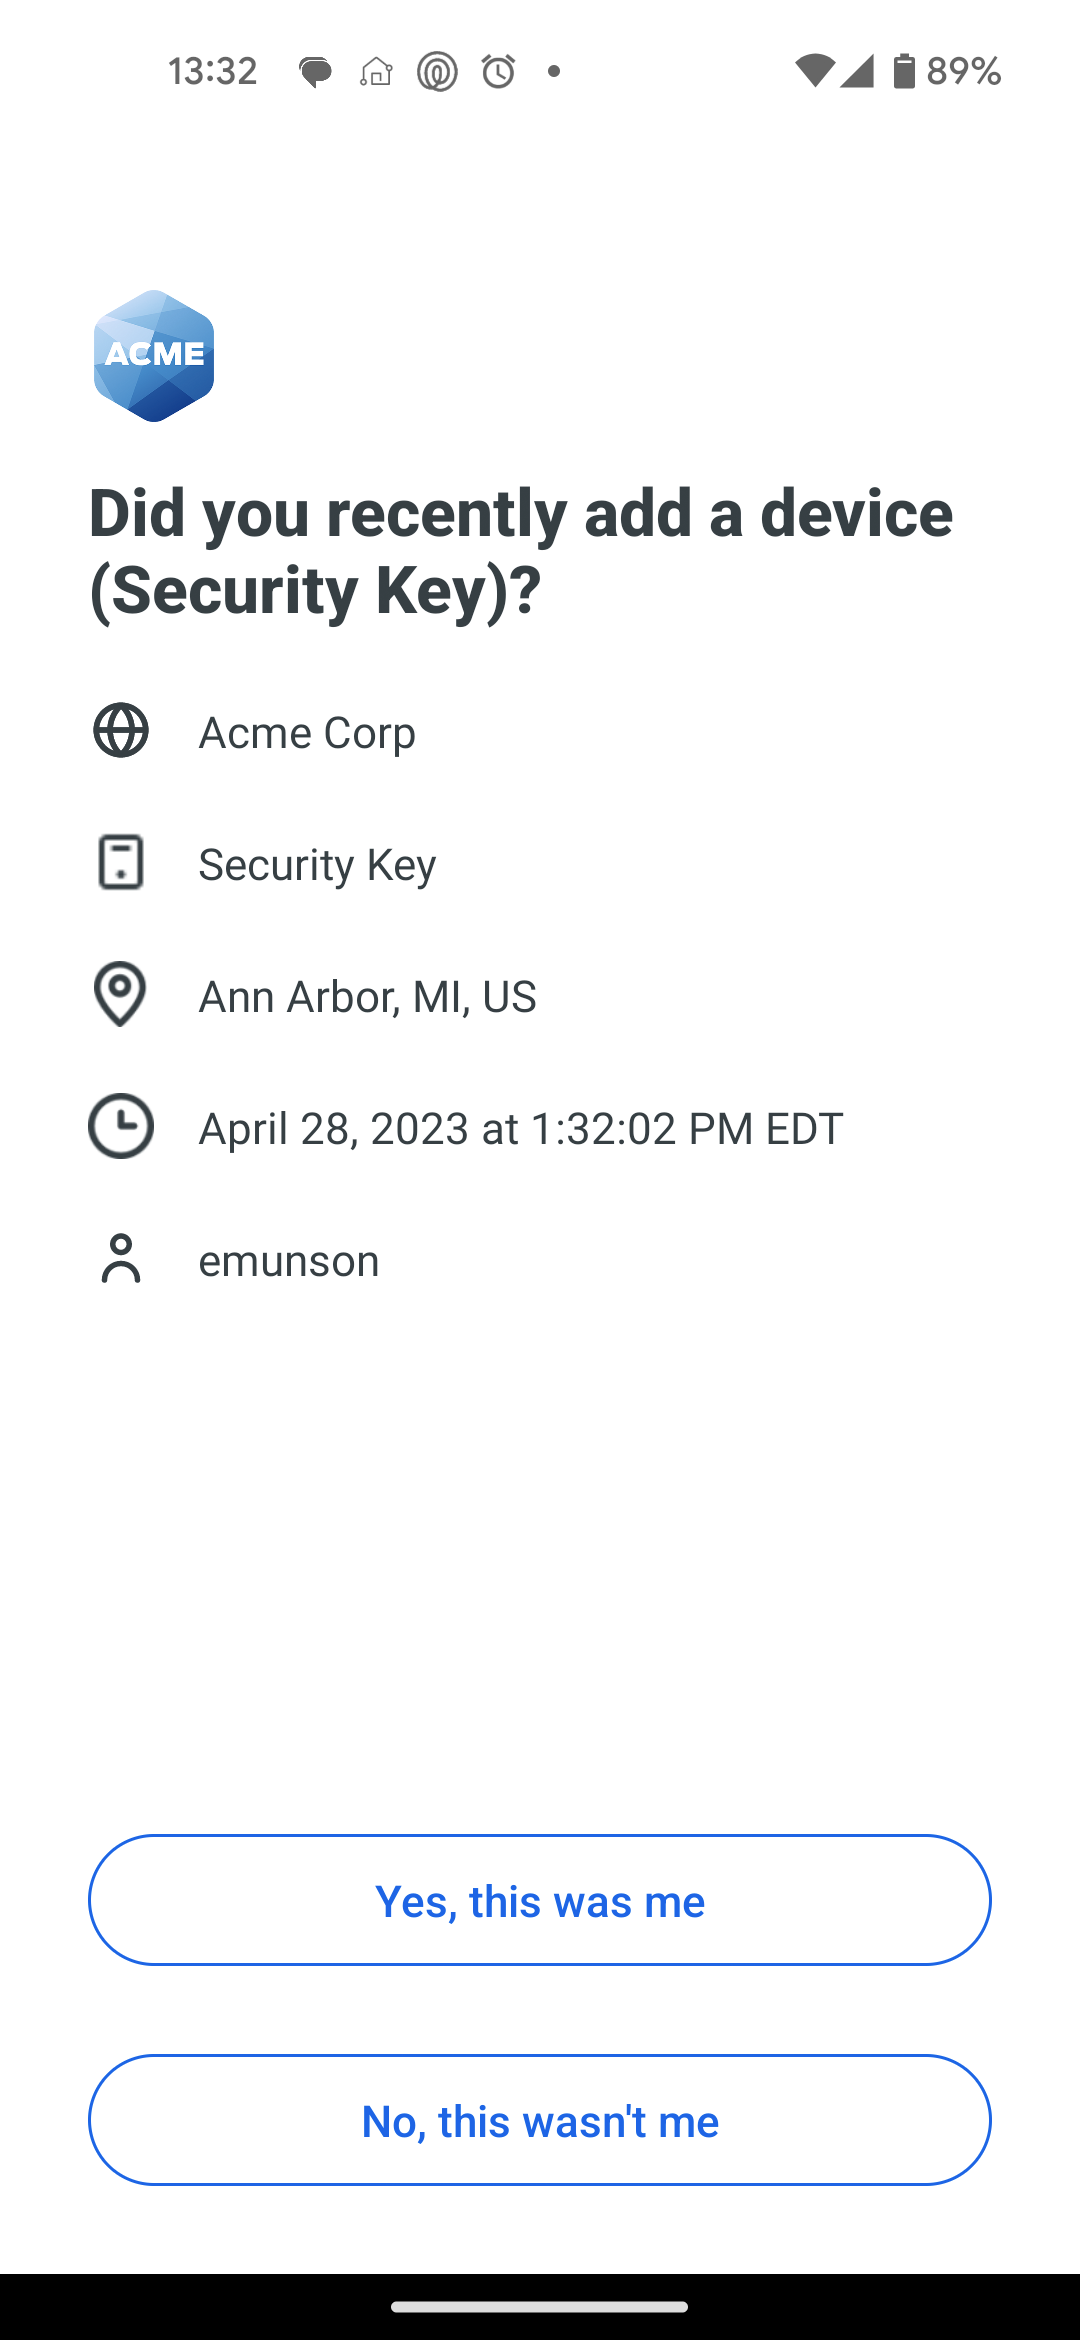
To confirm that you did add or remove a device, click or tap Yes, this was me in the Duo Mobile notification.
If you didn't add or remove a device, click or tap No, this wasn't me in the email message or Duo Mobile notification to let your Duo administrator know.
If you click or tap No, this wasn't me your Duo administrator will receive an email reporting that there was fraudulent activity on your Duo account.
Software Updates
The Universal Prompt includes software update checks.
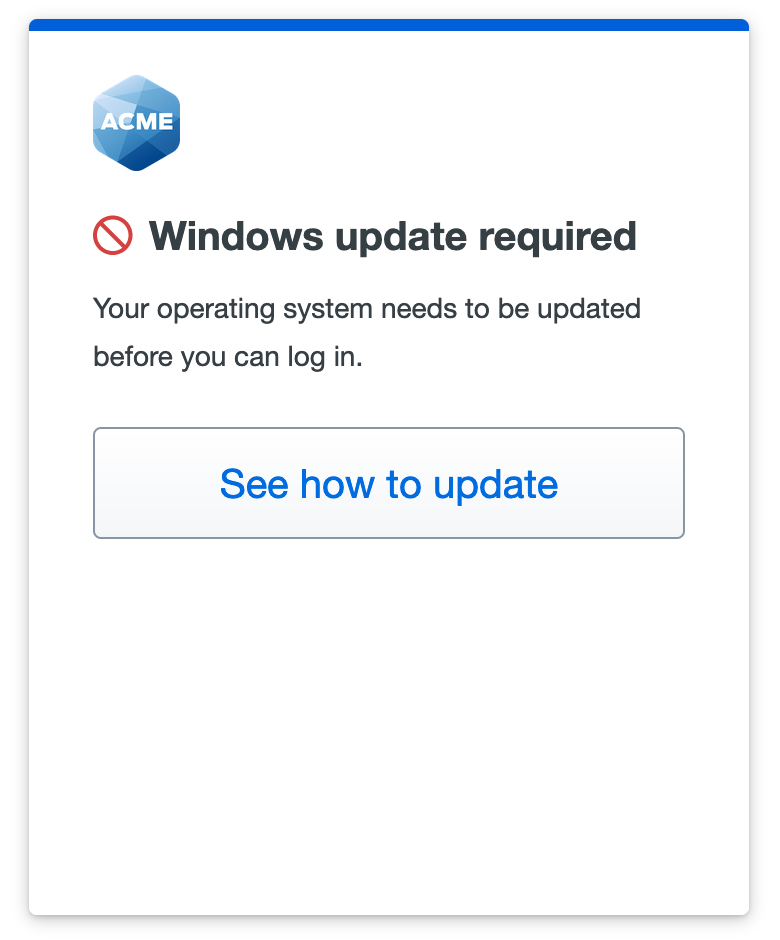
Refer to the Duo Software Update page to learn about software notifications shown by Duo and how to update your software.
Duo Desktop
Duo Desktop is an application installed on your desktop or laptop that performs health checks whenever you access Duo protected applications through the Universal Prompt, ensuring that your computer meets the organization’s security requirements. This helps protect corporate data and make sure your computer is less vulnerable to compromise.
Duo Desktop can also be used as an authentication method if enabled by your Duo administrator.
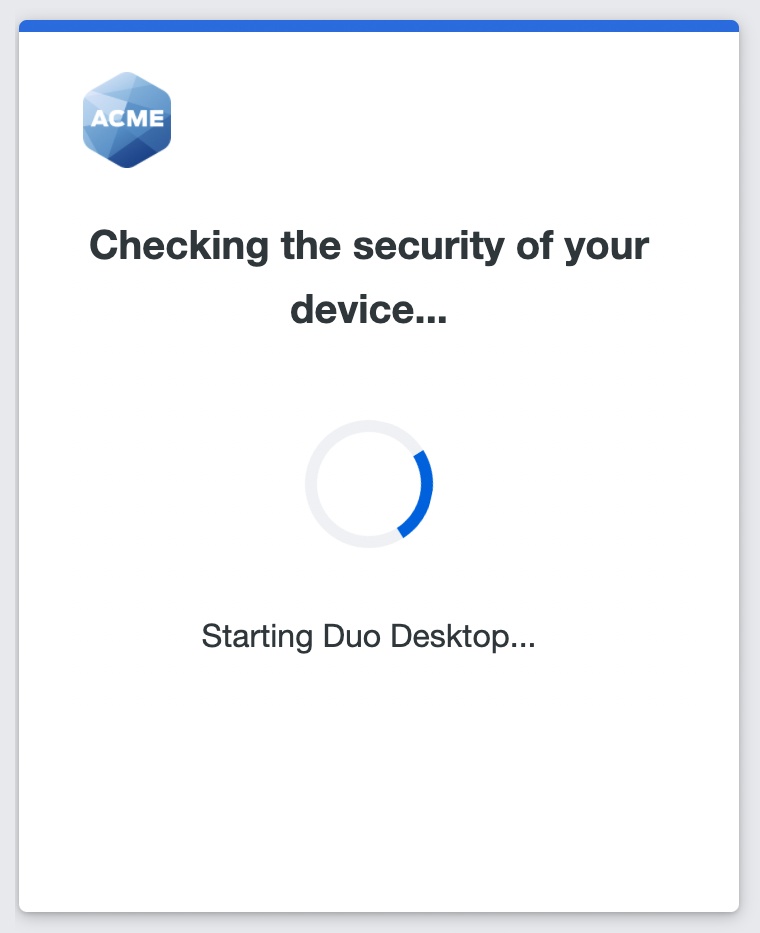
Refer to the Duo Desktop page to learn how to install Duo Desktop and address issues discovered by the app.
Personal Devices
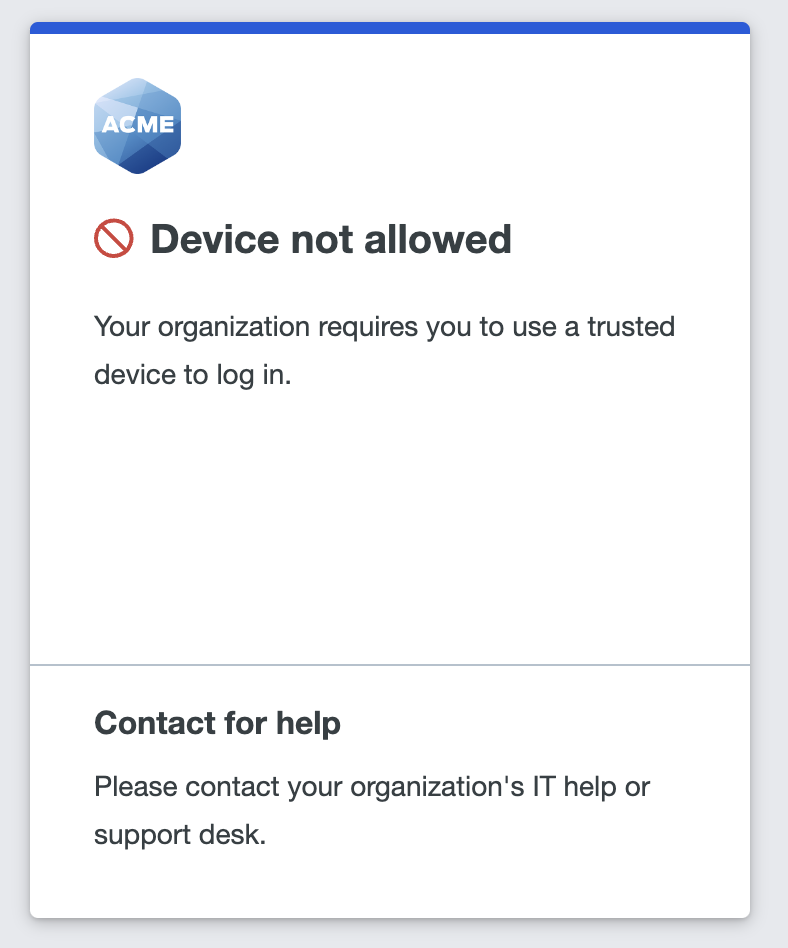
Your organization may choose to block access to applications from devices not managed by the organization. If this policy is enforced then you won't be able to complete Duo authentication from your personal device.
How to Get Help
If you can't authenticate or aren't sure what to do, contact your organization's Duo administrator or help desk for guidance. If you click Need help? at the bottom-left of the Universal Prompt your administrator may have customized the help text with further instructions or contact information. Please do not contact Duo Support directly, as Duo Support can only assist named Duo account administrators.
If you see an error with an Event ID, provide that info to your Duo administrator or help desk.
