Duo Universal Prompt Enrollment
Welcome to Duo's refreshed authentication experience, the Universal Prompt.
This guide takes you through setting up your Duo authentication options in the Universal Prompt.
| Is your organization still using the traditional Duo Prompt? See the traditional Duo Prompt enrollment guide for more information and instructions. | 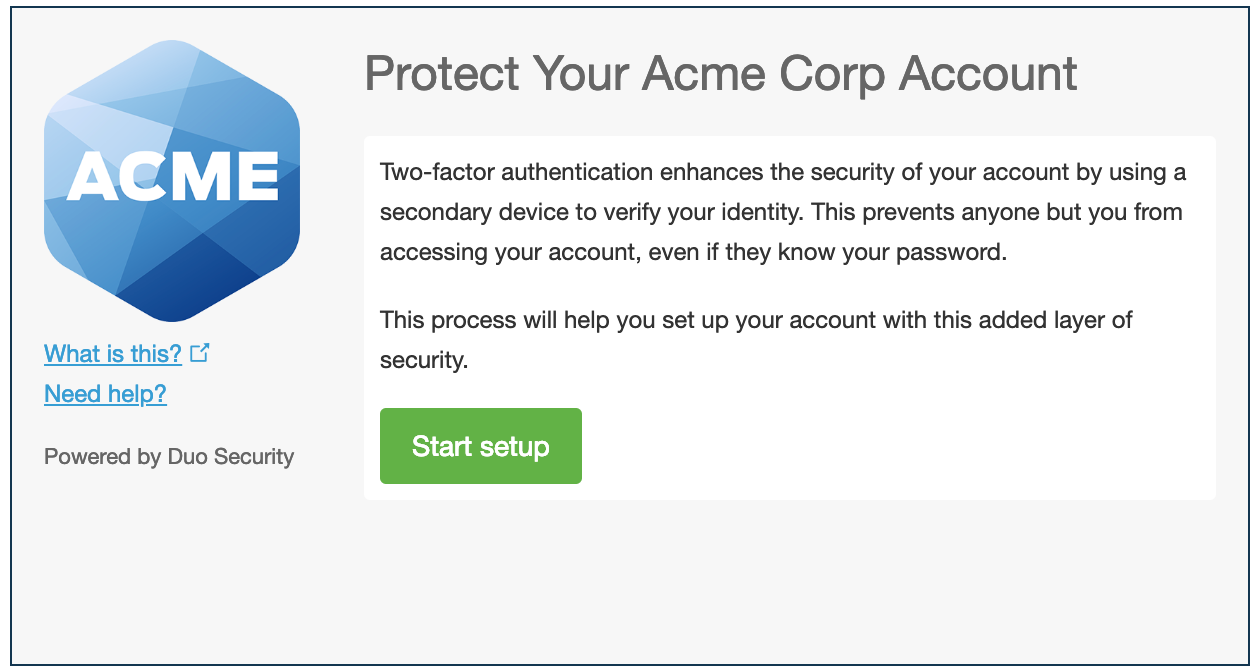 |
Researching Duo for your organization? Learn about Duo's multi-factor authentication (MFA) solutions.
Contents
- Supported Browsers
- First-time Enrollment in Duo
- Step One: Introduction
- Step Two: Choose Your Verification Method
- Step Three: Add Your Chosen Method
- Touch ID on Mac
- Windows Hello
- Face ID/Touch ID on iPhone or iPad
- Android Biometrics
- Duo Mobile
- Security Key
- Duo Desktop
- Phone for Call or Text
- Step Four: Add a Backup Method
- Add or Manage Devices After Enrollment
- Add Another Device
- Rename or Remove a Device
- Reactivate Duo Mobile for an Existing Device
- Device Notifications
- Log In With the Duo Universal Prompt
- How to Get Help
Supported Browsers
The Universal Prompt supports Chrome (Desktop and Mobile), Firefox, Safari (Desktop and Mobile), Edge, and Internet Explorer. Not all browsers support all Duo authentication methods, so for the widest compatibility we recommend Chrome.
Check the table below for supported browser versions and Duo login option compatibility. Platform and roaming authenticators may require a different browser or a newer minimum browser version; please refer to WebAuthn Browser Support. Duo's support for the minimum browser version includes Duo Push, passcode, and phone call authentication options.
| Browser | Minimum Supported Version |
|---|---|
| Chrome | 38 |
| Safari | 9 |
| Firefox | 47 |
| Edge | 17 |
| Internet Explorer | 11 |
While other browsers may work with the Universal Prompt, Duo actively tests and supports the browsers and minimum versions listed in the table.
When you log in Duo checks your current browser or client compatibility with the Universal Prompt. If your browser or client is not compatible, Duo will show you the traditional prompt experience instead.
WebAuthn Supported Browsers
Check the tables below for supported browser versions for platform authenticators (like Touch ID, Face ID, Windows Hello, or Android biometrics) and roaming authenticators (like security keys). While other browsers may work, Duo actively tests and supports the browser minimum versions listed in the tables.
Windows 10 and Later
| Browser | Minimum Supported Version | Platform Authenticator | Roaming Authenticator (Security Keys) |
|---|---|---|---|
| Edge | 79 | Yes 1 | Yes |
| Chrome | 73 | Yes 1 2 | Yes |
| Firefox | 66 | Yes | Yes |
- Windows Hello is not supported in Chrome Incognito or Edge InPrivate browsing sessions.
- Use of passkeys as platform authenticators requires Windows 11 and Chrome 108 or later.
macOS 11 and Later
You must sign in with the same iCloud account and enable iCloud Keychain sync on all the Apple devices you plan to use with Duo and passkeys. See the iCloud documentation for instructions specific to your device types:
| Browser | Minimum Supported Version | Platform Authenticator | Roaming Authenticator (Security Keys) |
|---|---|---|---|
| Safari | 14 | Yes 1 | Yes |
| Chrome | 70 | Yes 1 | Yes |
| Firefox | 114 | Yes 2 | Yes 3 |
- Use of passkeys as platform authenticators requires macOS 13 and Safari or Chrome 108.
- Firefox 122 or later is required for platform authenticators.
- For Duo Passwordless, Firefox on macOS cannot prompt to create a security key's PIN. Security keys that already have a PIN set can be used to authenticate in Firefox.
iOS/iPadOS 15 and Later
You must sign in with the same iCloud account and enable iCloud Keychain sync on all the Apple devices you plan to use with Duo and passkeys. See the iCloud documentation for instructions specific to your device types:
| Browser | Minimum Supported Version | Platform Authenticator | Roaming Authenticator (Security Keys) |
|---|---|---|---|
| Safari | 15 | Yes 1 | Yes |
| Chrome | 95 | Yes 1 | Yes |
| Edge | 95 | Yes 1 | Yes |
| Firefox | 68 | Yes 1 | Yes |
- Use of passkeys as platform authenticators requires iOS 16+ or iPadOS 16+.
Android 11 and Later
| Browser | Minimum Supported Version | Platform Authenticator | Roaming Authenticator (Security Keys) |
|---|---|---|---|
| Chrome | 95 | Yes 1 | Yes 2 |
| Firefox | 68 | Yes 3 | No 4 |
- Passkey support with Google Password Manager.
- Chrome on Android 11 cannot prompt for the security key's PIN to fulfill the passwordless user verification requirement.
- Firefox on Android 11 does not support Android biometric enrollment.
- Firefox on Android cannot prompt for the security key's PIN to fulfill the passwordless user verification requirement.
Linux
Linux has no supported platform authenticators.
| Browser | Minimum Supported Version | Platform Authenticator | Roaming Authenticator (Security Keys) |
|---|---|---|---|
| Chrome | 73 | No | Yes |
| Edge | 79 | No | Yes |
| Firefox | 114 | No | Yes |
ChromeOS 108 and Later
| Browser | Minimum Supported Version | Platform Authenticator | Roaming Authenticator (Security Keys) |
|---|---|---|---|
| Chrome | 108 | Yes | Yes |
Language Support
Your browser's language settings determine the language shown in the Universal Prompt, with no extra configuration necessary.
When the Universal Prompt displays English, Spanish, French, German, or Japanese, phone callback authentication will use the same language shown in the prompt.
Catalan, Chinese (Simplified), Chinese (Traditional), Czech, Danish, Dutch, Finnish, Hindi, Indonesian, Italian, Korean, Norwegian, Polish, Portuguese (Brazil), Portuguese (Portugal), Swedish, Thai, Turkish, and Vietnamese languages will display in the Universal Prompt, but phone callback authentication will be in English.
First-time Enrollment in Duo
Enrollment is the process that registers you as a user in Duo with a device capable of performing two-factor authentication. Duo prompts you to enroll the first time you log into a protected VPN or web application when using a browser or client application that shows the interactive Duo web-based prompt. Follow the on-screen prompts to set up your Duo authentication device.
Instead of enrolling when you log in to an application, you might receive an email from your organization's Duo administrator with an enrollment link instead. This emailed link takes you directly to the Duo enrollment portal. You'll see either the Universal Prompt experience shown on this page or enrollment in the traditional Duo prompt depending on your organization's email enrollment configuration.
Step One: Introduction
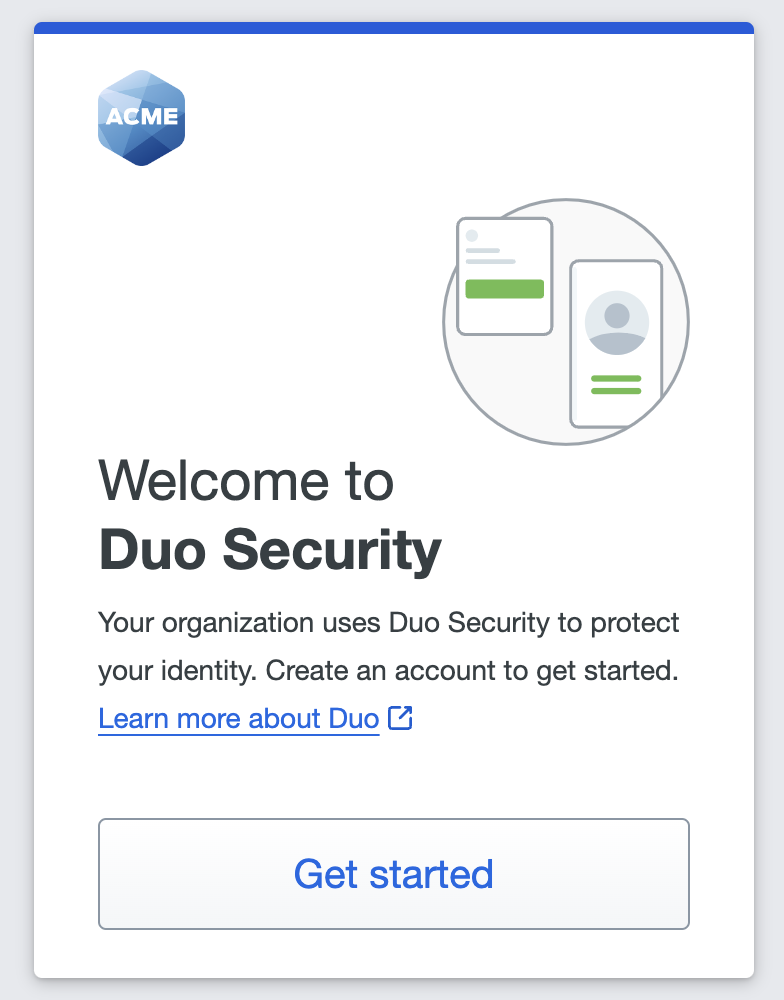
Logging into a Duo-protected application enabled for self-enrollment takes you to the device management page to enroll. Click Next to learn why protecting your identity with two-step verification is important and begin the setup process.
Step Two: Choose Your Verification Method
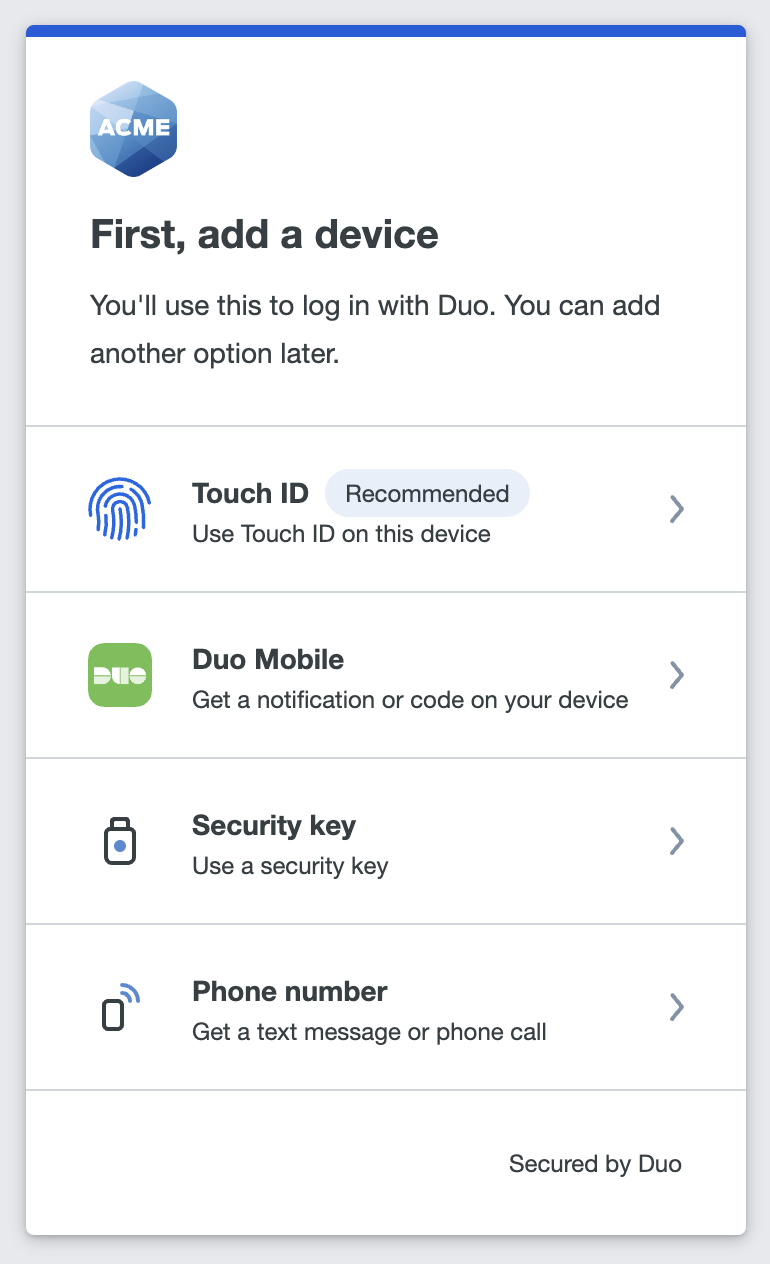
Choose the device type in the list that matches your desired authentication experience:
- Touch ID: Use the fingerprint sensor on Apple MacBooks, Magic Keyboards, or iPhone.
- Face ID: Use the face scanning feature on iPhone.
- Windows Hello: Use your Windows Hello PIN, scan your fingerprint, or use facial recognition on Windows devices.
- Device verification: Use Android Biometrics on Android devices.
- Duo Mobile: Approve Duo Push verification requests on iOS or Android devices, or generate a one-time passcode from the Duo Mobile app.
- Security key: Tap a WebAuthn/FIDO2 security key. Requires Chrome, Safari, Firefox, or Edge.
- Phone number: Receive a one-time passcode in an SMS message or approve a login attempt with a phone call from Duo.
Only your organization's Duo administrator or help desk can add hardware tokens and Yubikey OTP tokens for you. These verification options do not show up in the list of available options. Neither do any methods that your organization blocks from use; if your Duo administrator applied a policy that doesn't allow authentication with text messages or phone calls, the "Phone number" option will be missing when you enroll.
Duo recommends the most secure option of the methods available to you, so it's a good idea to set up that method first if you have a device that supports it.
This is an example of the options on a MacBook with Touch ID available:
Step Three: Add Your Chosen Method
Once you choose how to verify your identity, you will next complete the setup steps for that method.
Touch ID on Mac
In order to use Touch ID with Duo, make sure you have the following:
- A MacBook Pro, MacBook Air, or Apple Magic Keyboard with a Touch ID button.
- A fingerprint enrolled in Touch ID (see how to do this at the Apple Support site).
- A supported browser: Safari or Chrome. Refer to the browser support table.
- iCloud Keychain sync enabled on all the Apple devices you will use with Duo and the passkey you will create during setup.
- Read the Touch ID information and click Continue.
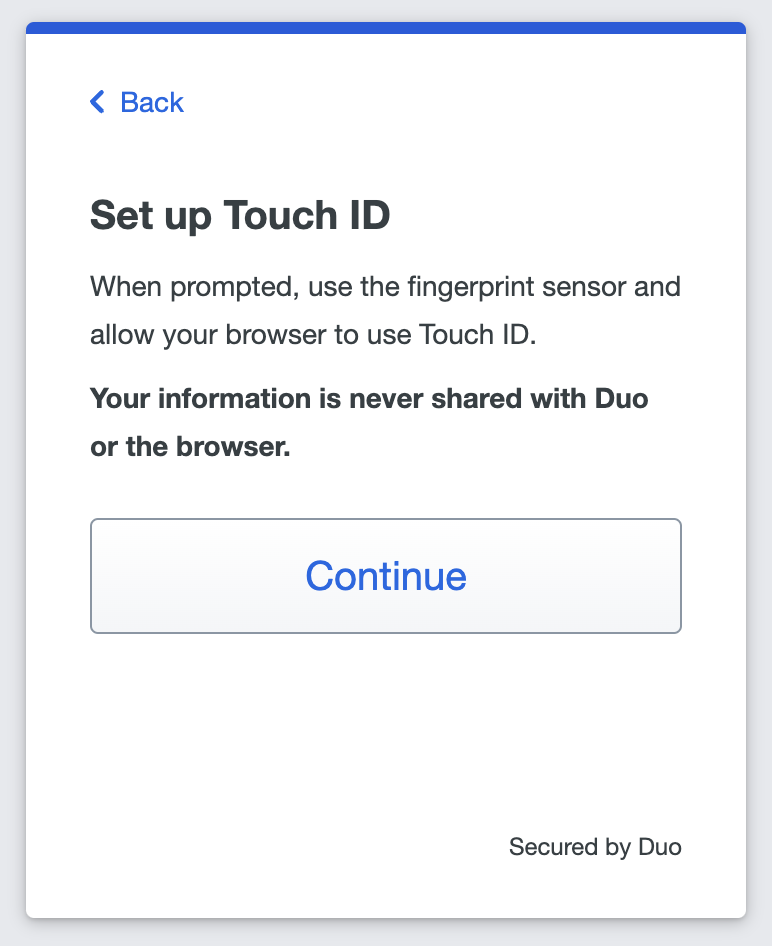
- Chrome prompts you to verify your identity on duosecurity.com.

- Place your finger on the Touch ID button in the Touch Bar to complete Touch ID enrollment.

- When you receive confirmation that you added Touch ID as a verification method, tap Continue.
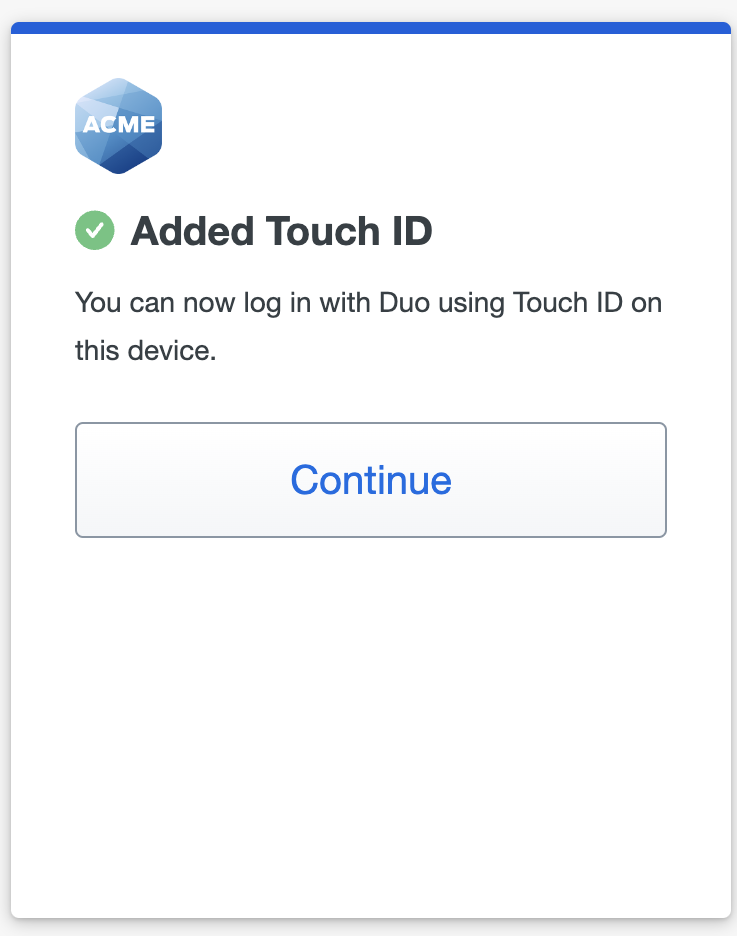
You can now log in to Duo-protected applications that show the Duo prompt in a web browser using your Touch ID fingerprint sensor.
If your organization has enabled Duo Passwordless for Duo Single Sign-On applications then you'll automatically be able to use Touch ID for passwordless authentication after the first time you complete two-factor authentication with Touch ID during Duo Single Sign-On login. If you completed your Duo enrollment while logging in to Duo Single Sign-On then you will be able log in without a password the next time you access the application.
If you have more than one MacBook with which you'd like to approve Duo login requests using Touch ID, you'll need to add each of them separately as a new Touch ID device in Duo. To do this, your organization must have enabled self-service device management.
Windows Hello
- Read the Windows Hello information and click or tap Continue.
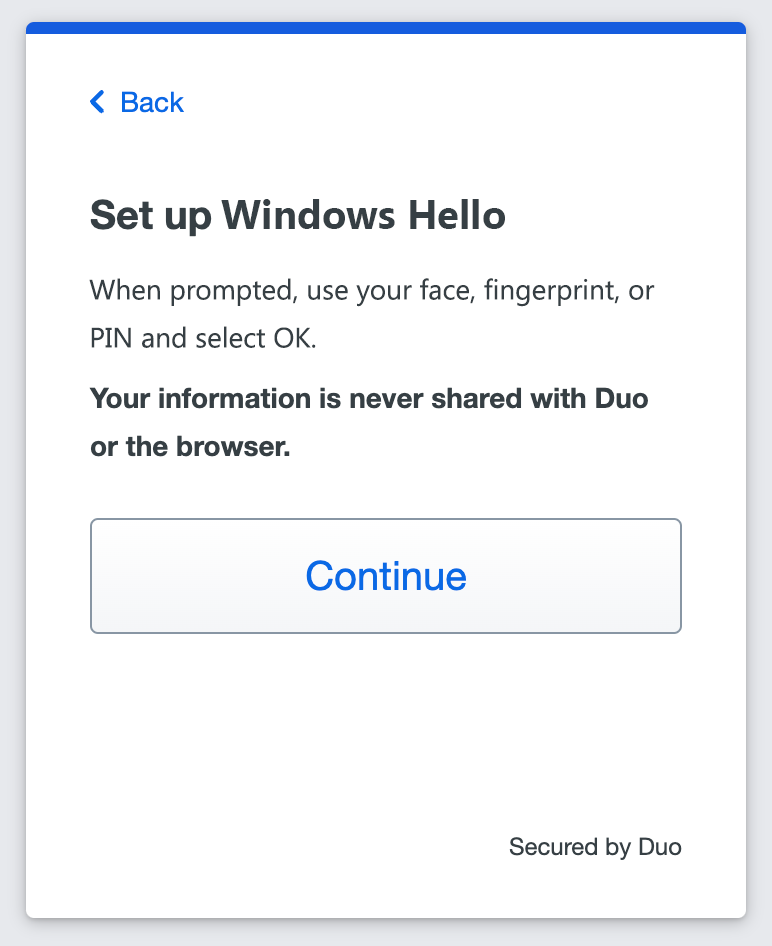
- Follow the Windows Hello instructions to verify your identity by entering your PIN, scanning your fingerprint, or pointing your face to your camera.
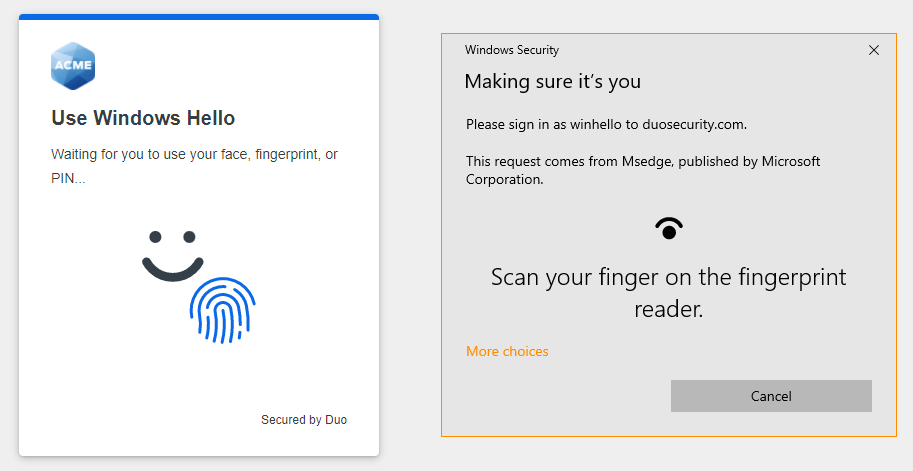
- When you receive confirmation that you added Windows Hello as a verification method click or tap Continue.
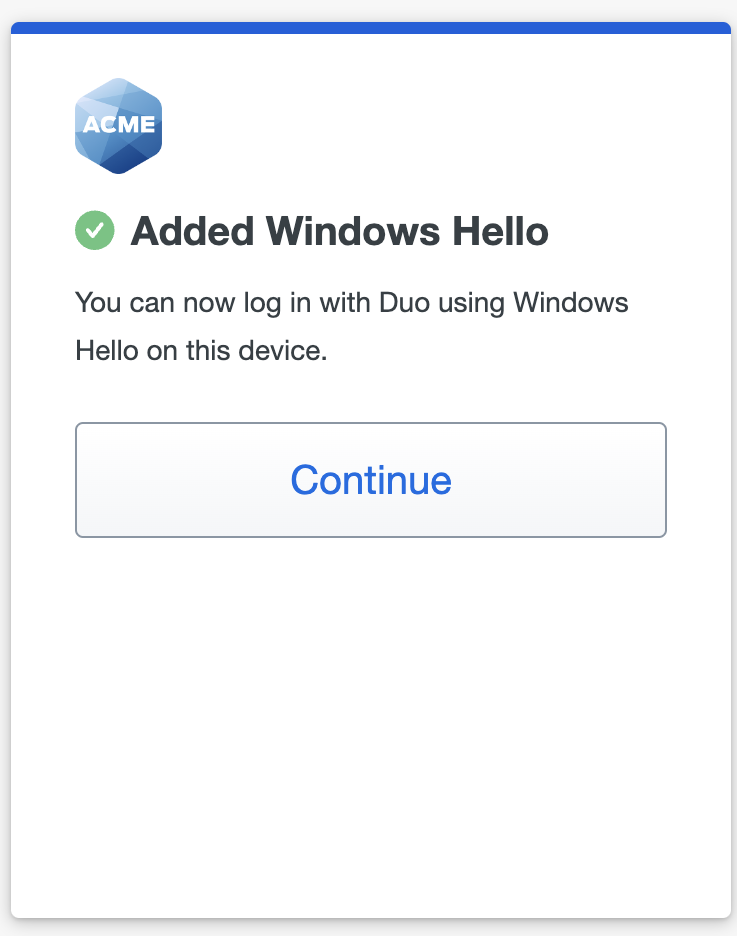
You can now log in to Duo-protected applications that show the Duo prompt in a web browser using Windows Hello.
If your organization has enabled Duo Passwordless for Duo Single Sign-On applications then you'll automatically be able to use Windows Hello for passwordless authentication after the first time you complete two-factor authentication with Windows Hello during Duo Single Sign-On login. If you completed your Duo enrollment while logging in to Duo Single Sign-On then you will be able log in without a password the next time you access the application.
Face ID/Touch ID on iPhone or iPad
In order to use Face ID or Touch ID on an iPhone or iPad with Duo, make sure you have the following:
- An iPhone or iPad that supports Face ID or Touch ID.
- Face ID or Touch ID already set up on the iPhone or iPad. Learn how to set up Face ID or set up Touch ID at the Apple Support site.
- iCloud Keychain sync enabled on all the Apple devices you will use with Duo and the passkey you will create during setup.
- Read the Face ID (or Touch ID) information and tap Continue.
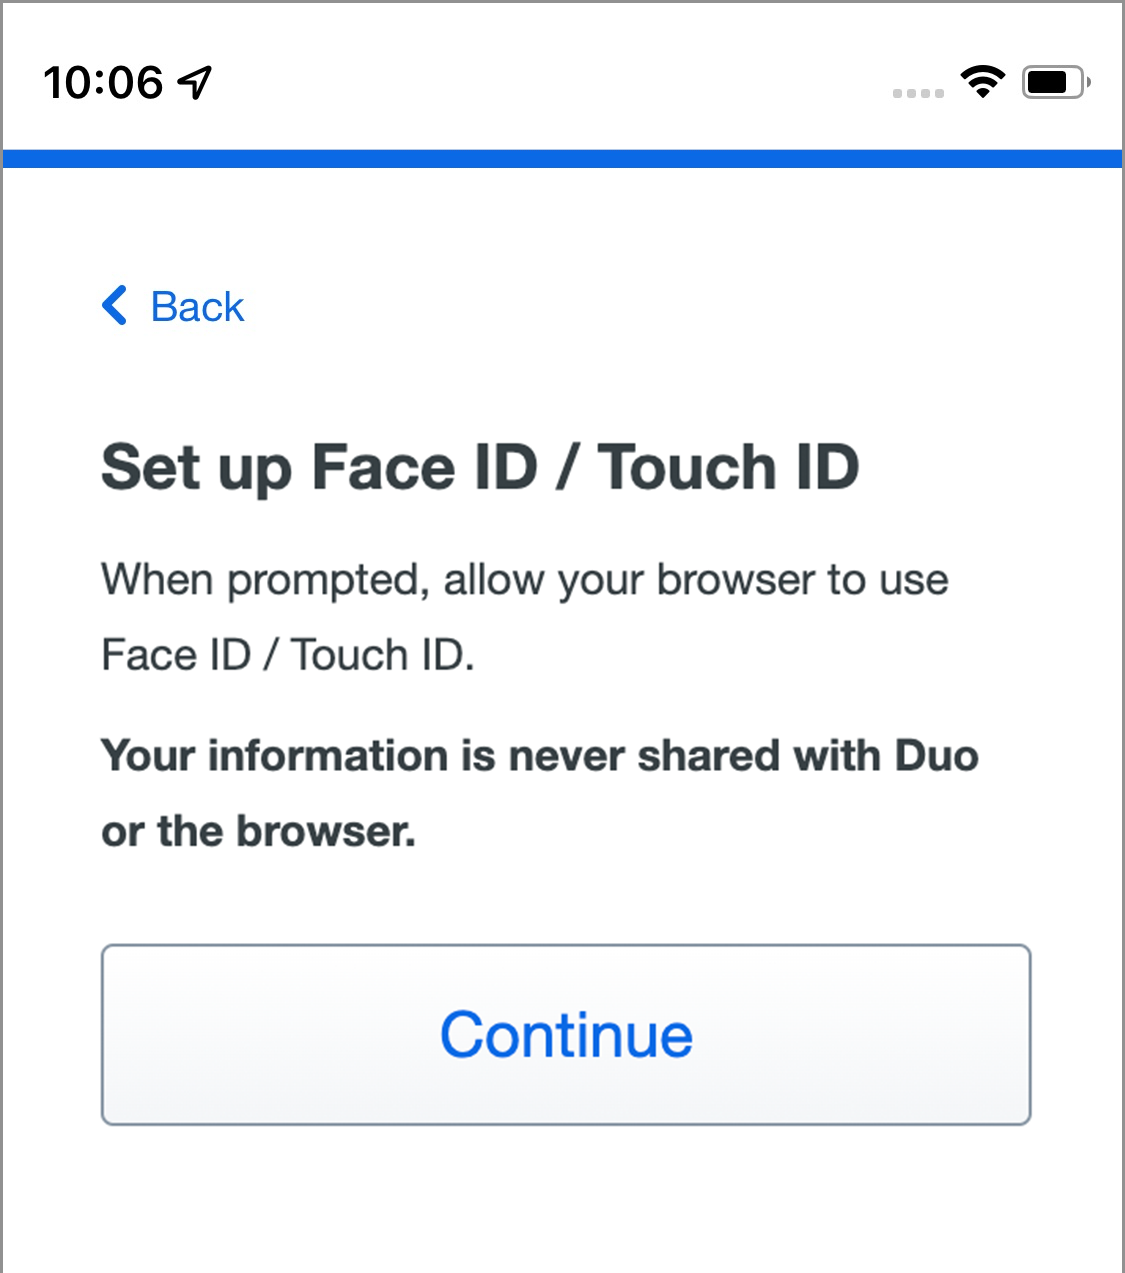
- Follow your device's instructions for scanning your face to complete Face ID verification or scan your fingerprint for Touch ID verification.
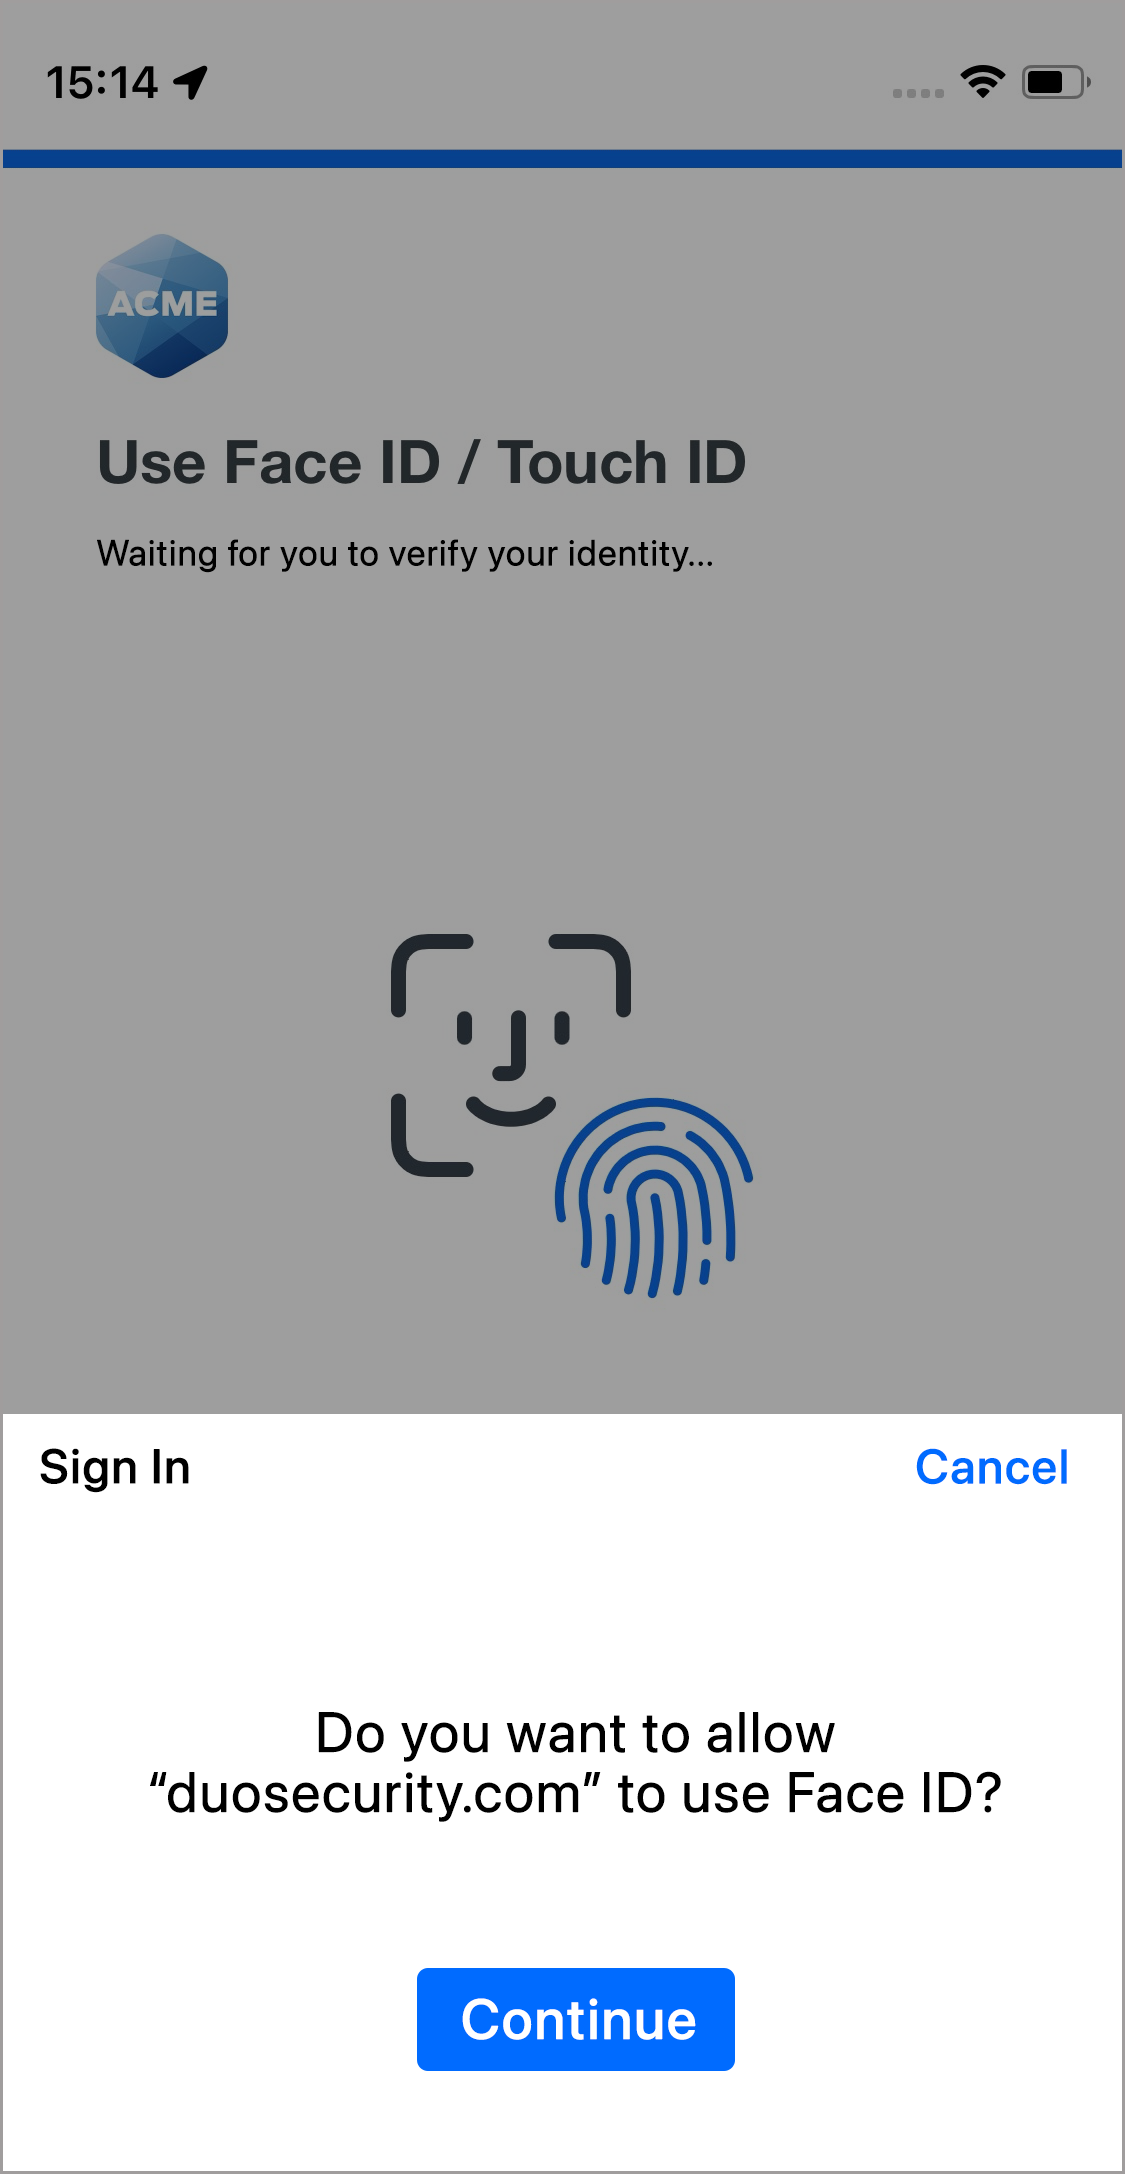
- When you receive confirmation that you added Face ID as a verification method click Continue.
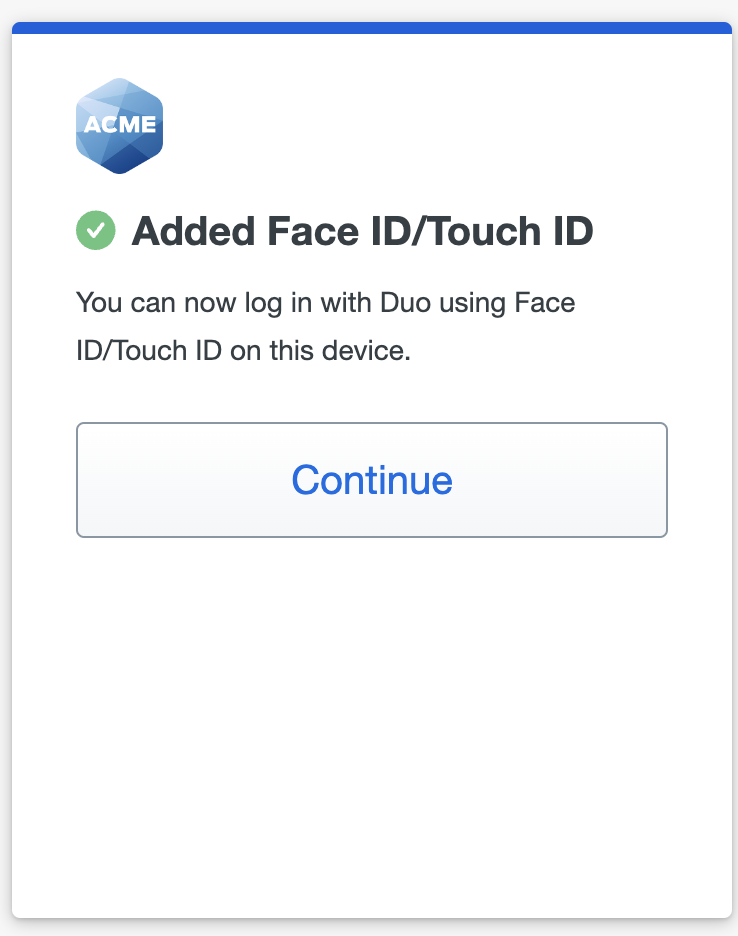
You can now log in to Duo-protected applications that show the Duo prompt in a web browser using Face ID or Touch ID on an iPhone or iPad.
If your organization has enabled Duo Passwordless for Duo Single Sign-On applications then you'll automatically be able to use Face ID or Touch ID for passwordless authentication after the first time you complete two-factor authentication with Face ID or Touch ID during Duo Single Sign-On login. If you completed your Duo enrollment while logging in to Duo Single Sign-On then you will be able log in without a password the next time you access the application.
Android Biometrics
- Read the device verification information and click or tap Continue.
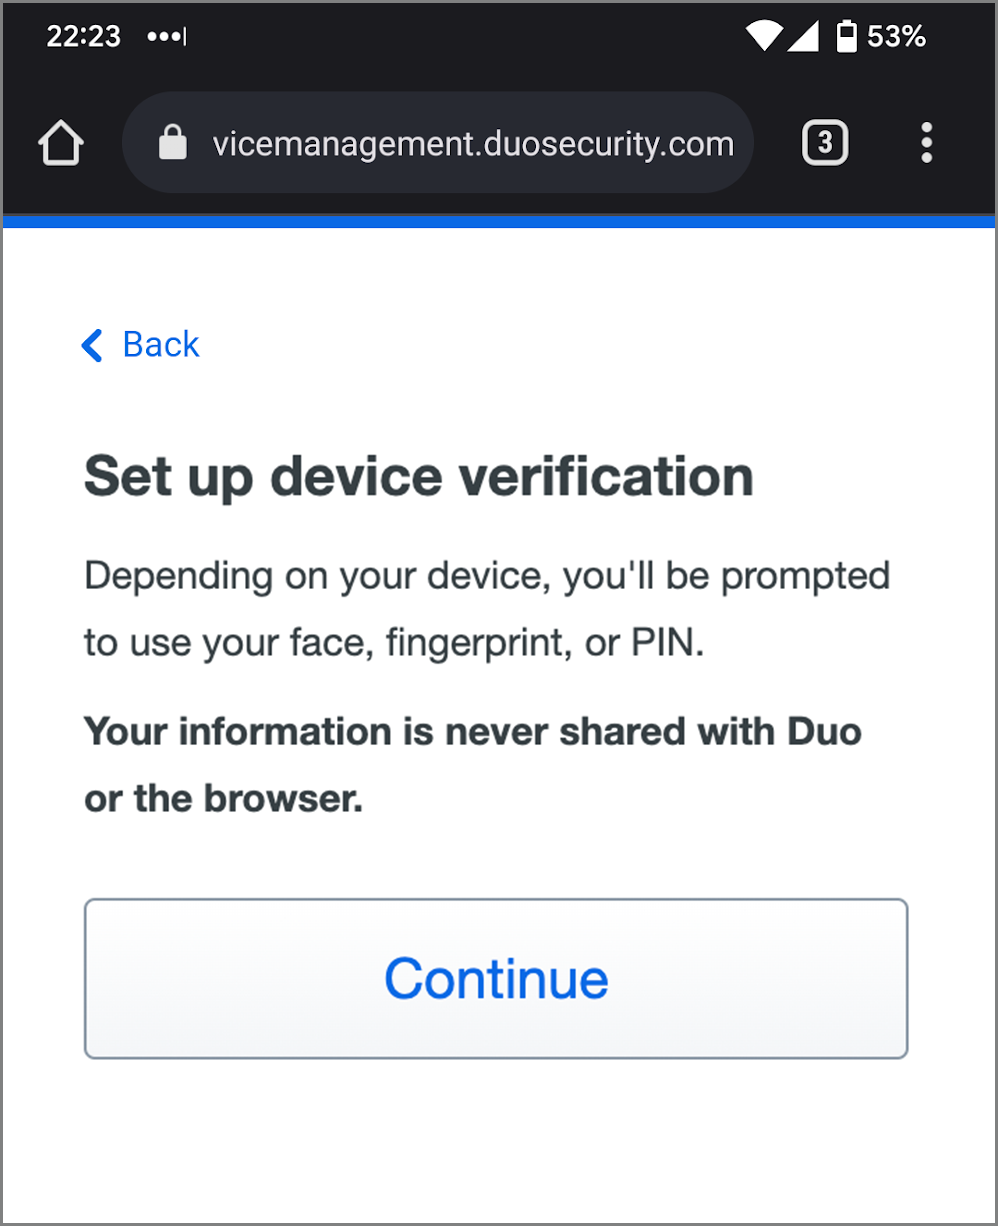
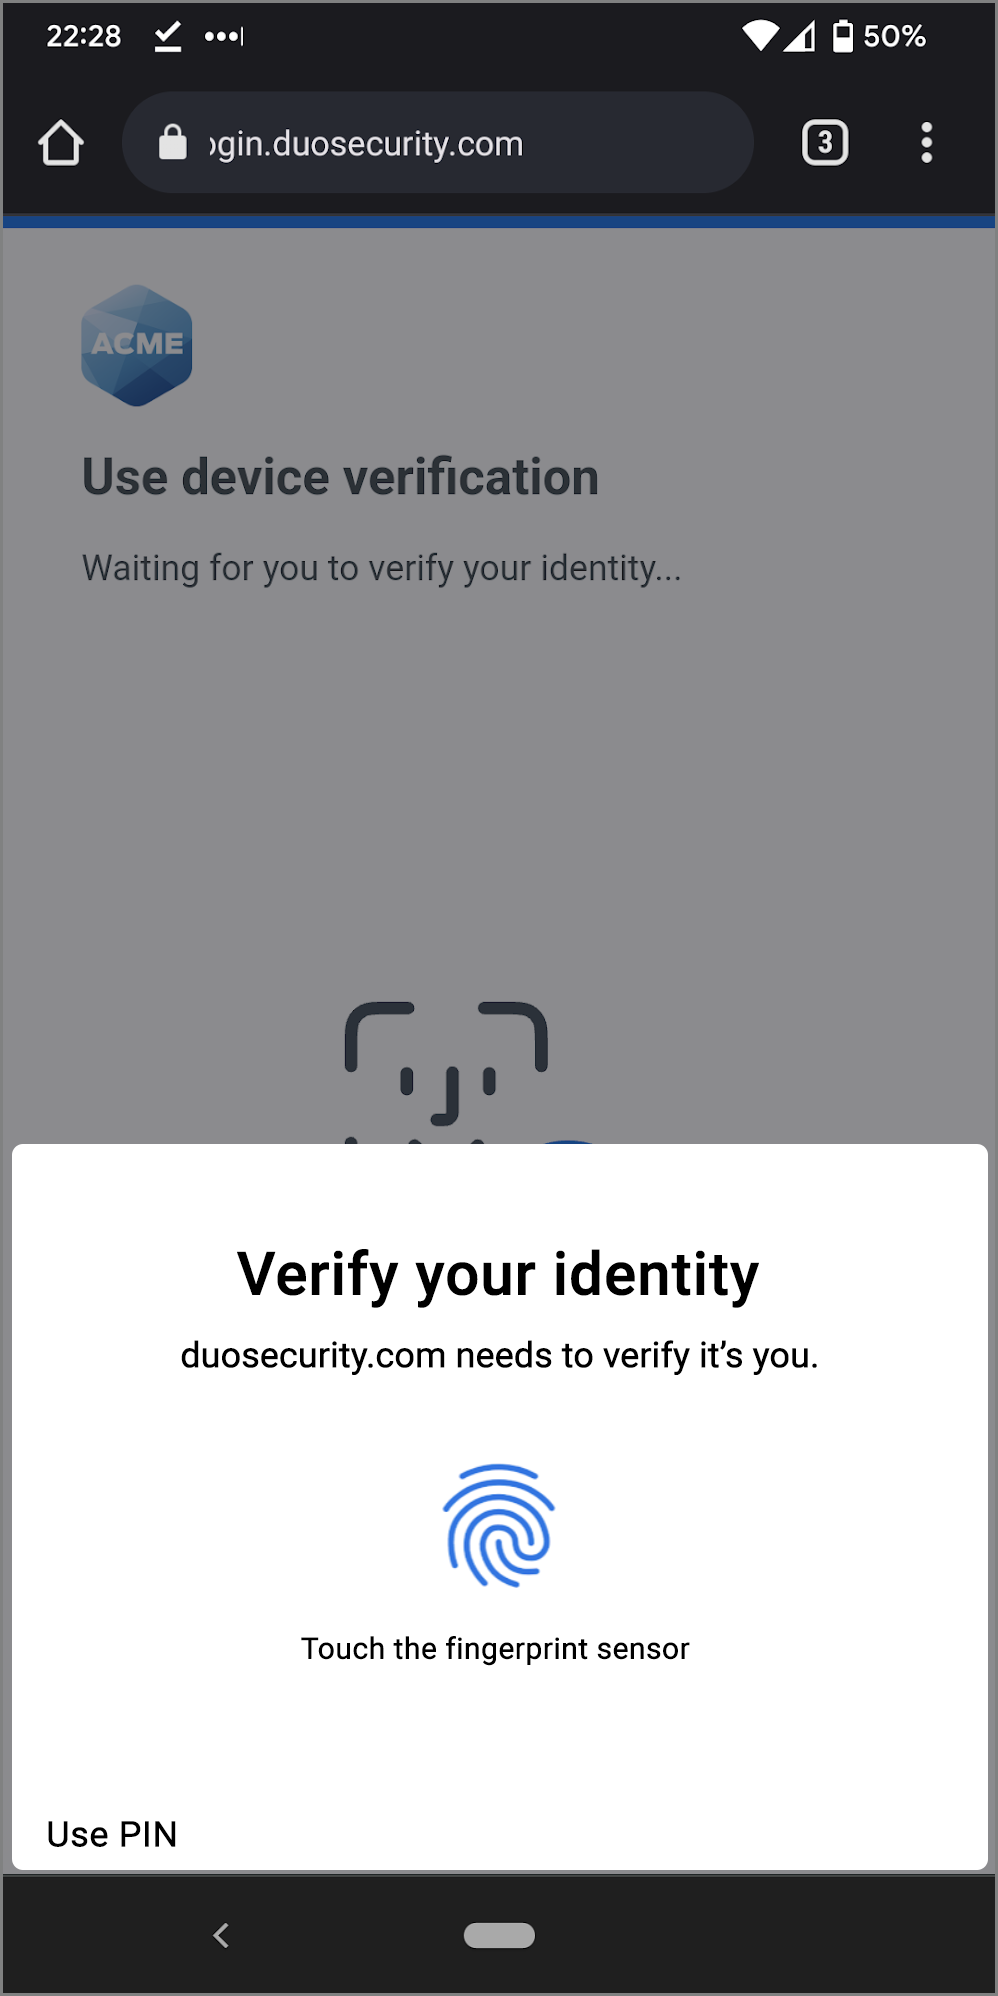
- Follow the Android instructions to verify your identity by scanning your fingerprint or pointing your face to your camera. If you aren't able to do either of those biometric checks, you can enter your Android PIN.
- When you receive confirmation that you added your Android device as a verification method tap Continue.
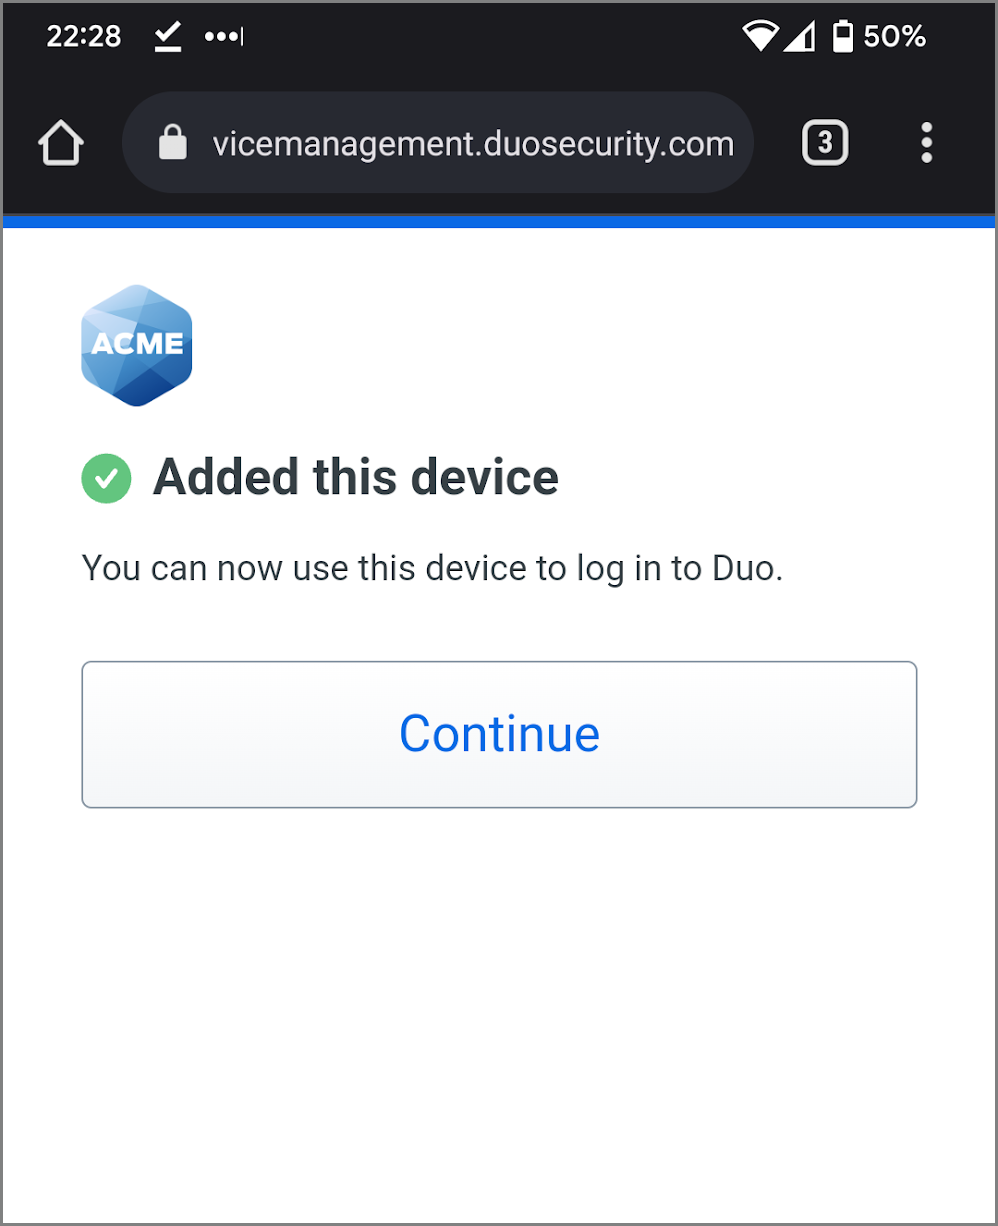
You can now log in to Duo-protected applications that show the Duo prompt in a web browser using Android biometrics.
If your organization has enabled Duo Passwordless for Duo Single Sign-On applications then you'll automatically be able to use Android biometrics for passwordless authentication after the first time you complete two-factor authentication with Android biometrics during Duo Single Sign-On login. If you completed your Duo enrollment while logging in to Duo Single Sign-On then you will be able log in without a password the next time you access the application.
Duo Mobile
Duo Mobile is an app that runs on iOS and Android phones and tablets. It's fast and easy to use, and doesn't require cell services. Duo pushes login requests to Duo Mobile when you have mobile data or wifi connectivity to the internet. When you have no data service, you can generate passcodes with Duo Mobile for logging in to applications.
The current version of Duo Mobile supports iOS 16 or greater and Android 11 or greater.
- Select your country from the drop-down list and type your mobile phone number, and then click Add phone number.
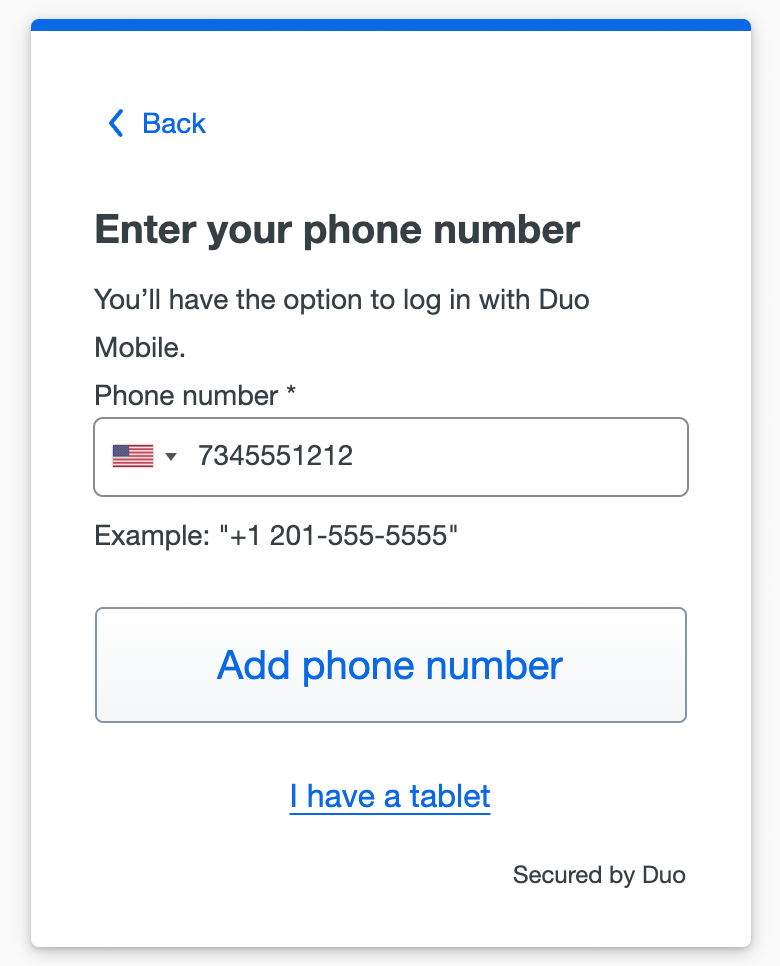
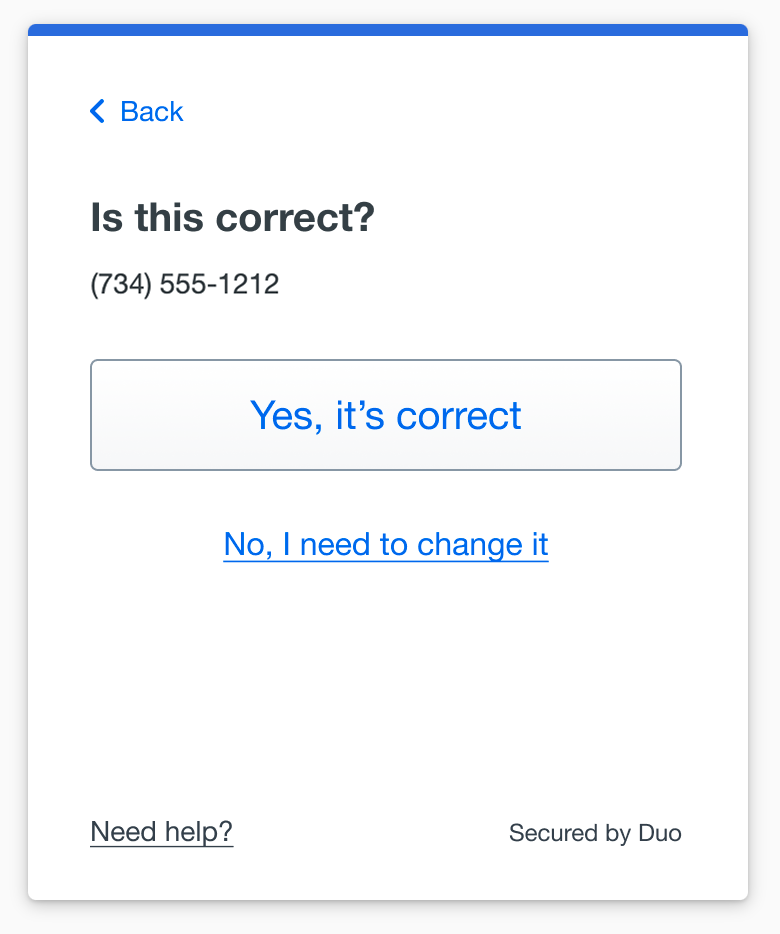
If you're going to use Duo Mobile on a tablet (like an iPad) with no phone service, don't enter a phone number and click I have a tablet instead. - If you entered a phone number, double-check that you entered it correctly and click Yes, it's correct to continue (or No, I need to change it to go back and enter the number again).
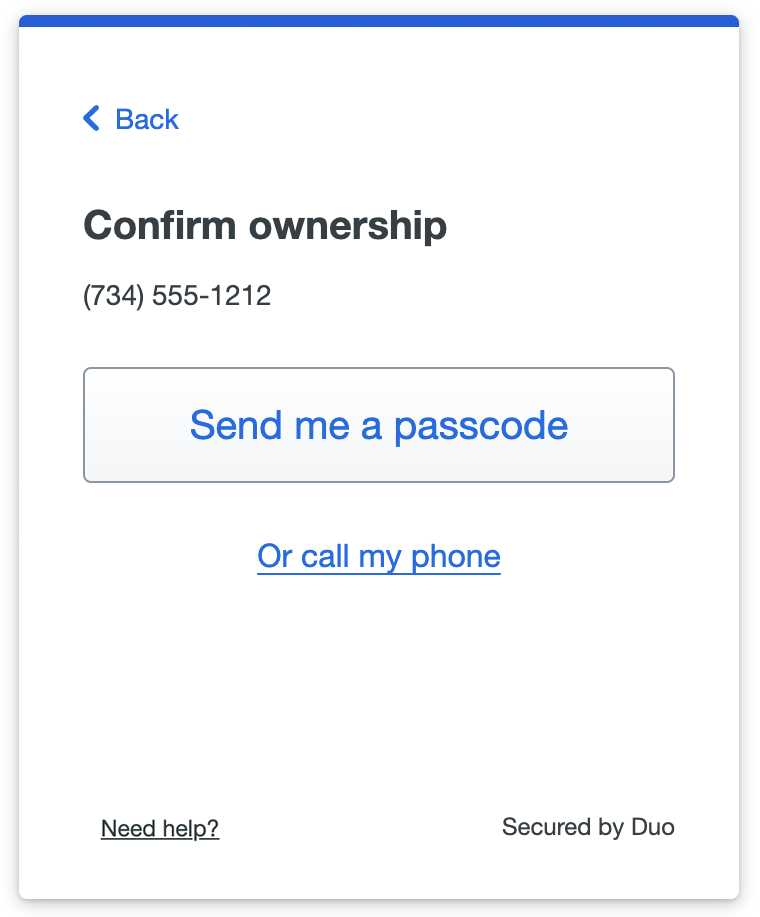
If the phone number you entered already exists in Duo as the authentication device for another user then you'll need to enter a code sent to that number by phone call or text message to confirm that you own it. Choose how you want to receive the code and enter it to complete verification and continue.
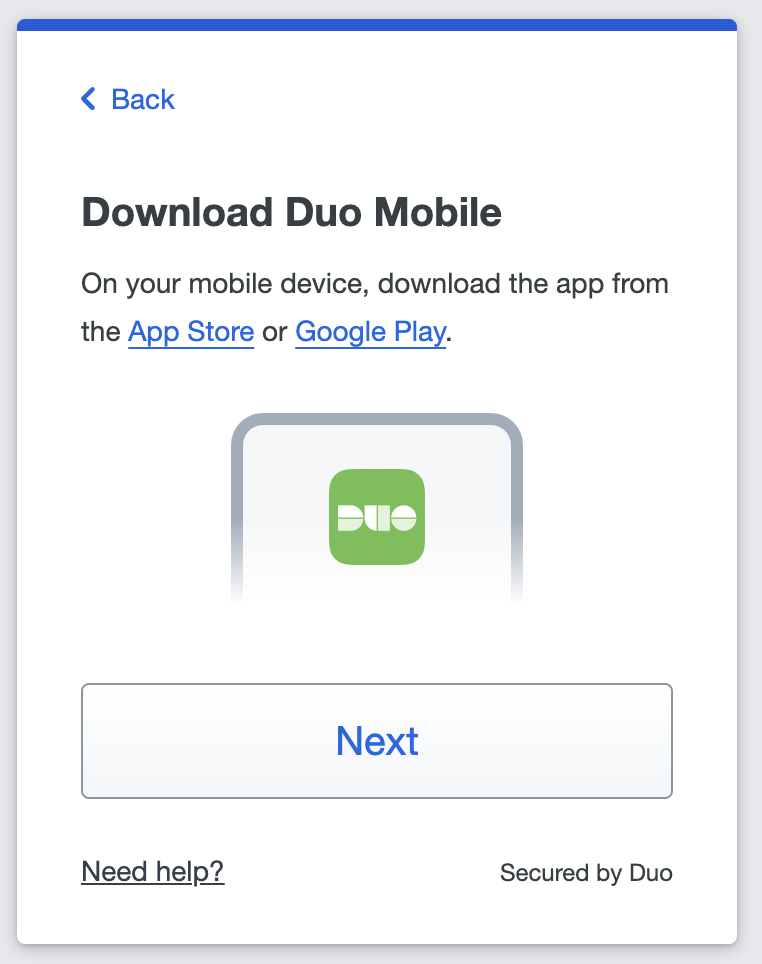
- Download and install Duo Mobile on your phone or tablet from the Google Play Store or Apple App Store. Once you have Duo Mobile installed click Next.
- Open the Duo Mobile app or the camera app on your phone or tablet and add this account by scanning the QR code shown on-screen.
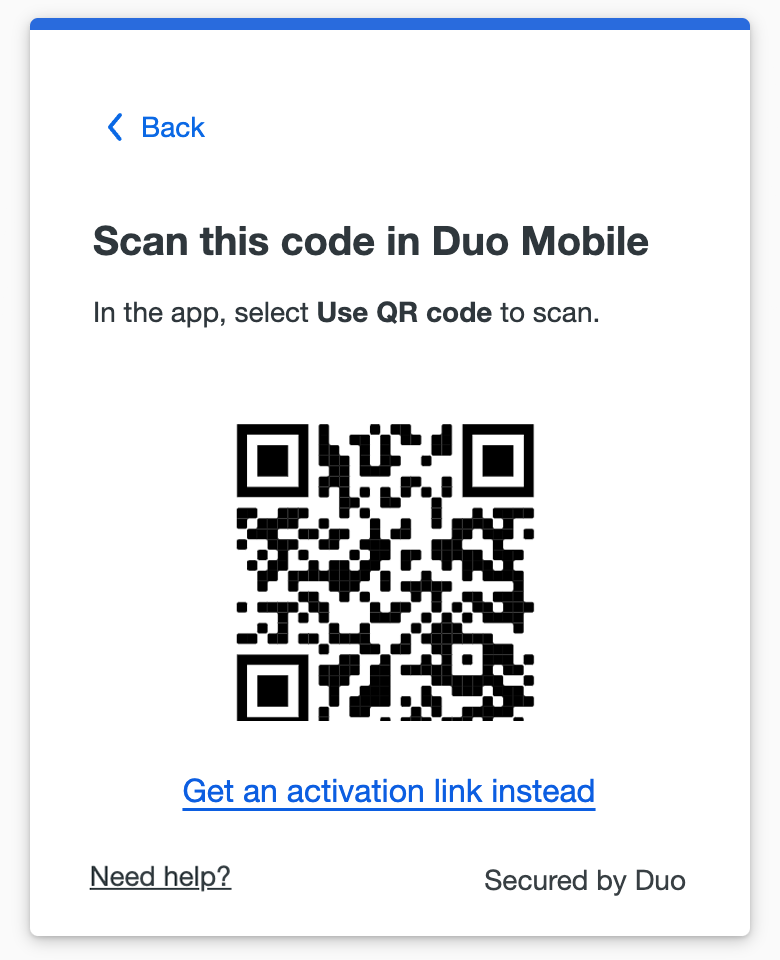
If you aren't able to scan the QR code, tap Get an activation link instead and then enter your email address to send the activation link to yourself. Follow the instructions in the email to activate the new account in Duo Mobile. If you're on a mobile device, tap Open Duo Mobile to activate the new account in Duo Mobile. - When you receive confirmation that Duo Mobile was added click Continue.
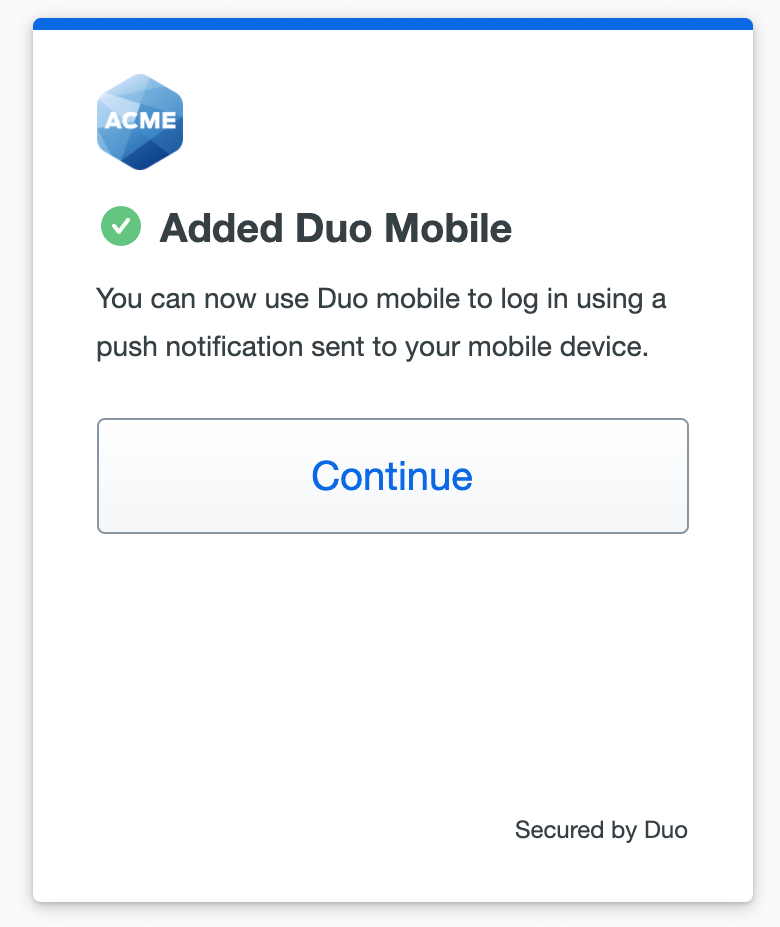
You can now log in to Duo-protected applications with Duo Push or with a Duo Mobile passcode.
If your organization has enabled Duo Passwordless for Duo Single Sign-On applications then you'll automatically be able to use Duo Push for passwordless authentication after the first time you complete two-factor authentication with Duo Push during Duo Single Sign-On login. If you completed your Duo enrollment while logging in to Duo Single Sign-On then you will be able log in without a password the next time you access the application.
Security Key
A security key is an external device that when tapped or when the button is pressed sends a signed response back to Duo to validate your login. Duo uses the WebAuthn authentication standard to interact with your security keys. You may also see WebAuthn referred to as "FIDO2".
To use a security key with Duo, make sure you have the following:
- A supported security key. WebAuthn/FIDO2 security keys from Yubico or Feitian are good options. U2F-only security keys (like the Yubikey NEO-n) can't be used with the Universal Prompt.
- If your organization requires user verification of your security key with a PIN or biometric then your security key must support FIDO2.
- A supported browser: Chrome, Safari, Firefox, or Edge. Refer to the Universal Prompt browser support table for minimum browser versions with security key support in Duo.
- Read the security key information and click Continue.
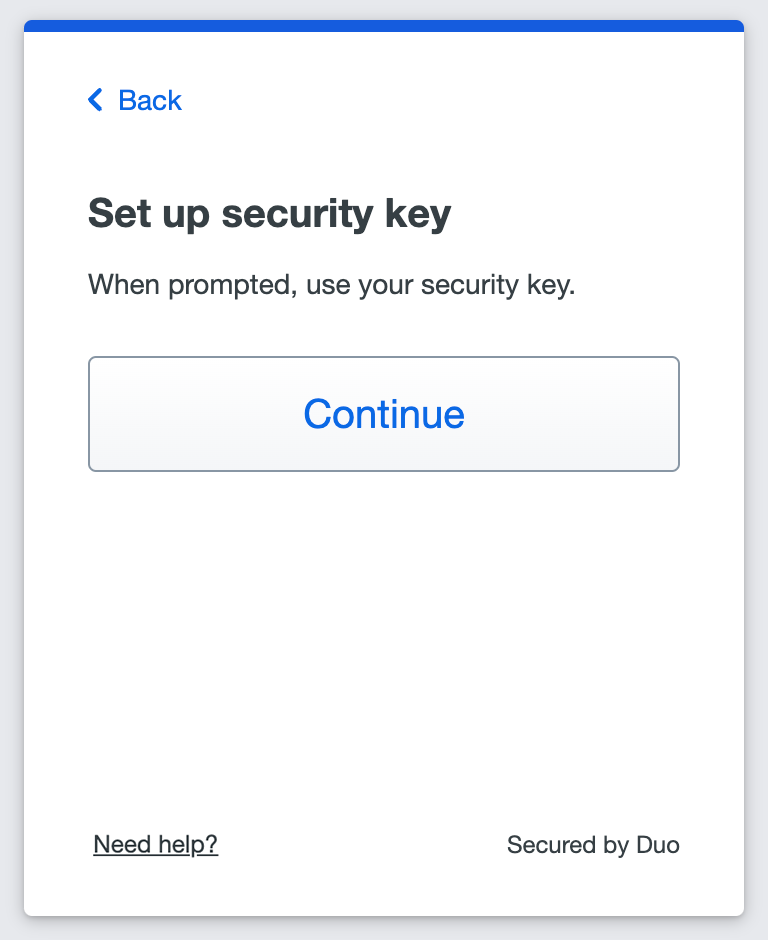
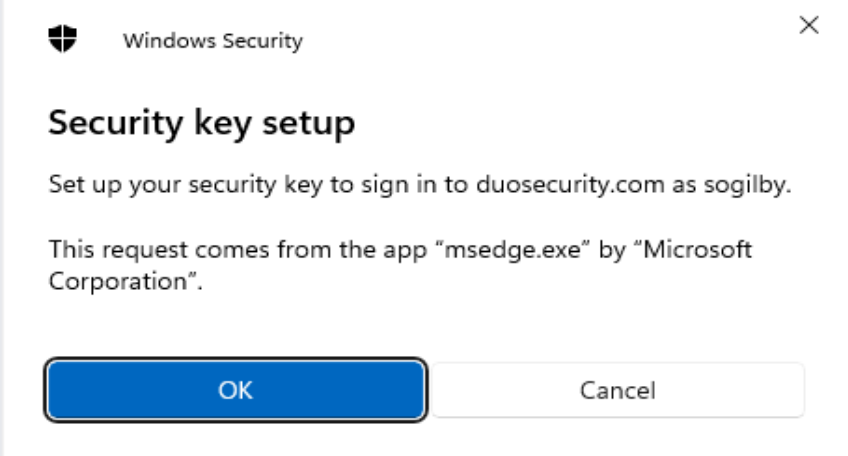
- Follow the browser prompts to complete enrollment of your security key, allowing Duo to access information about your security key during setup (Windows example using Edge shown).
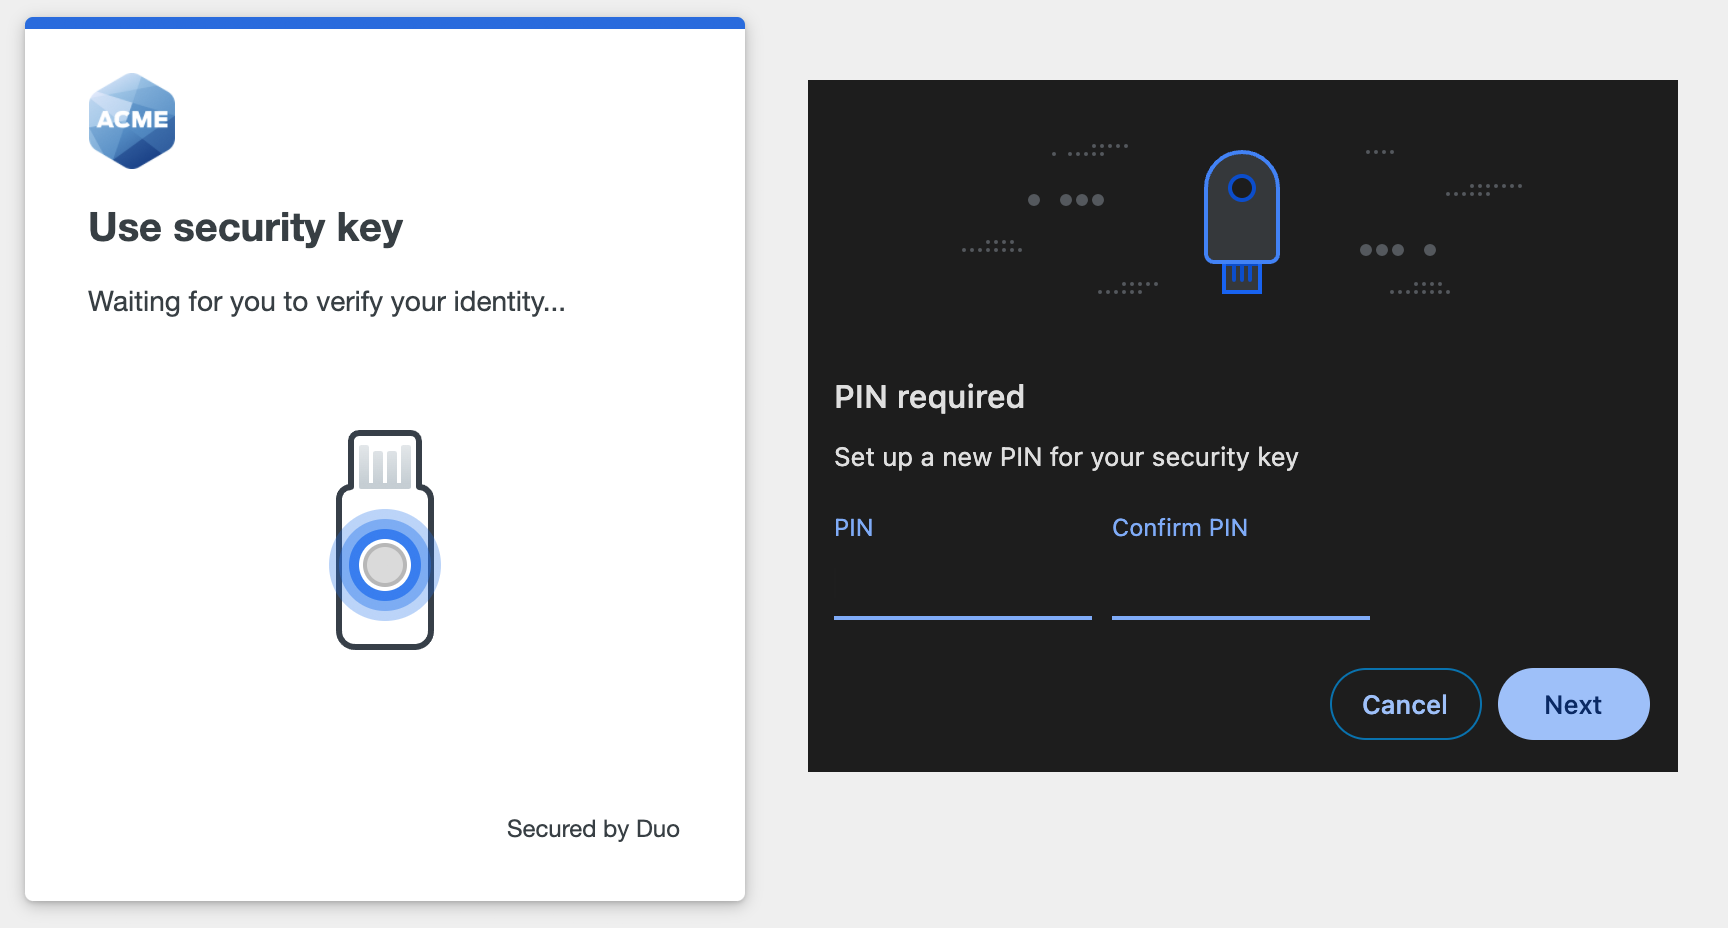
- If your organization requires user verification and you have not already configured a PIN or biometric for your security key you will need to do that now (Chrome example shown). If you already set your PIN or configured biometrics for your security key then you'll need to enter your PIN or scan your biometric to complete setup.
- When you receive confirmation that you added your security key as a verification method click Continue.
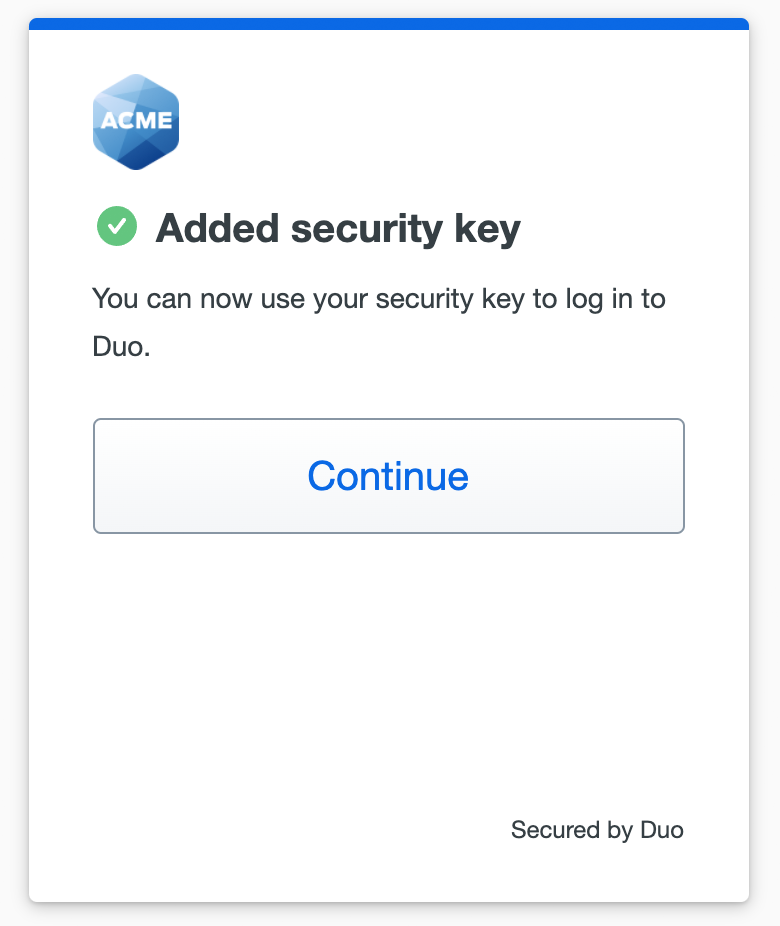
You can now log in to Duo-protected applications that show the Duo prompt in a web browser using your security key.
To use your security key with Duo Passwordless it must support user verification, such as requiring a PIN or fingerprint for use.
Duo Desktop
In order to use Duo Desktop for authentication, make sure you have the following:
- Your device must be running macOS 11+ or Windows 10 build 1803+.
- Duo Desktop 6.12.0+ installed on Windows or Duo Desktop 6.12.0.0+ installed on macOS.
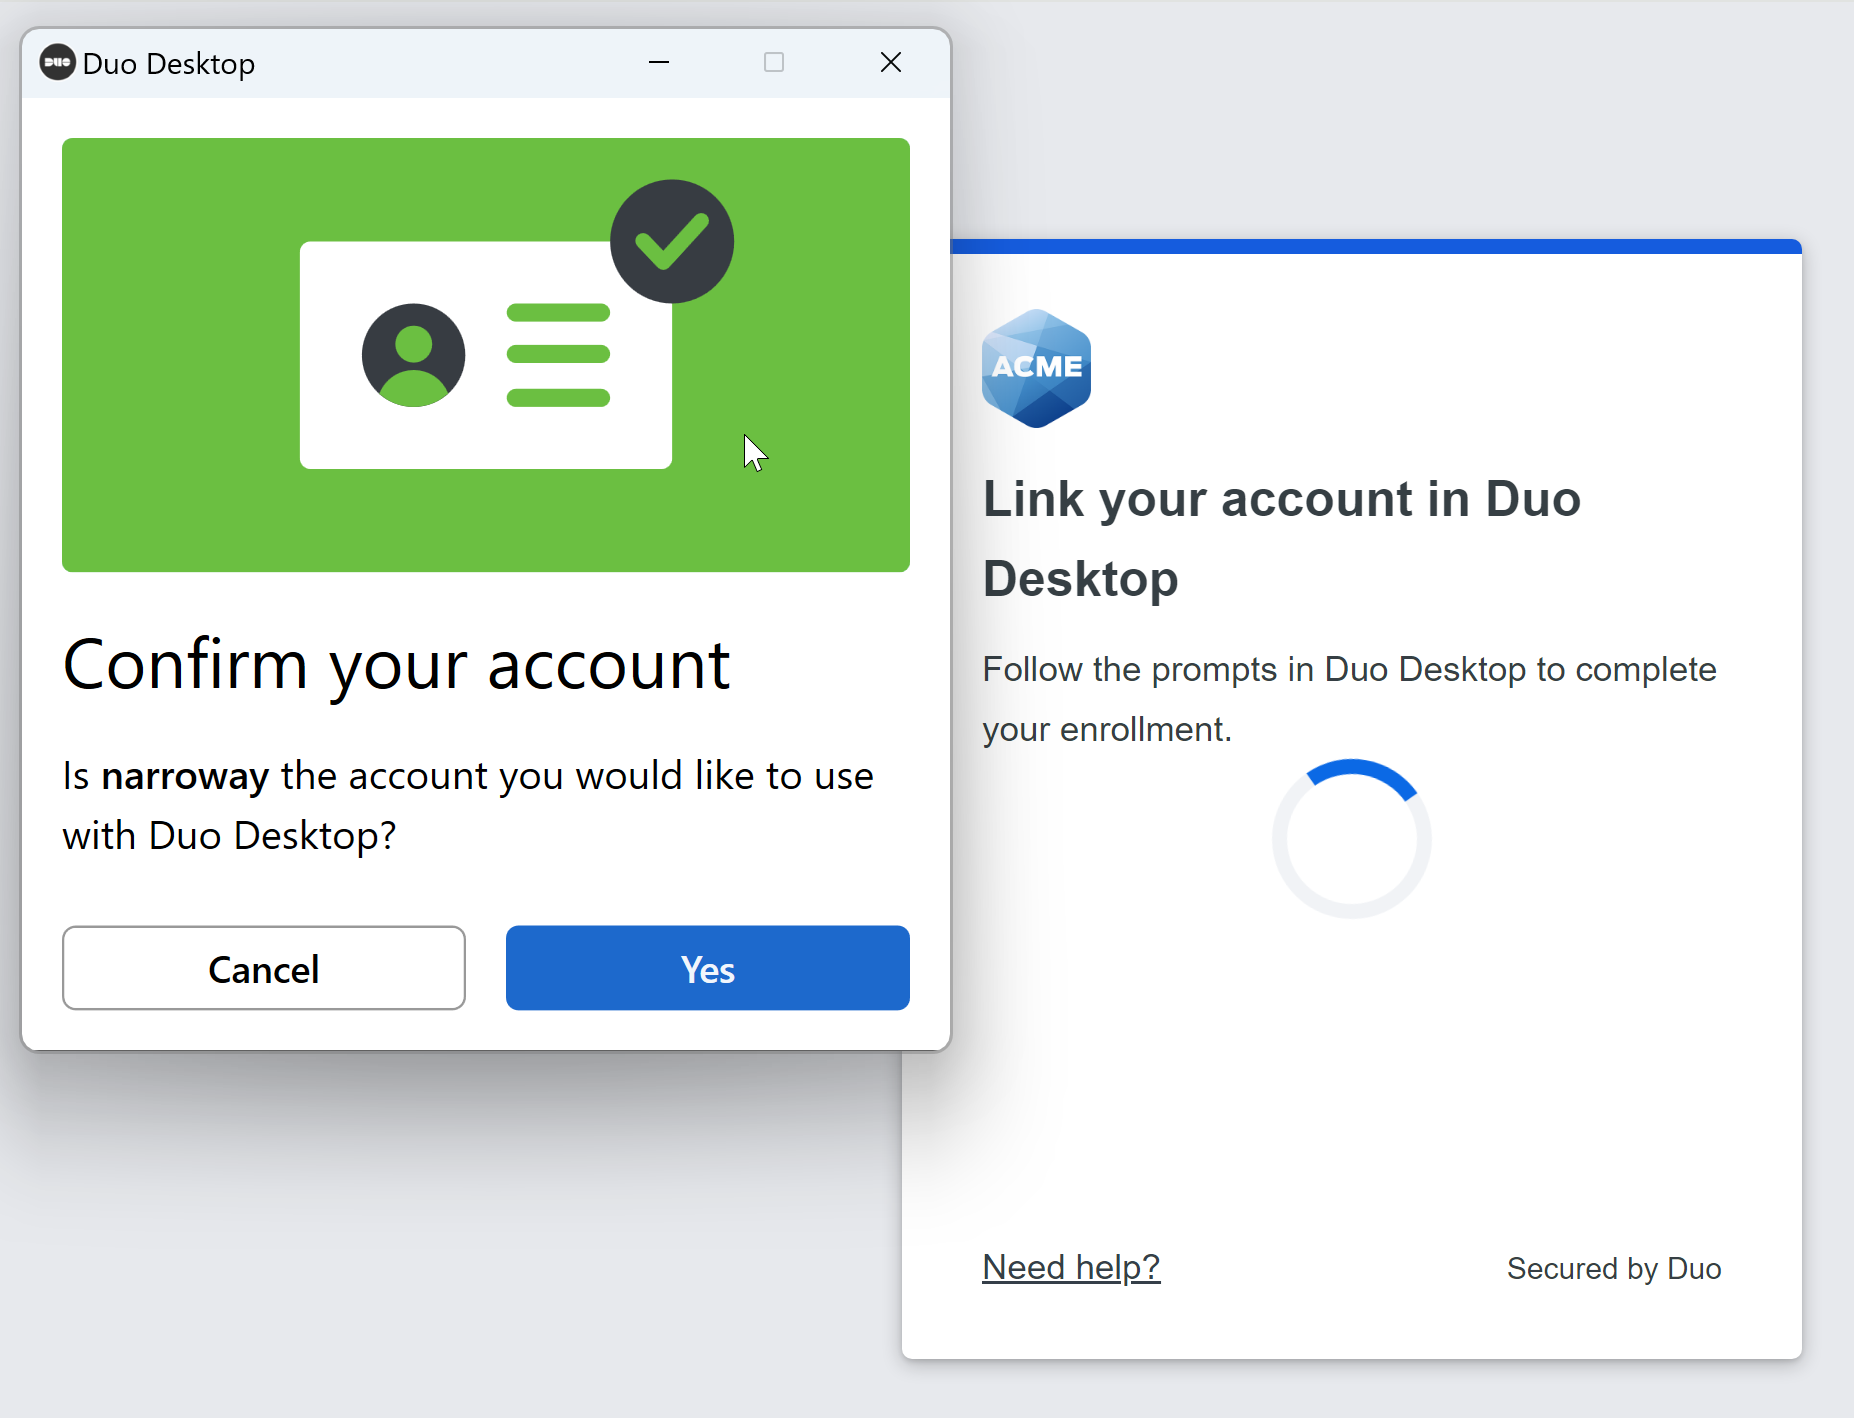
- Duo Desktop will pop up a confirmation window. Click Yes to link your account.
On macOS:
On Windows: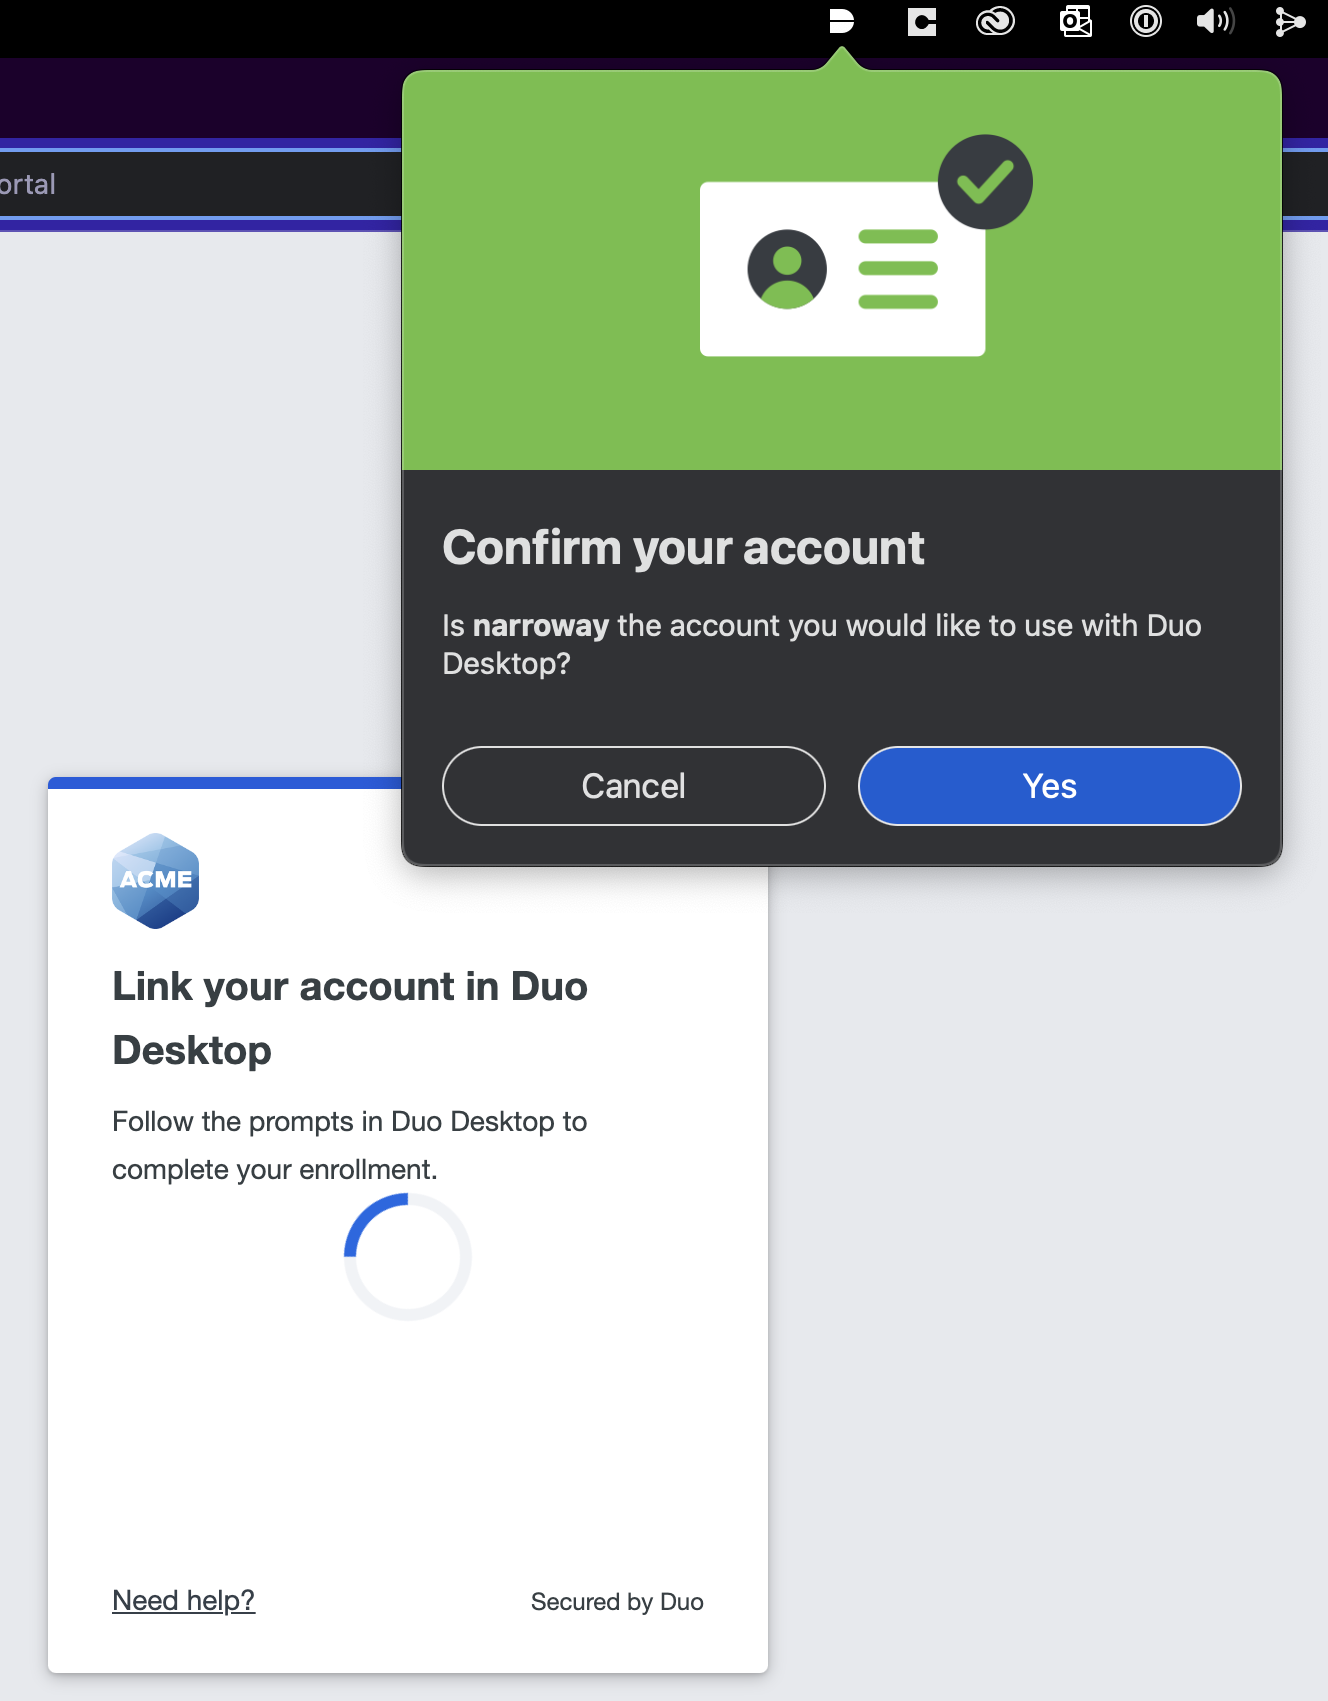
- Click Continue to login.
On macOS:
On Windows: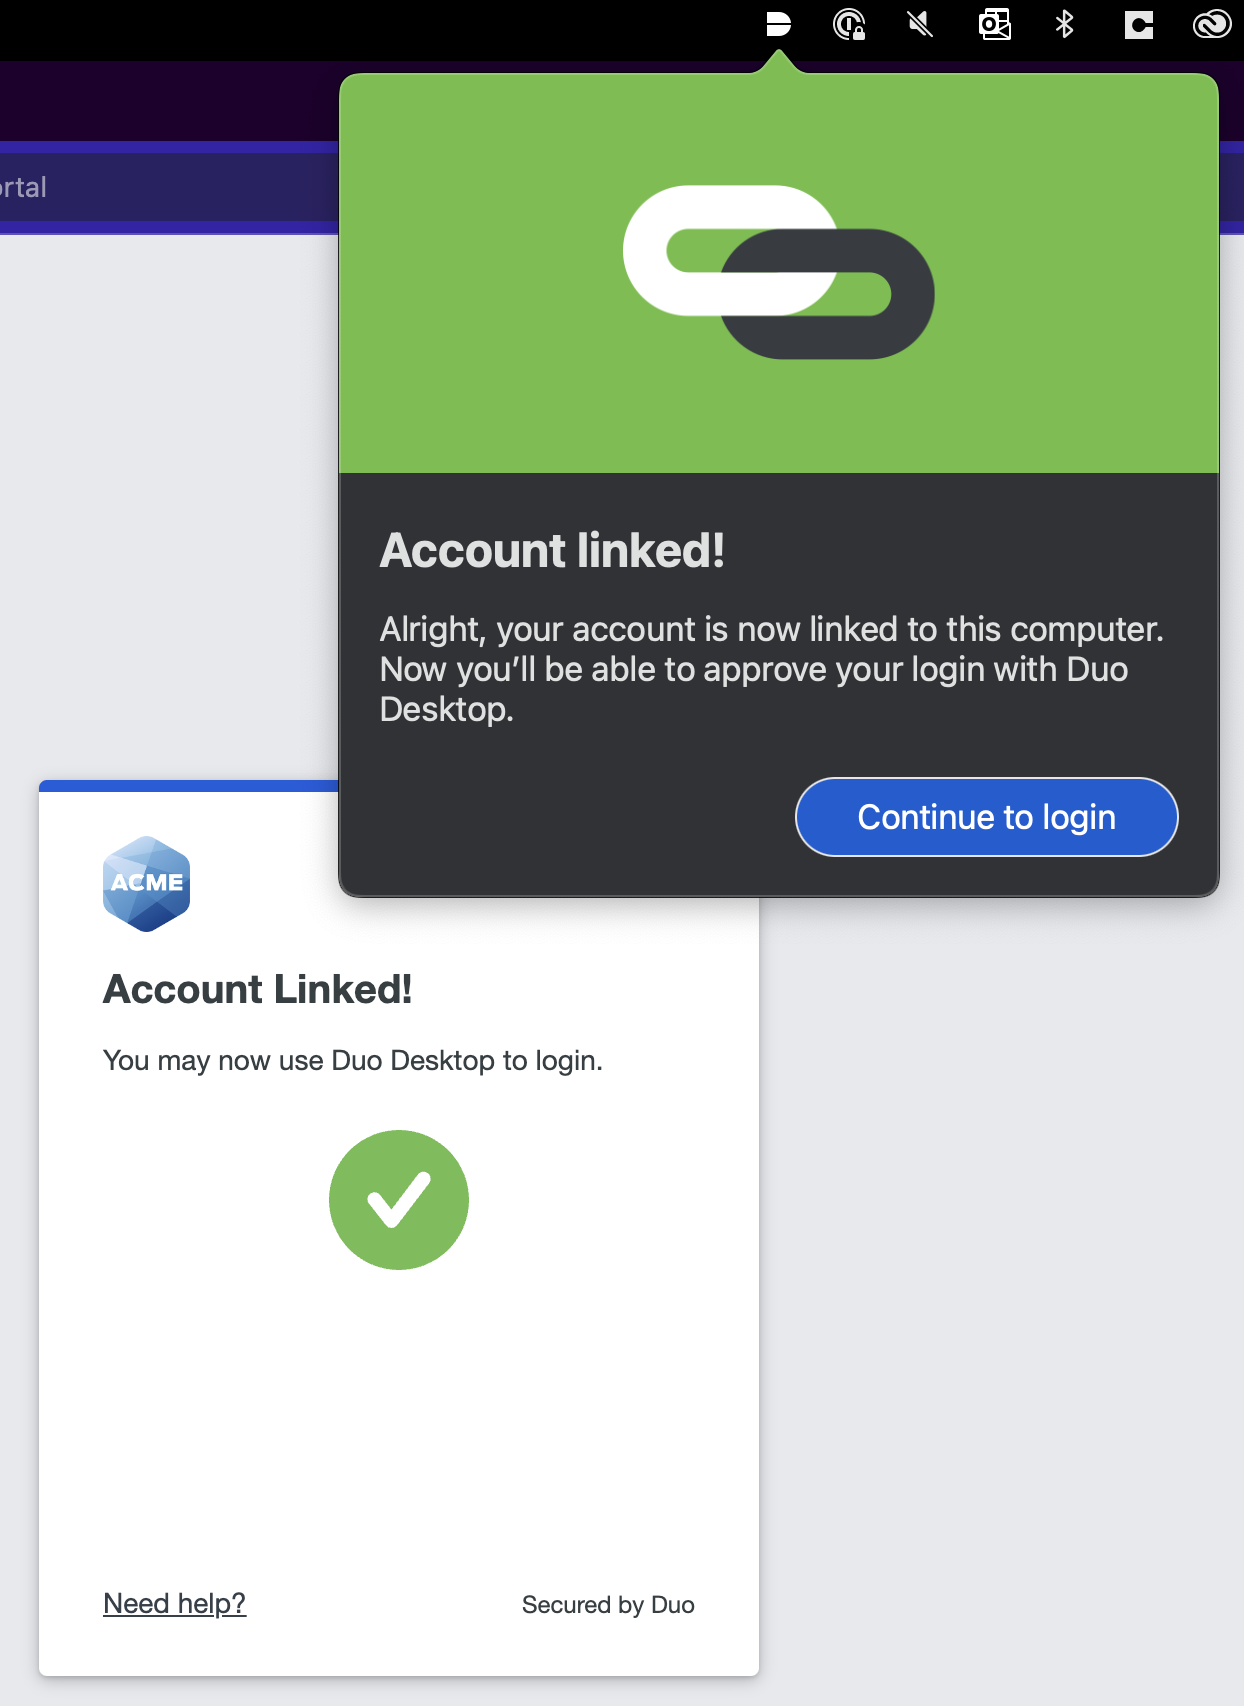
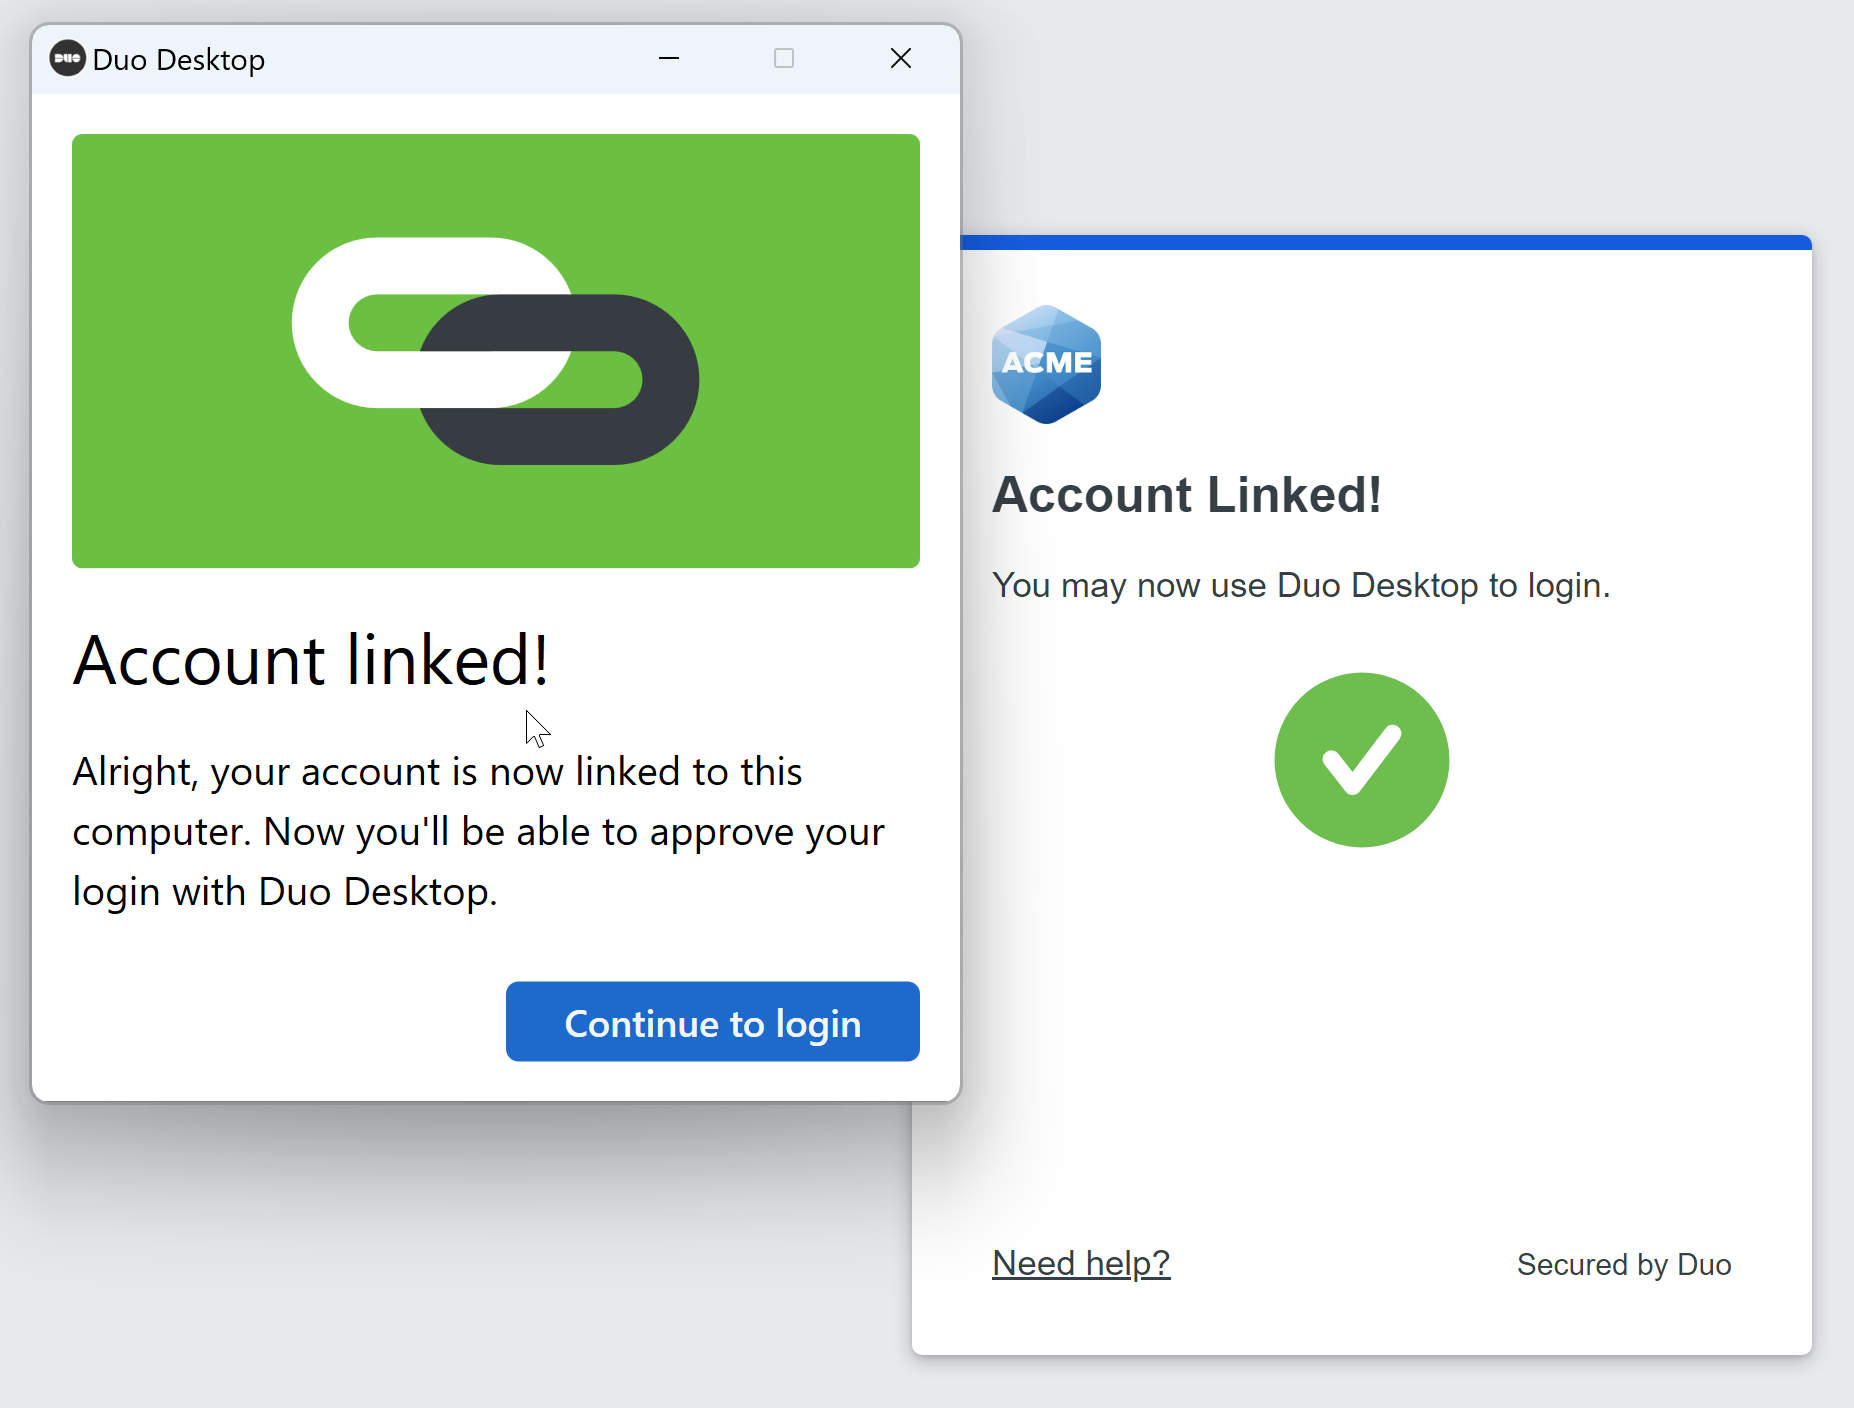
You can now log in to Duo-protected applications that show the Duo prompt in a web browser using Duo Desktop. If you switch between computers, your organization's Duo administrator may have enabled an option that automatically sets up Duo Desktop for authentication on different computers after you complete the setup steps once.
Phone for Call or Text
This option is suitable for mobile phones that can't run Duo Mobile, or office phones and landlines.
- Select your country from the drop-down list and type your phone number, and then click Add phone number.
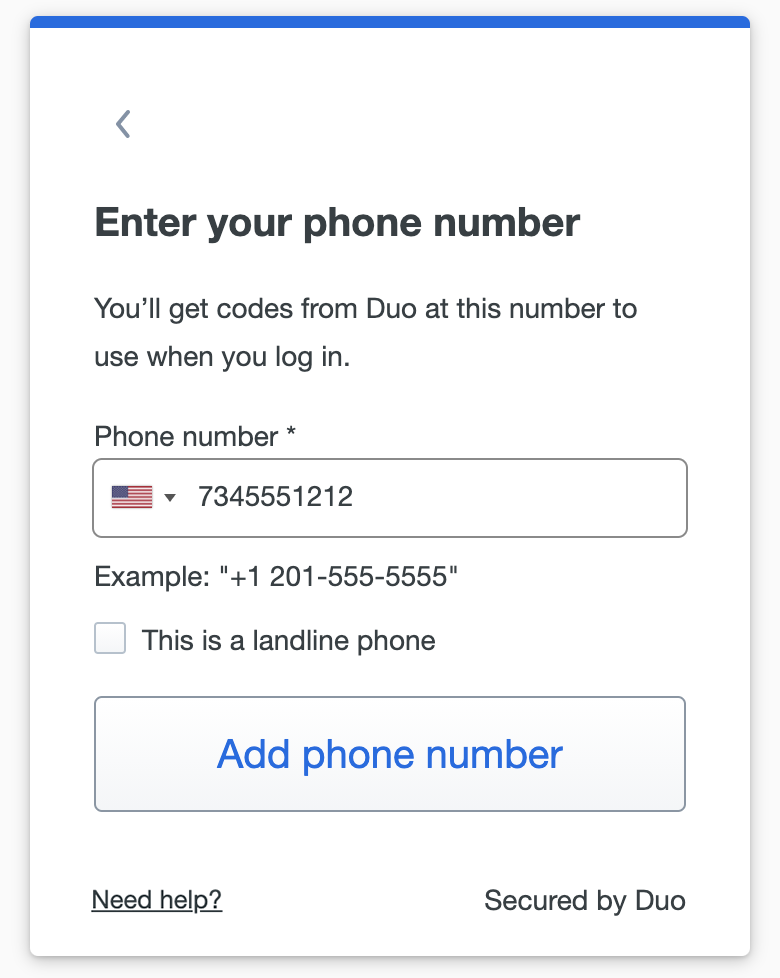
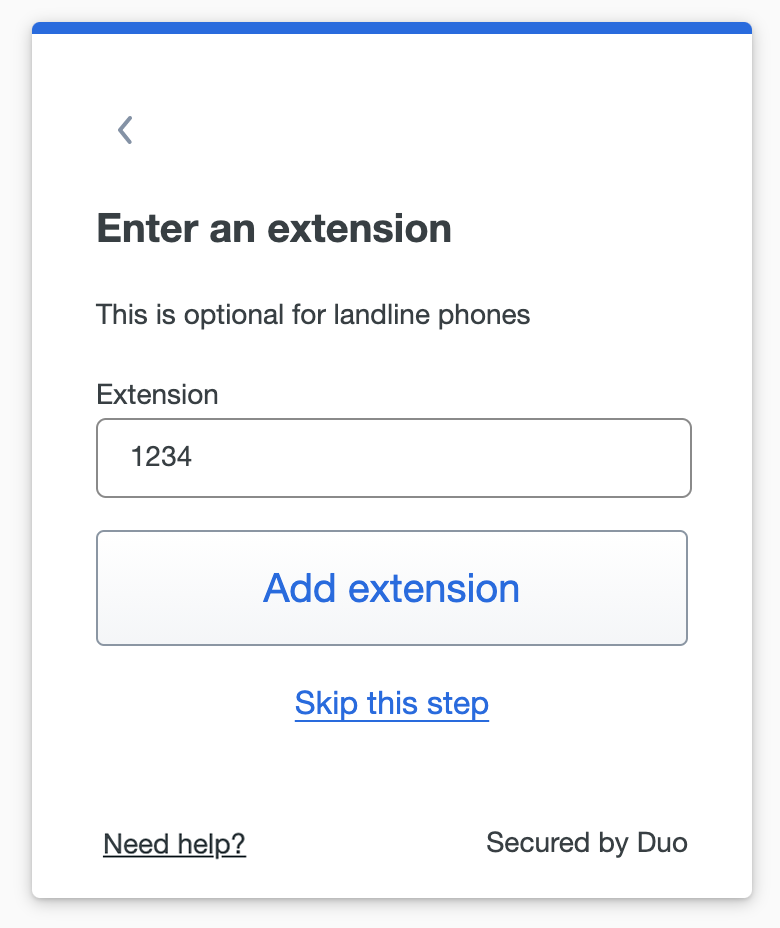
If this phone number is a landline and can't receive text messages, select the This is a landline phone option before continuing. - If you opted to add a landline, you can enter the landline's extension on the next screen and click Add extension or click Skip this step if you do not need to enter an extension for your landline.
- Verify that the phone number shown (and landline extension, if you entered one) is accurate and click Yes, it's correct to continue (or No, I need to change it to go back and enter the number again).

If the phone number you entered already exists in Duo as the authentication device for another user then you'll need to enter a code sent to that number by phone call or text message to confirm that you own it. Choose how you want to receive the code and enter it to complete verification and continue.

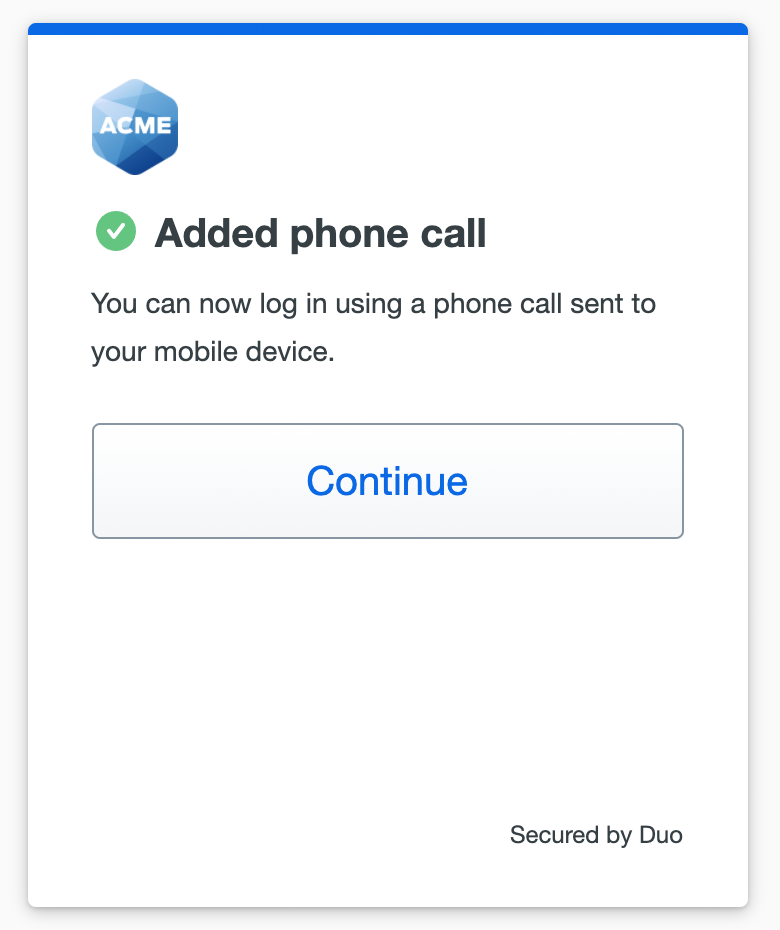
- When you receive confirmation of adding the new mobile phone number for texts or calls, click Continue to login to log in to the application with a passcode received via text message or a phone call from Duo.
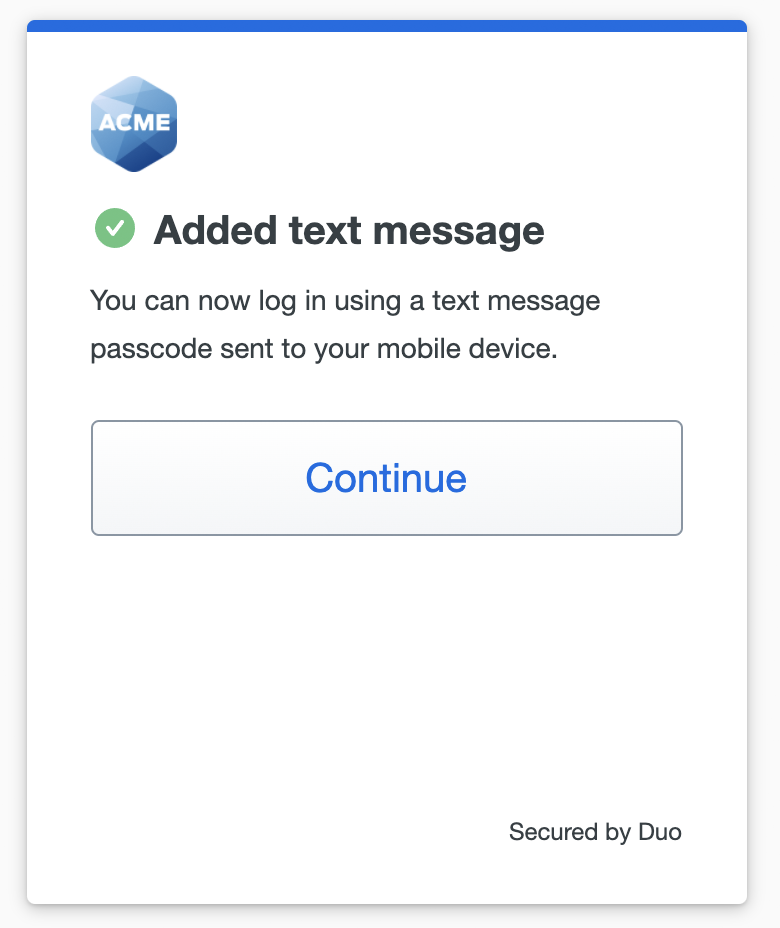
If you added a landline phone number, click Continue to log in to the application with a phone call from Duo.
Step Four: Add a Backup Method
It's a good idea to add a second verification method that you can use as a backup if the first method you added isn't available to you at some point, like if you lose or forget your phone and need to log in with Duo, or if you want to access an application from a different MacBook than the one you used to set up Touch ID in Duo.
When you click Continue after registering your first verification method, Duo prompts you to add another one.
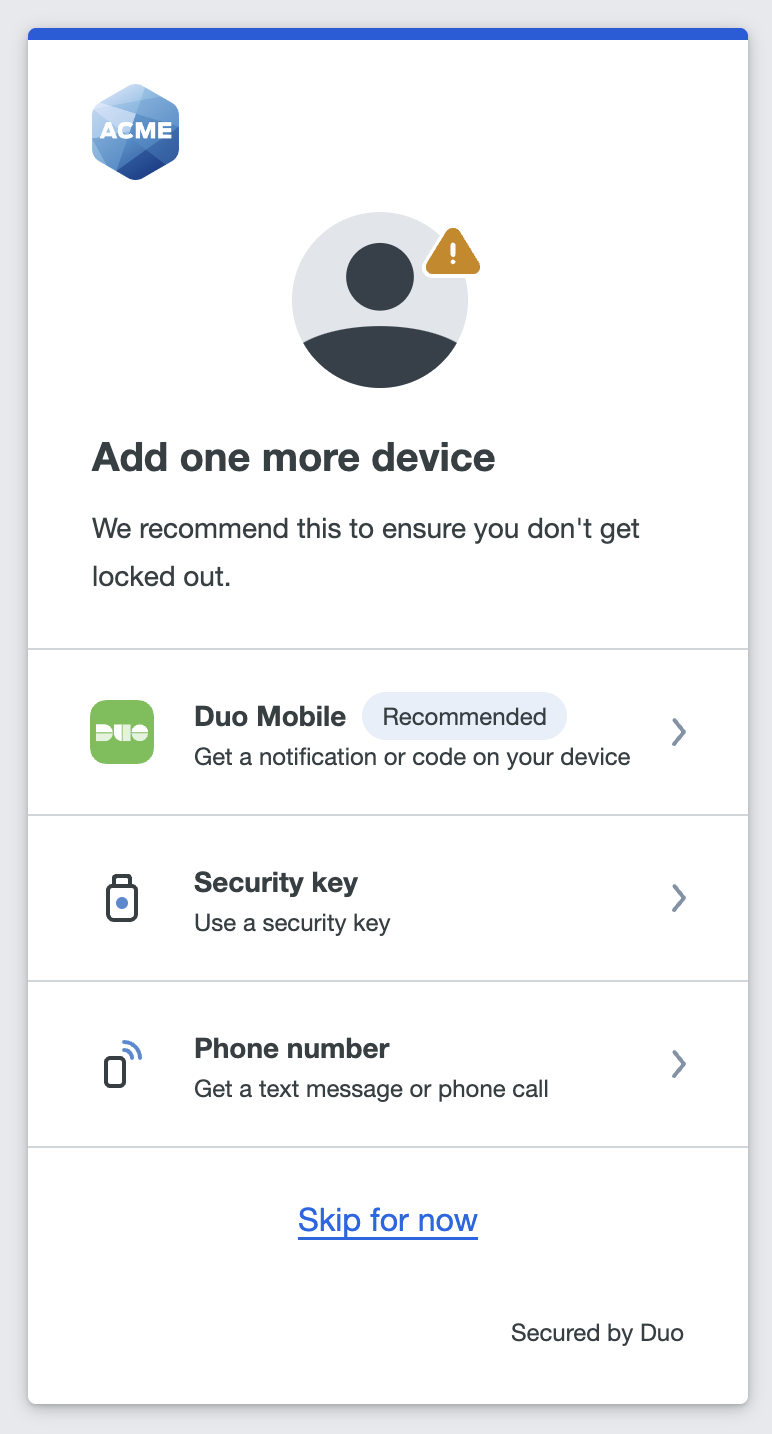
Choose any of the available methods and proceed through the steps for adding it. If you don't want to add another method at this time, click I don't want to add more devices.
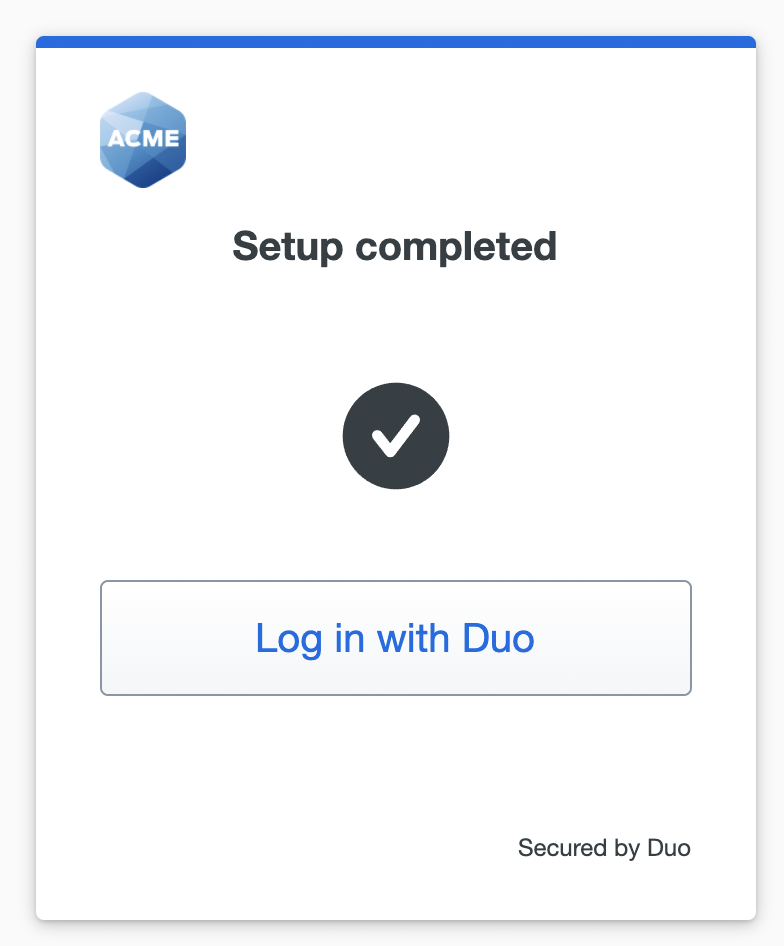
After you add a second login verification method, or if you chose to skip it, you'll arrive at the end of the Duo setup process. Click Log in with Duo to log in to the application using the Duo method you just added.
Add or Manage Devices After Enrollment
If enabled by your administrator, you can add additional verification methods, manage your existing devices, or reactivate Duo Mobile for Duo Push from the Duo Universal Prompt.
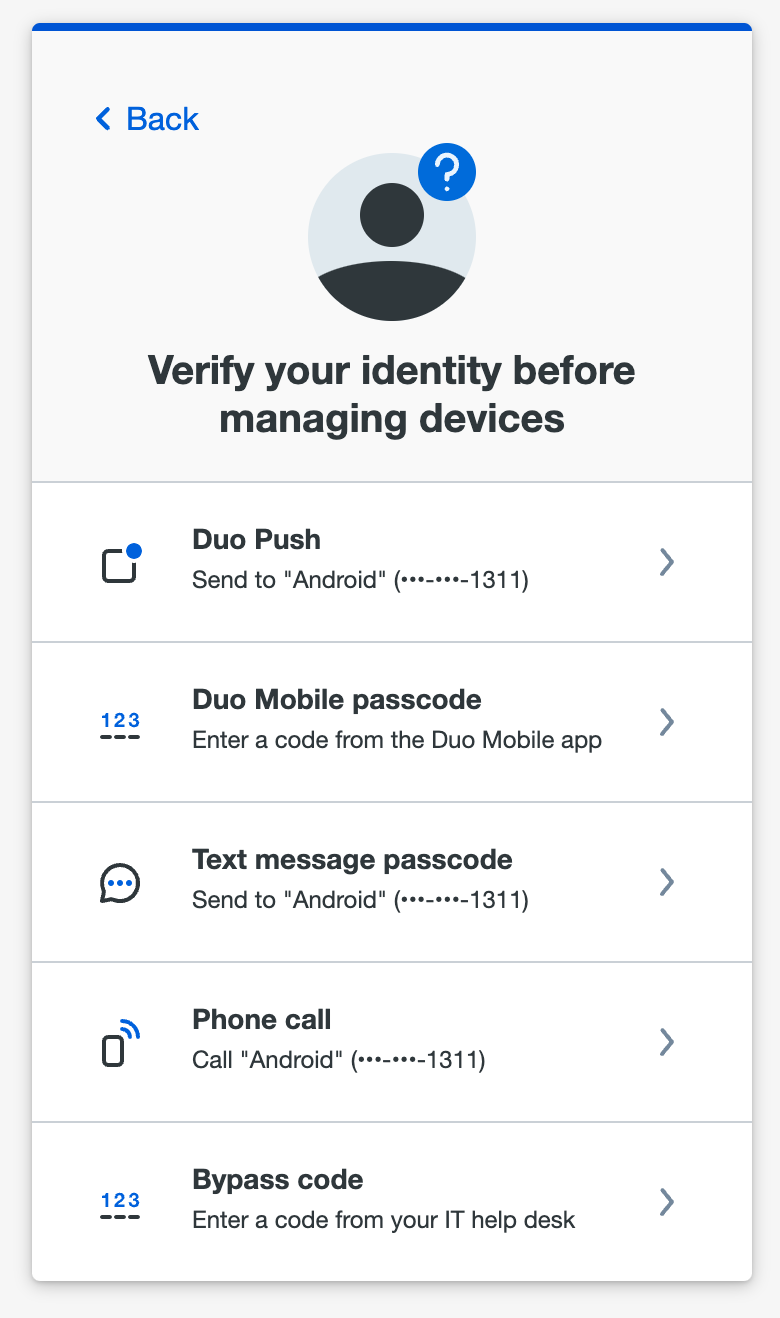
When logging in to an application with the Universal Prompt, click the Other options link on the authentication page to view your list of available methods. If your organization enabled self-service device management then you'll see a Manage devices choice at the end of the list. Click that to enter the device management portal.
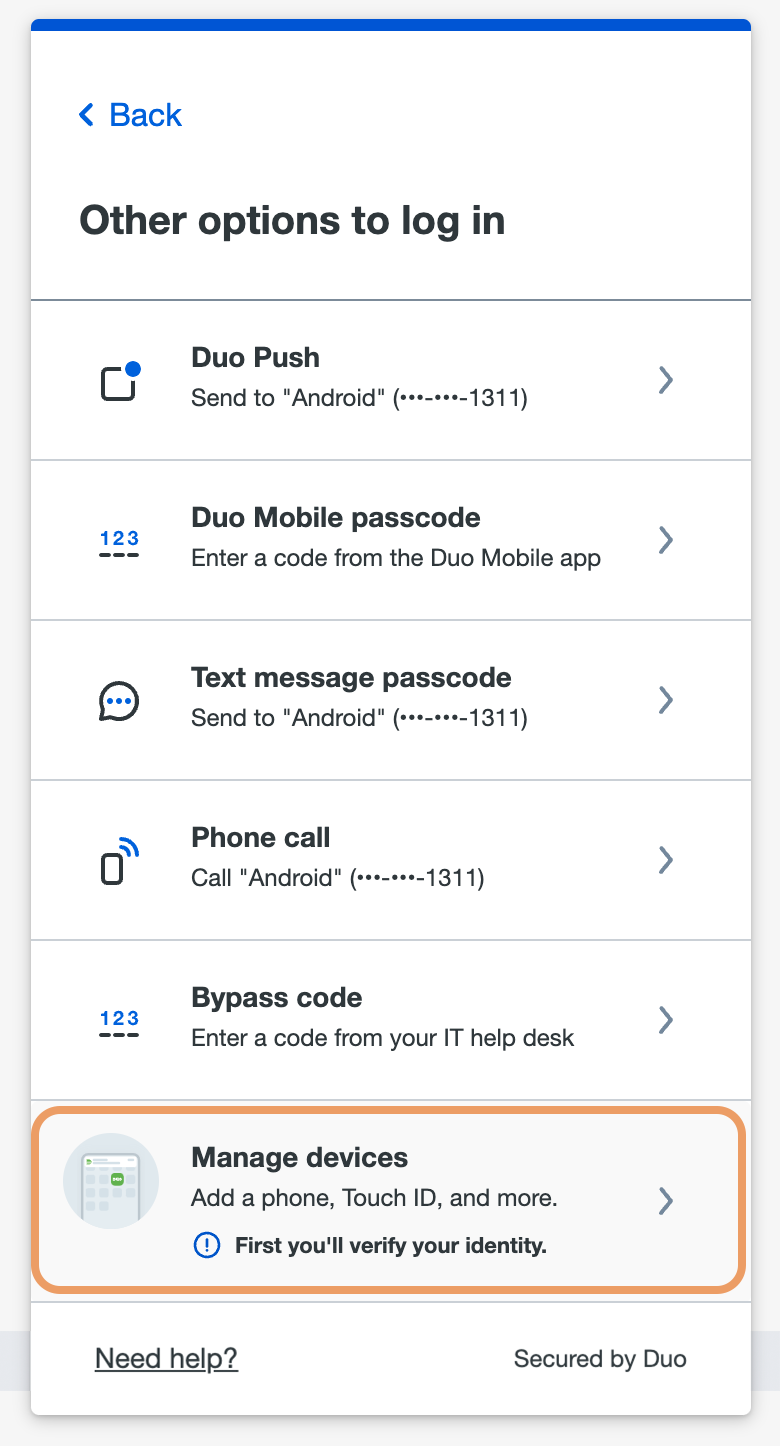
To access the device management you'll first need to verify your identity, just as you do when logging in to a service or application protected by Duo. Click on an available option to verify your identity. If you're visiting device management to delete or update a device you don't have anymore (such as a phone you lost or replaced), be sure to pick a verification option that you still have with you. If you don't have any devices you can use to authenticate to device management, contact your organization's Duo administrator or help desk.
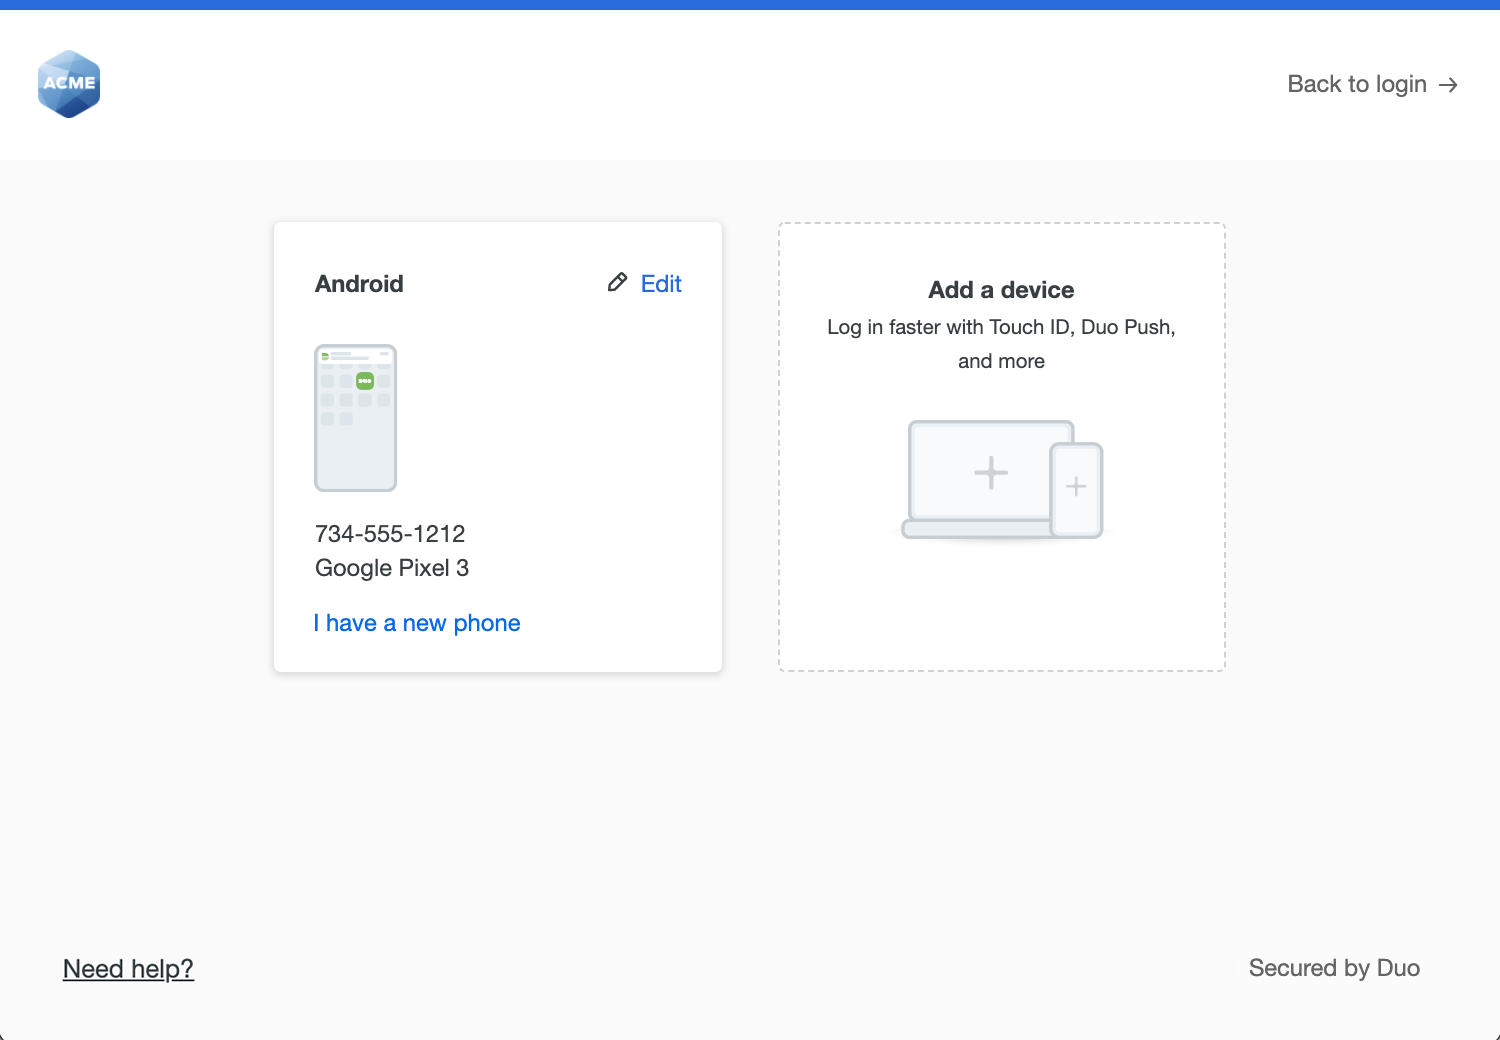
After approving a Duo authentication request, you can see all your registered devices in the device management portal.
Add Another Device
To add a new method of verifying your identity in Duo, click Add a device and select one of the verification options.
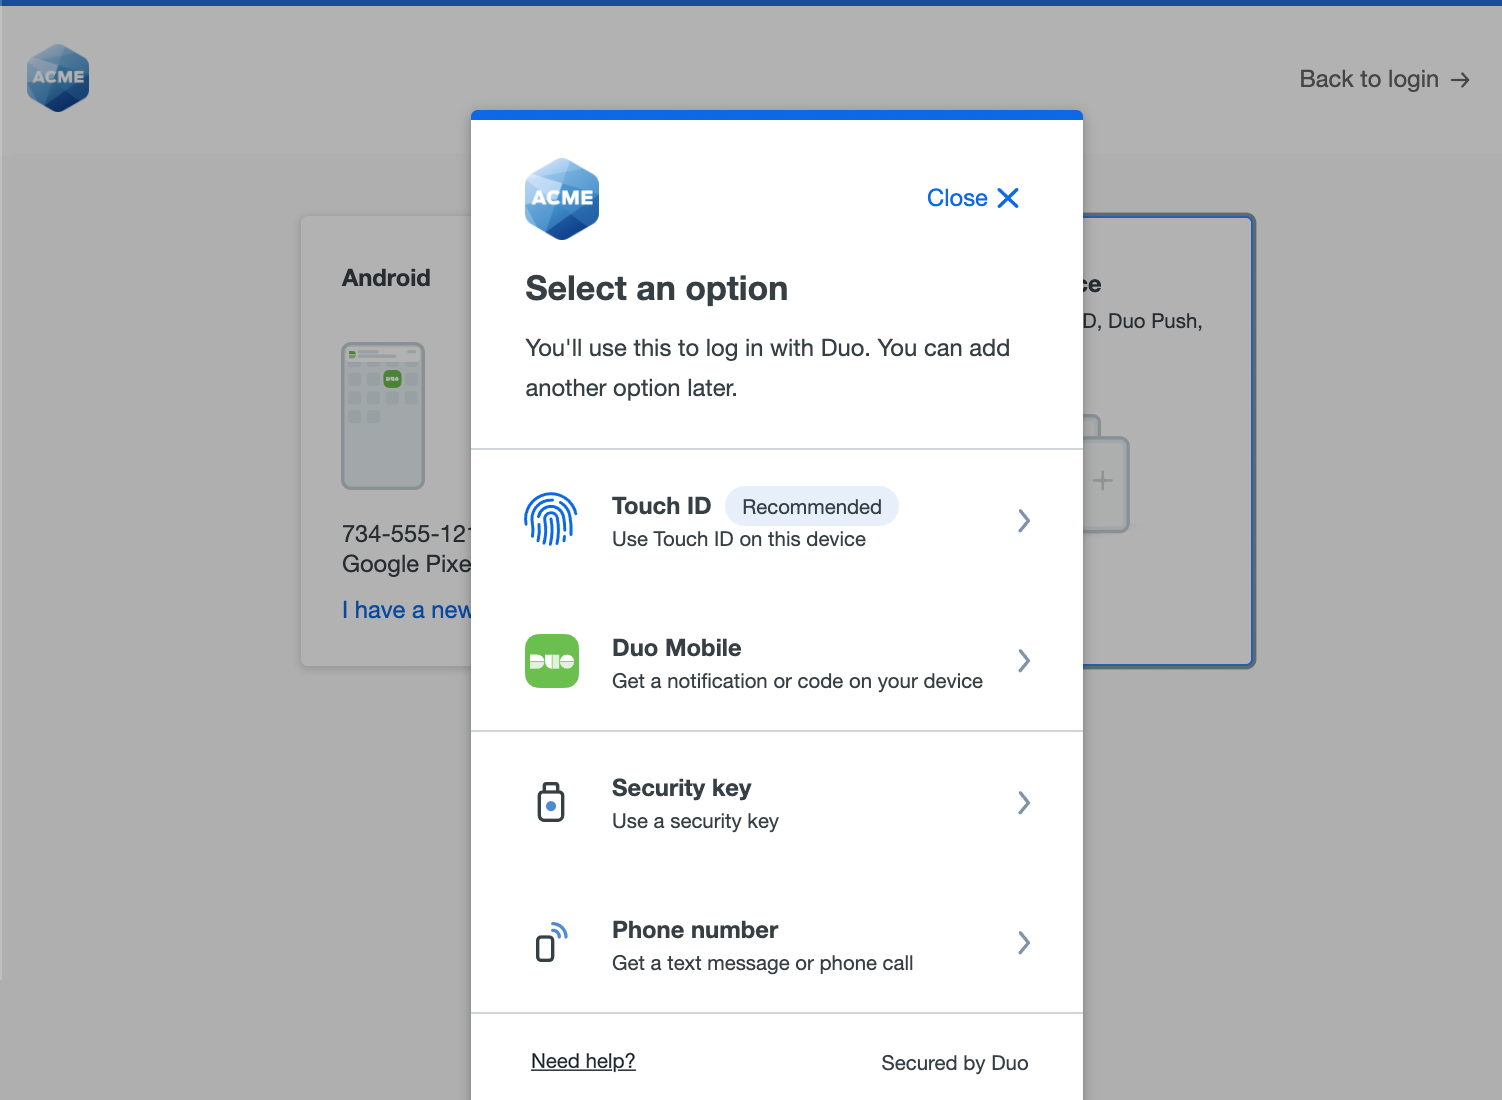
Duo takes you through the steps of adding the new device, just like first-time enrollment. The difference between adding a new device from device management and during first-time enrollment is that when you have finished enrolling the new device you return to the device management page to view all your registered devices, including the new one, instead of continuing to log into an application.
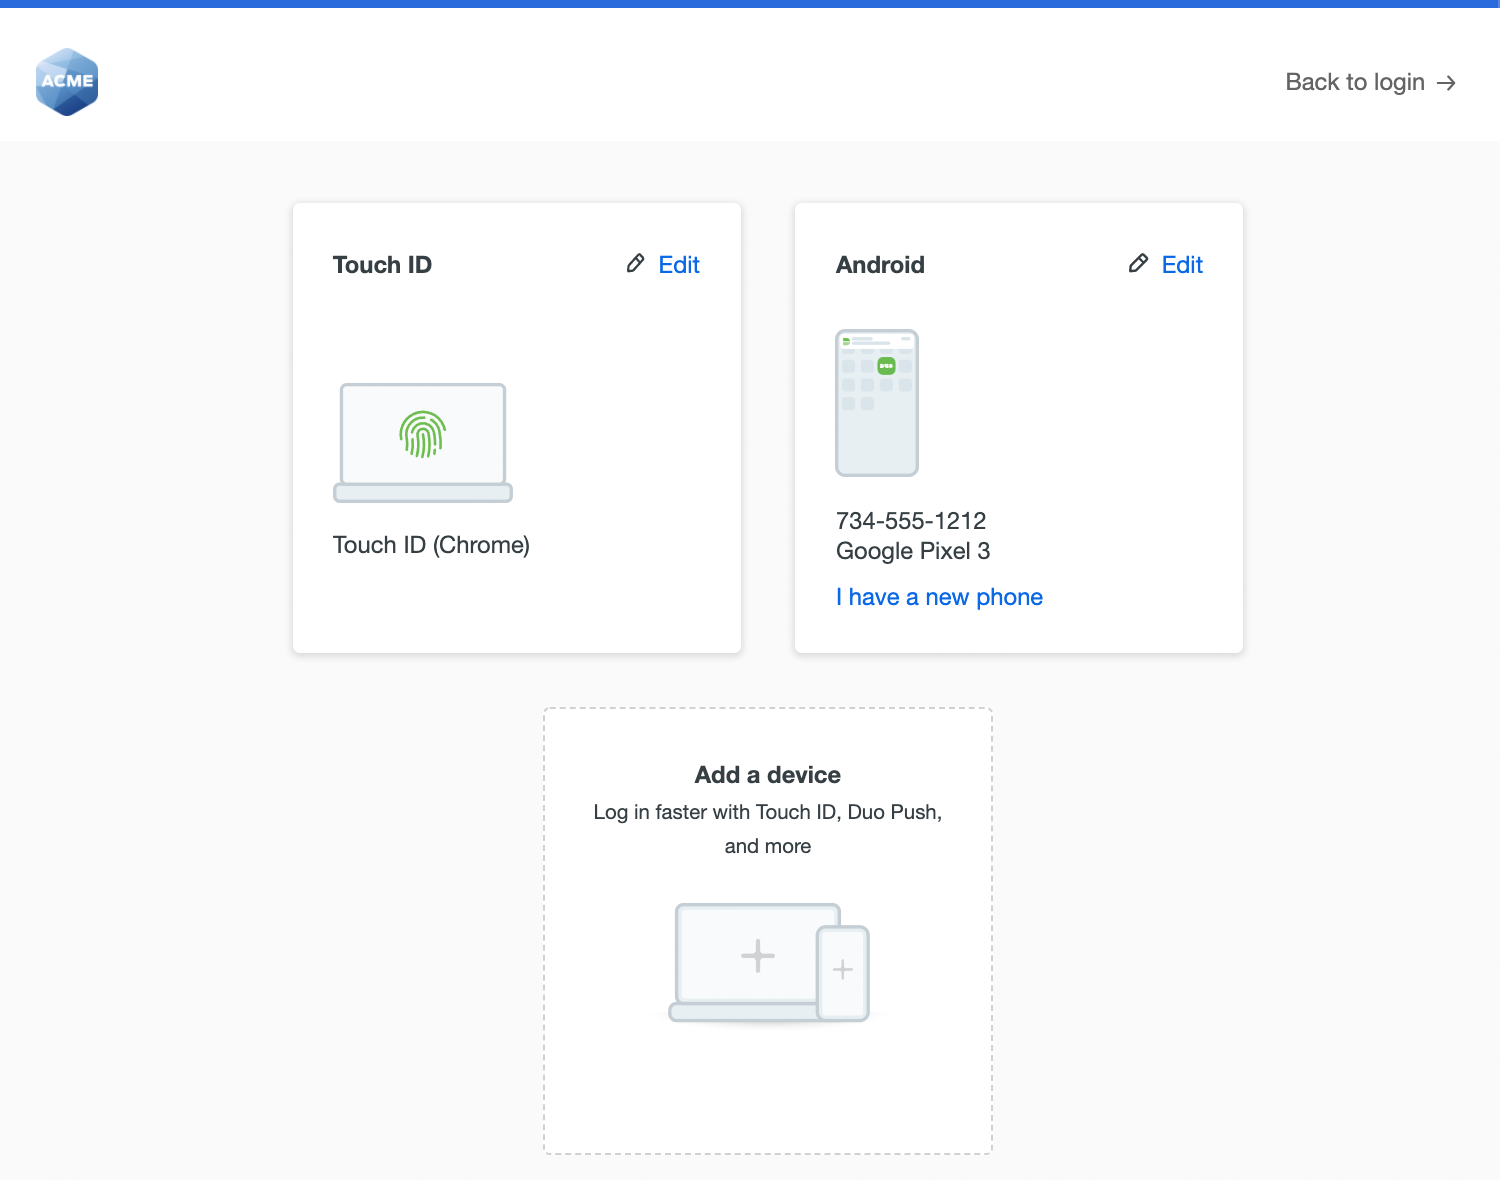
When you access device management during login to a Duo Single Sign-On application or from Duo Centrals and use it to add platform authenticators, like Touch ID or Windows Hello, then you'll be able to use that authentication method to log in to Duo Single Sign-On applications without a password if your organization has enabled Duo Passwordless.
Rename or Remove a Device
Click Edit and then Rename to give a device a new name to help you identify it. This new name shows up in the verification method list and on the authentication page when you log in with Duo to make it easier for you to identify which device you're using.
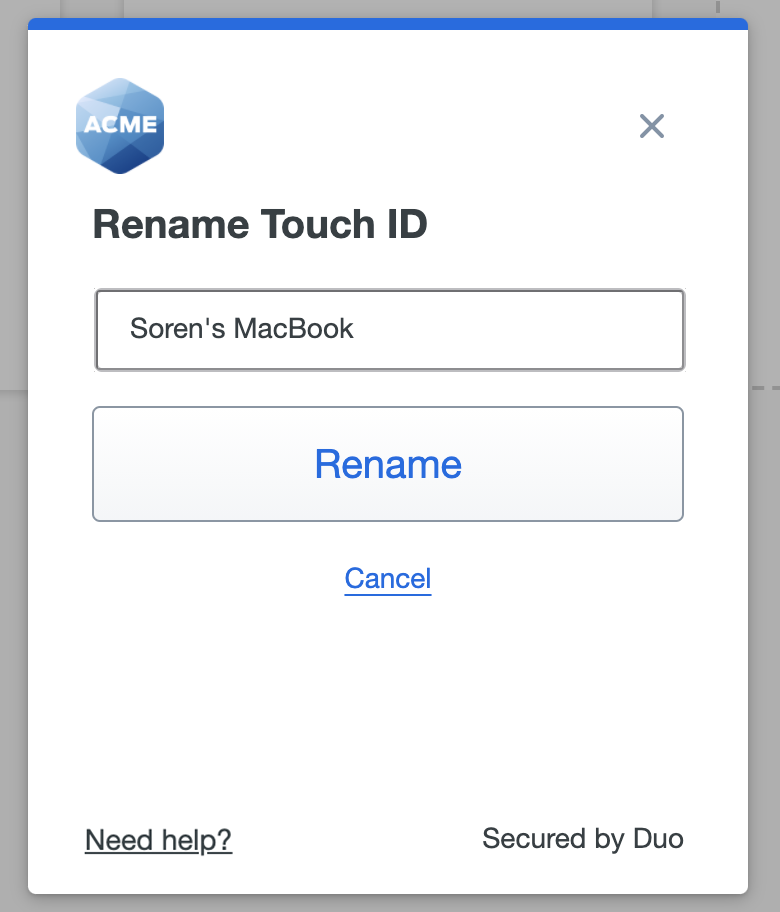
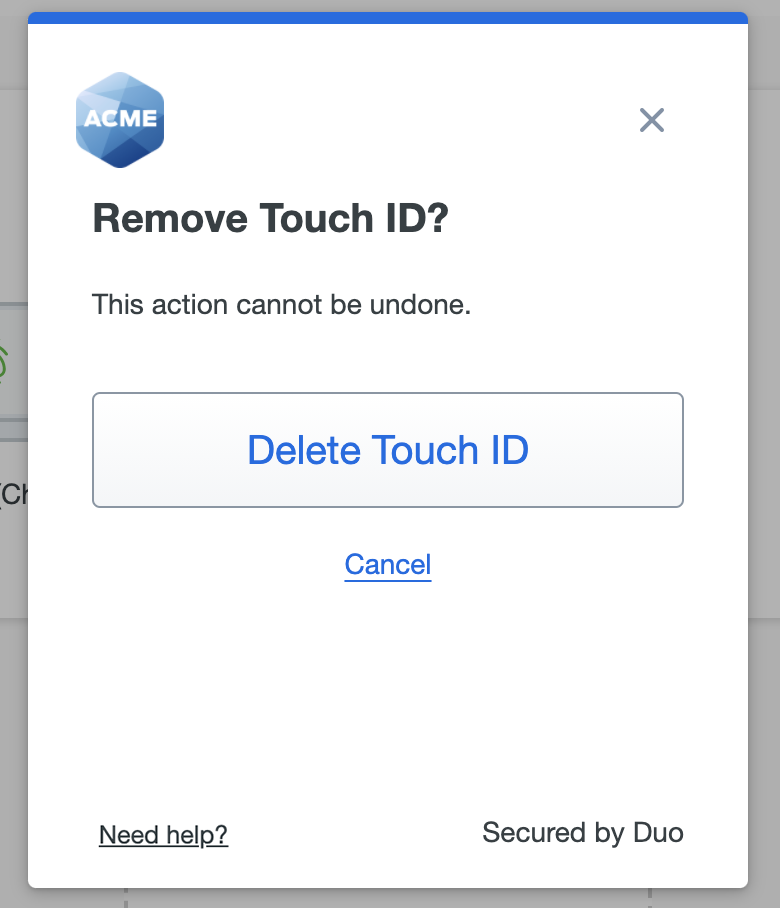
To delete a device, click Edit and then Remove. You'll be able to confirm that you want to remove this device before deleting it. Once deleted, a verification device can't be restored, but if you still have the device available you can add it again. You can't delete your only identity verification device.
Reactivate Duo Mobile for an Existing Device
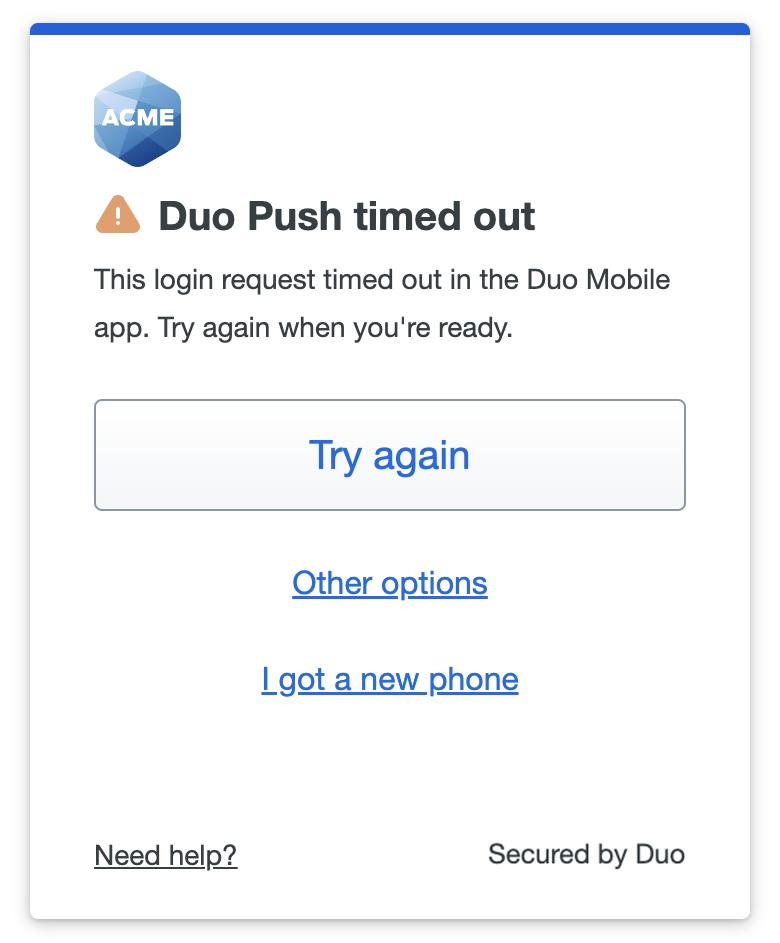
If you have replaced the phone you activated for Duo Push, or if Duo Push stops working, you can get Duo Push working again without contacting your help desk. If your organization has self-service enabled then if a Duo Push authentication times out you'll see the I got a new phone link shown in the Universal Prompt. Click or tap that link to begin the reactivation process.
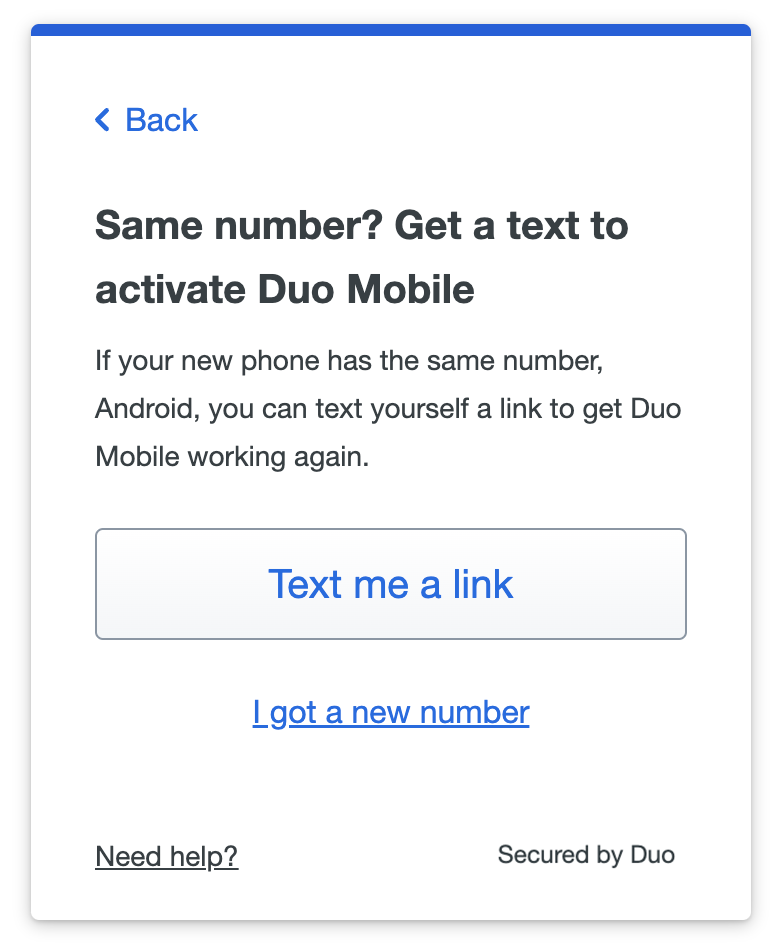
If you still use the same phone number as you did when you first set up the phone to use Duo Push, then click or tap the Text me a link button. When the text message with the link arrives on your phone, tap it to automatically reactivate Duo Mobile on your phone to use Duo Push again. If you don't have Duo Mobile installed be sure to install it before you try to open the activation link in the text message.
If you are using a different phone number than the one you first set up to use Duo Push then tap or click the I got a new number link.
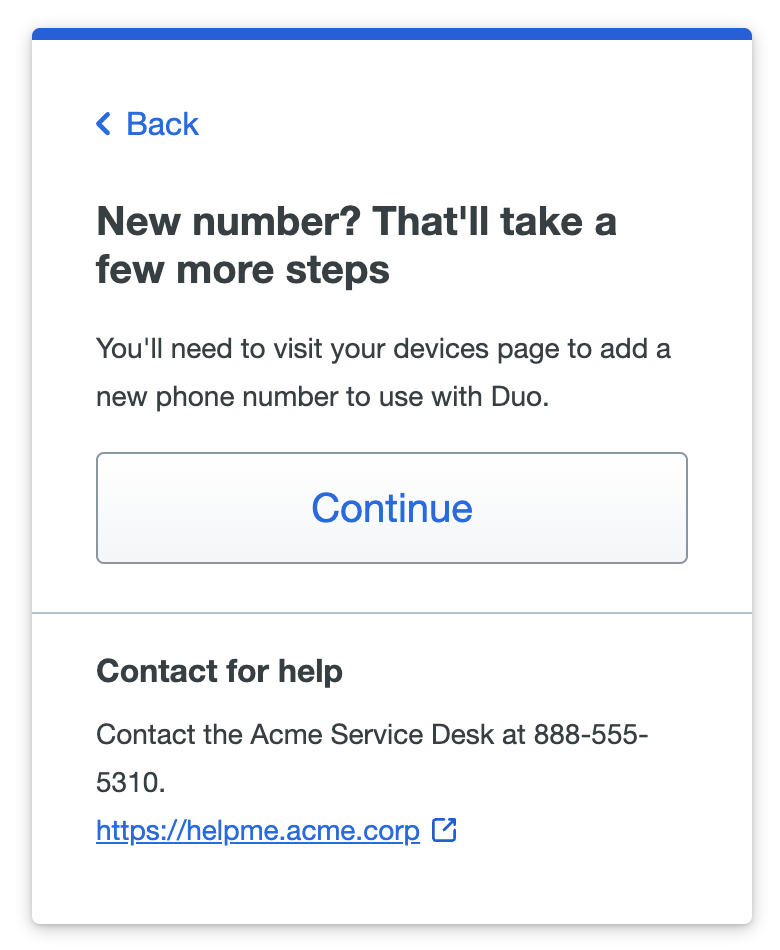
If you have a new phone number then you can't send yourself a text message with a Duo Push reactivation link. Click or tap Continue to proceed to the Duo self-service device management portal, where you can complete the steps to add your new phone number and set up Duo Push on the new phone so you can use it to log in with Duo.
You'll still need to verify your identity with a different Duo verification method, so if you don't have one available you will need to contact your organization's help desk or Duo administrator for assistance.
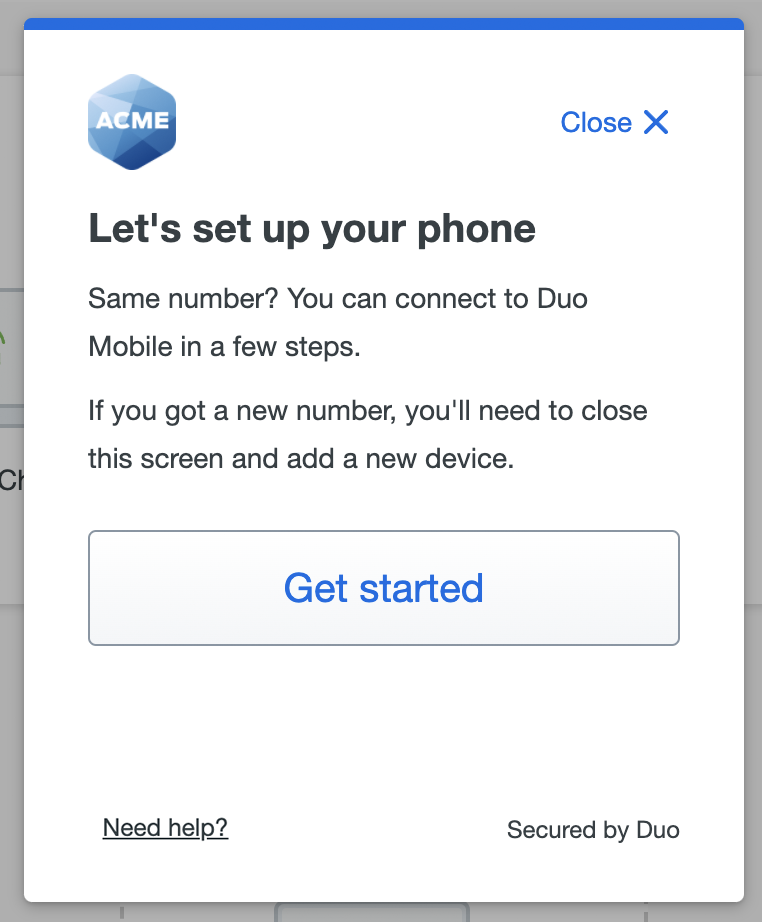
You can also reactivate Duo Mobile for use with Duo Push on a new phone from the device portal if it uses the same phone number as when you set up the original phone in Duo.
- Locate the existing phone in the device management portal and click the I have a new phone link.
- Click Get started if your phone uses the same phone number as before. If you want to add a new phone with a different number, cancel reactivation and follow the process for adding a new device instead.
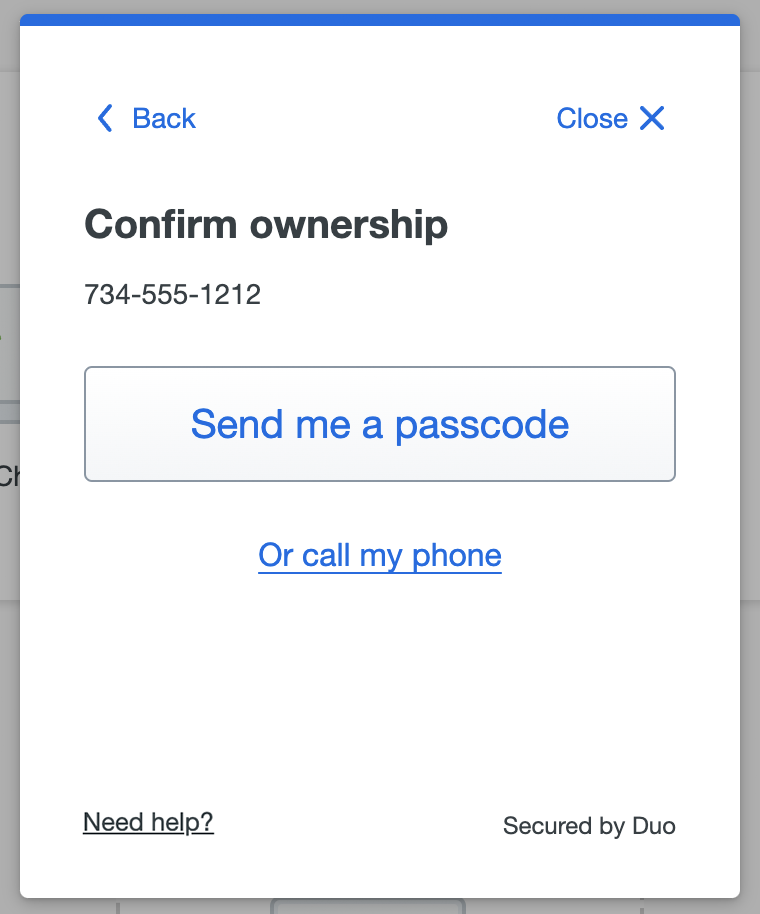
- Verify that you have access to the phone by clicking Send me a passcode or Or call my phone to receive a passcode from Duo.
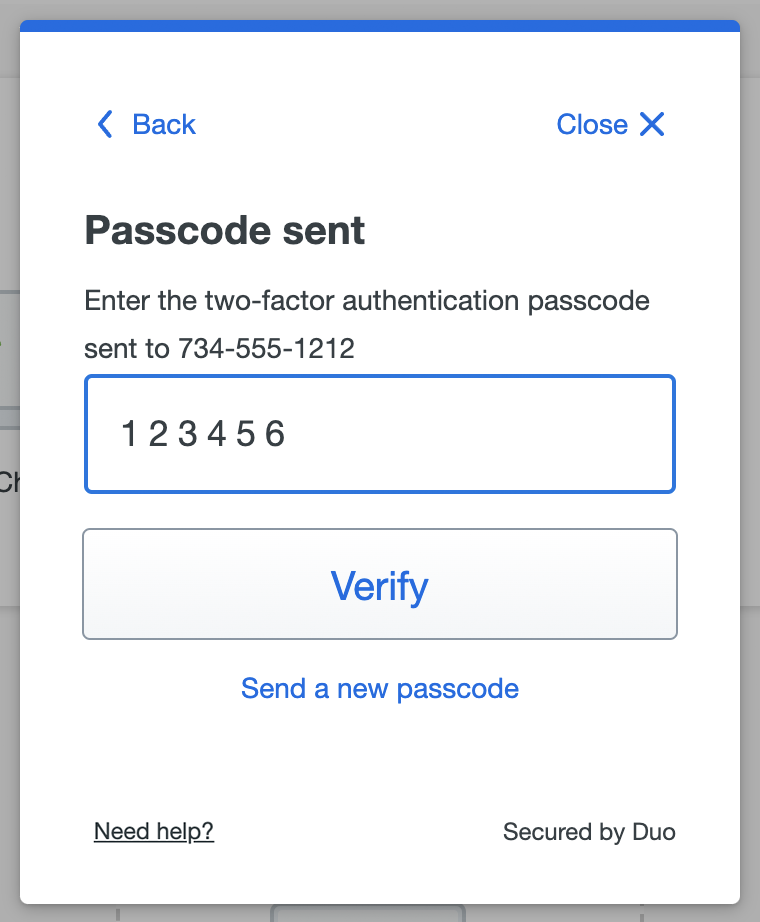
- Enter the verification passcode you received in a text message or phone call and click Verify .
- Install the Duo Mobile app on your new phone if you hadn't already done so, open it and tap Add to scan the QR code shown on-screen, continuing the same steps you completed when you originally set up Duo Mobile for Duo Push on your phone. You may also scan the QR code with your camera app if you already have Duo Mobile installed.

- Click Continue when you've finished reactivating Duo Mobile on your new phone to return to the device management portal.
If your existing phone stops receiving Duo Push requests your Duo administrator or help desk might suggest that you try reactivating Duo Mobile on your phone with this process as a troubleshooting step.
Device Notifications
Your organization may have enabled notifications when you add or remove a device in Duo. You could receive an email notification, a notification pushed directly to the device where you activated Duo Mobile, or both.
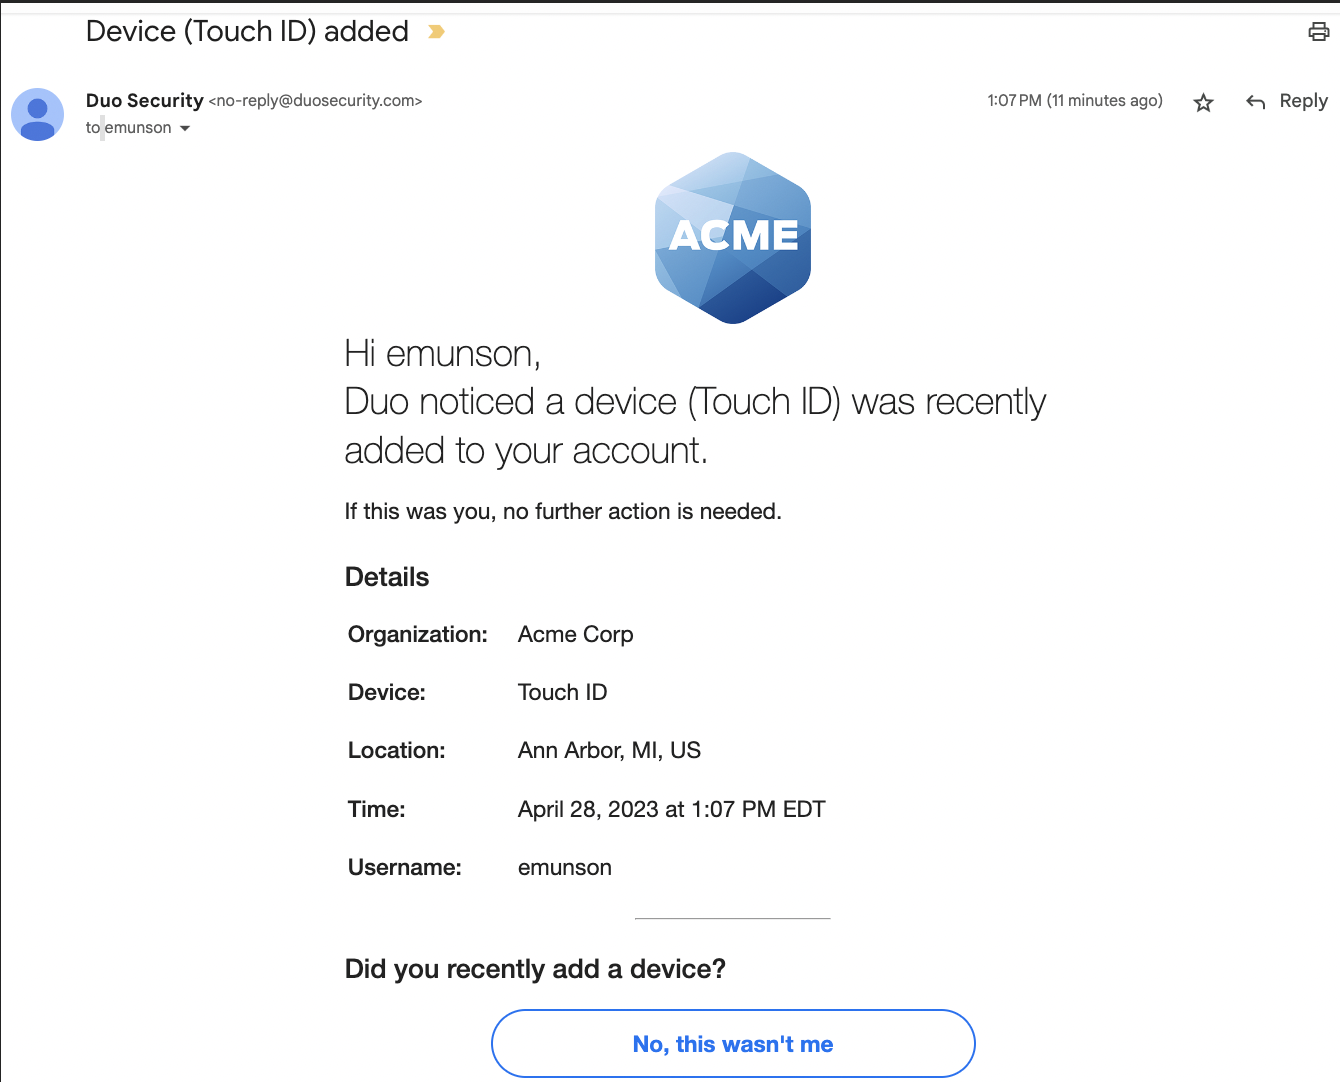
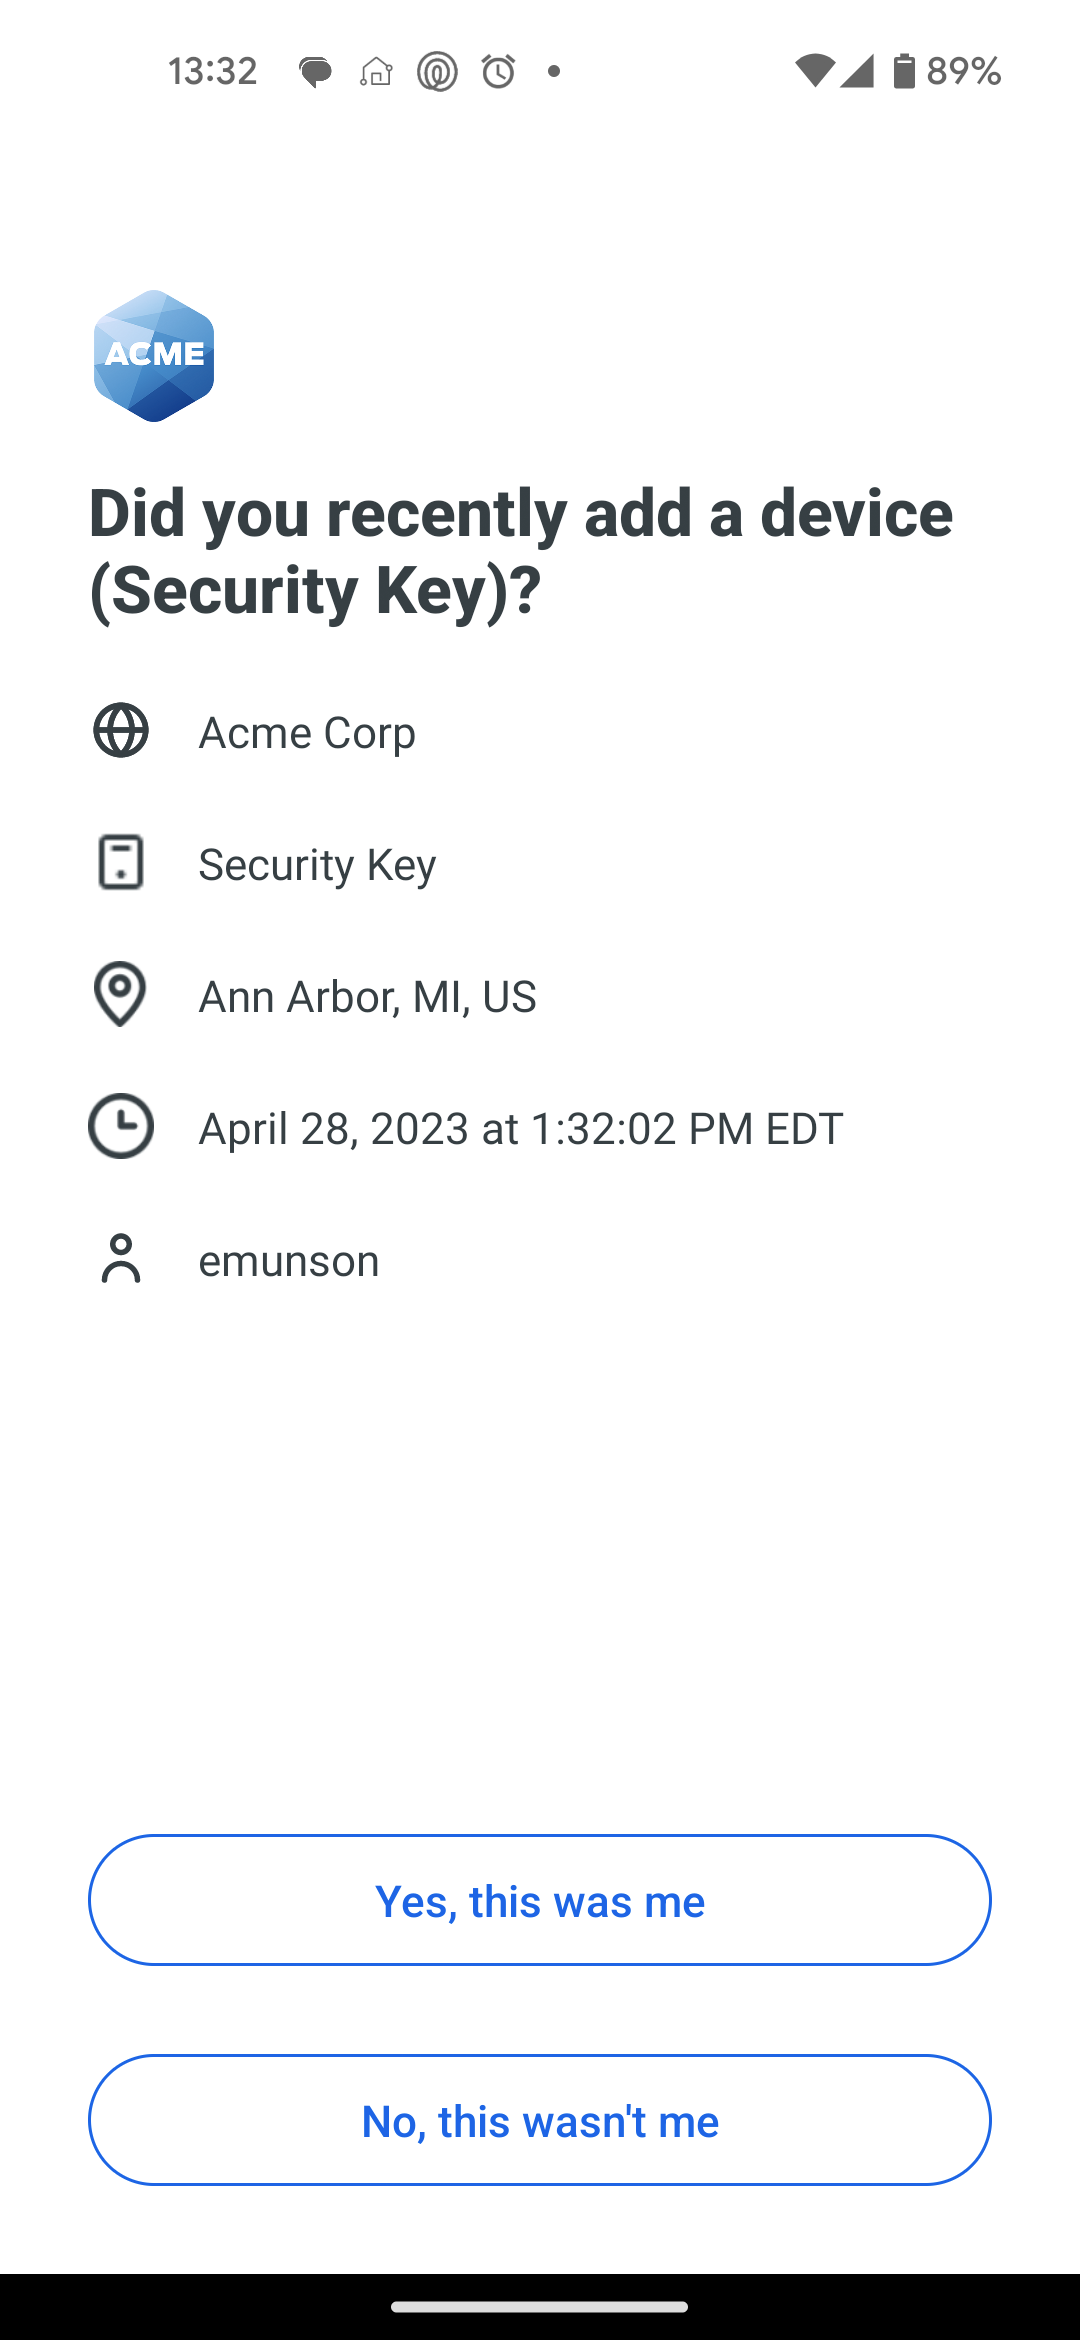
To confirm that you did add or remove a device, click or tap Yes, this was me in the Duo Mobile notification.
If you didn't add or remove a device, click or tap No, this wasn't me in the email message or Duo Mobile notification to let your Duo administrator know.
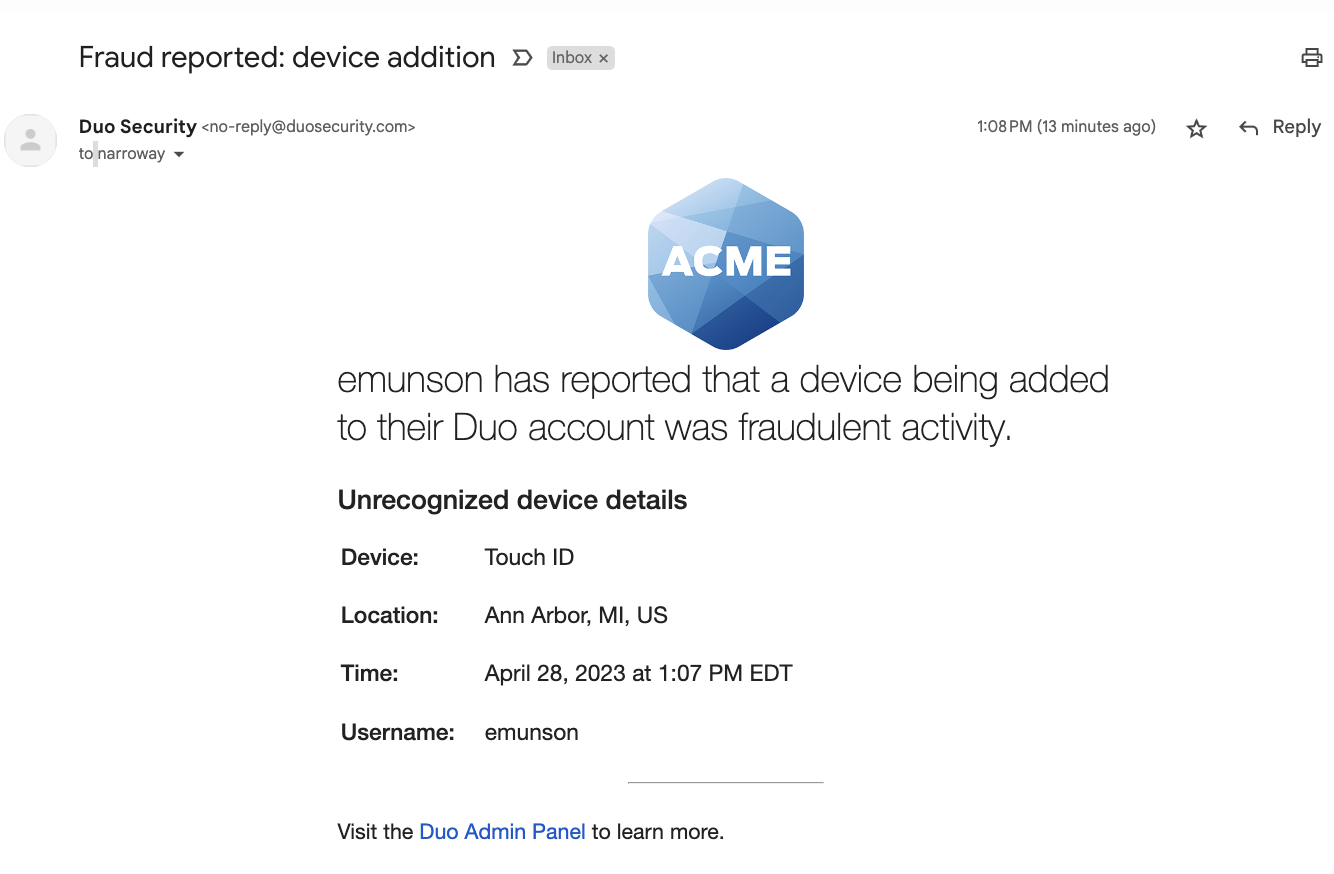
If you click or tap No, this wasn't me your Duo administrator will receive an email reporting that there was fraudulent activity on your Duo account.
Log In With the Duo Universal Prompt
After completing Duo enrollment (or if your Duo administrator set you up to use Duo), you'll see the Duo prompt the next time you perform a browser-based login to a web service or application protected with Duo.
Learn how to log into browser apps using Duo in the Duo Universal Prompt guide
How to Get Help
If you can't authenticate or aren't sure what to do, contact your organization's Duo administrator or help desk for guidance. If you click Need help? at the bottom-left of the Universal Prompt your administrator may have customized the help text with further instructions or contact information. Please do not contact Duo Support directly, as Duo Support can only assist named Duo account administrators.
If you see an error with an Event ID, provide that info to your Duo administrator or help desk.
